Post-Call Surveys
- Requires RingDNA for Salesforce managed package version 1.31 or later.
- You must have at least one existing call flow before creating a survey flow.
Post-call surveys collect feedback from callers immediately after an agent ends a call. They are purpose-built call flows that play a short prompt and record the caller’s response as structured Salesforce data — giving managers visibility into customer satisfaction and a basis for rep coaching.
This article covers the full end-to-end setup: configuring post-call routing on an existing call flow, building a survey call flow, and reporting on survey results in Salesforce.
How post-call routing works
Post-call routing automatically transfers a caller to another call flow the moment an agent (or the caller) hangs up. It applies only to inbound call flow calls — not direct calls to agents.
When a call flow has a Post Call Transfer value set, Revenue.io transfers the caller to that flow upon hang-up. If no value is set, the call terminates normally.
Step 1: Configure post-call routing
Navigate to Routing > Call Flows to view your existing call flows.
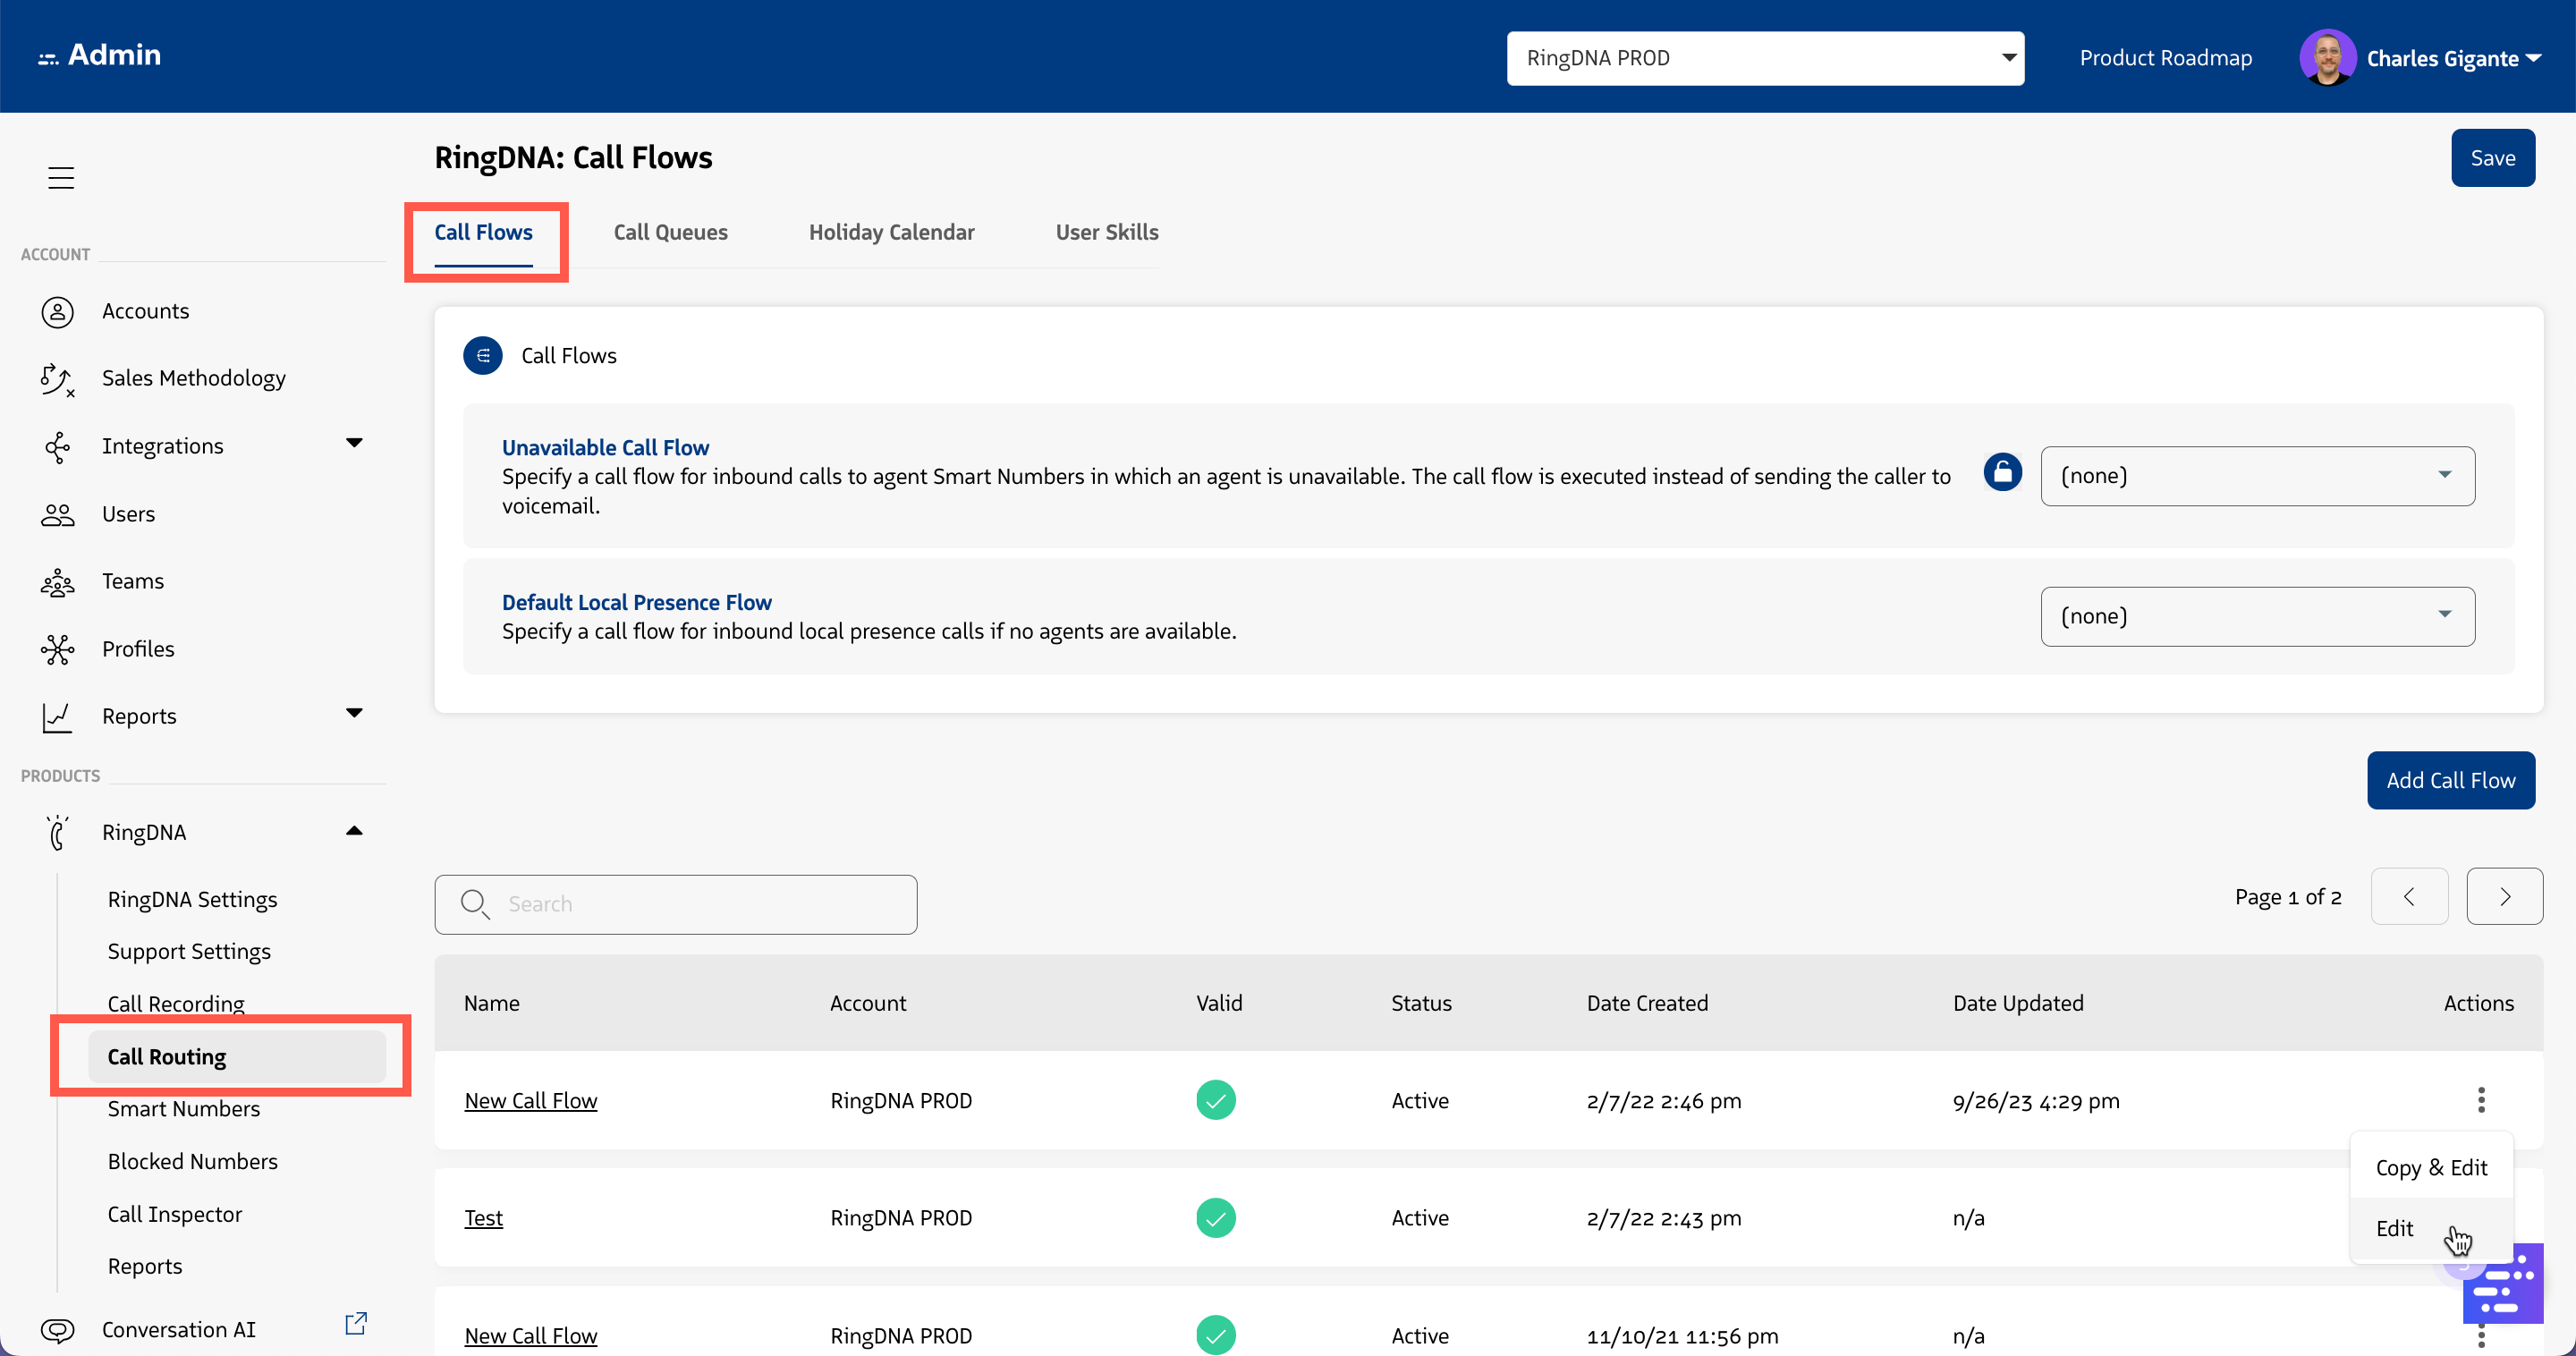
Open the call flow you want to route from. In the call flow settings, locate the Post Call Transfer (Optional) field and select the survey call flow you want callers routed to after the call ends.
Click Save in the top right corner. Once saved, Revenue.io will automatically transfer callers to the selected flow when the agent hangs up.
Step 2: Build your survey call flow
A survey call flow is a standard call flow with one important restriction: it may only contain Greeting, Menu, and Prompt steps. Including any other step type makes the flow ineligible for selection in the Post Call Transfer field.
| Step type | Typical use |
|---|---|
| Greeting | Play the survey question, or confirm receipt of the caller’s response at the end. |
| Menu | Present response options as single-digit choices (up to 12 options). |
| Prompt | Present response options with multi-digit input — useful when tracking more than 12 distinct responses. |
Create the survey flow:

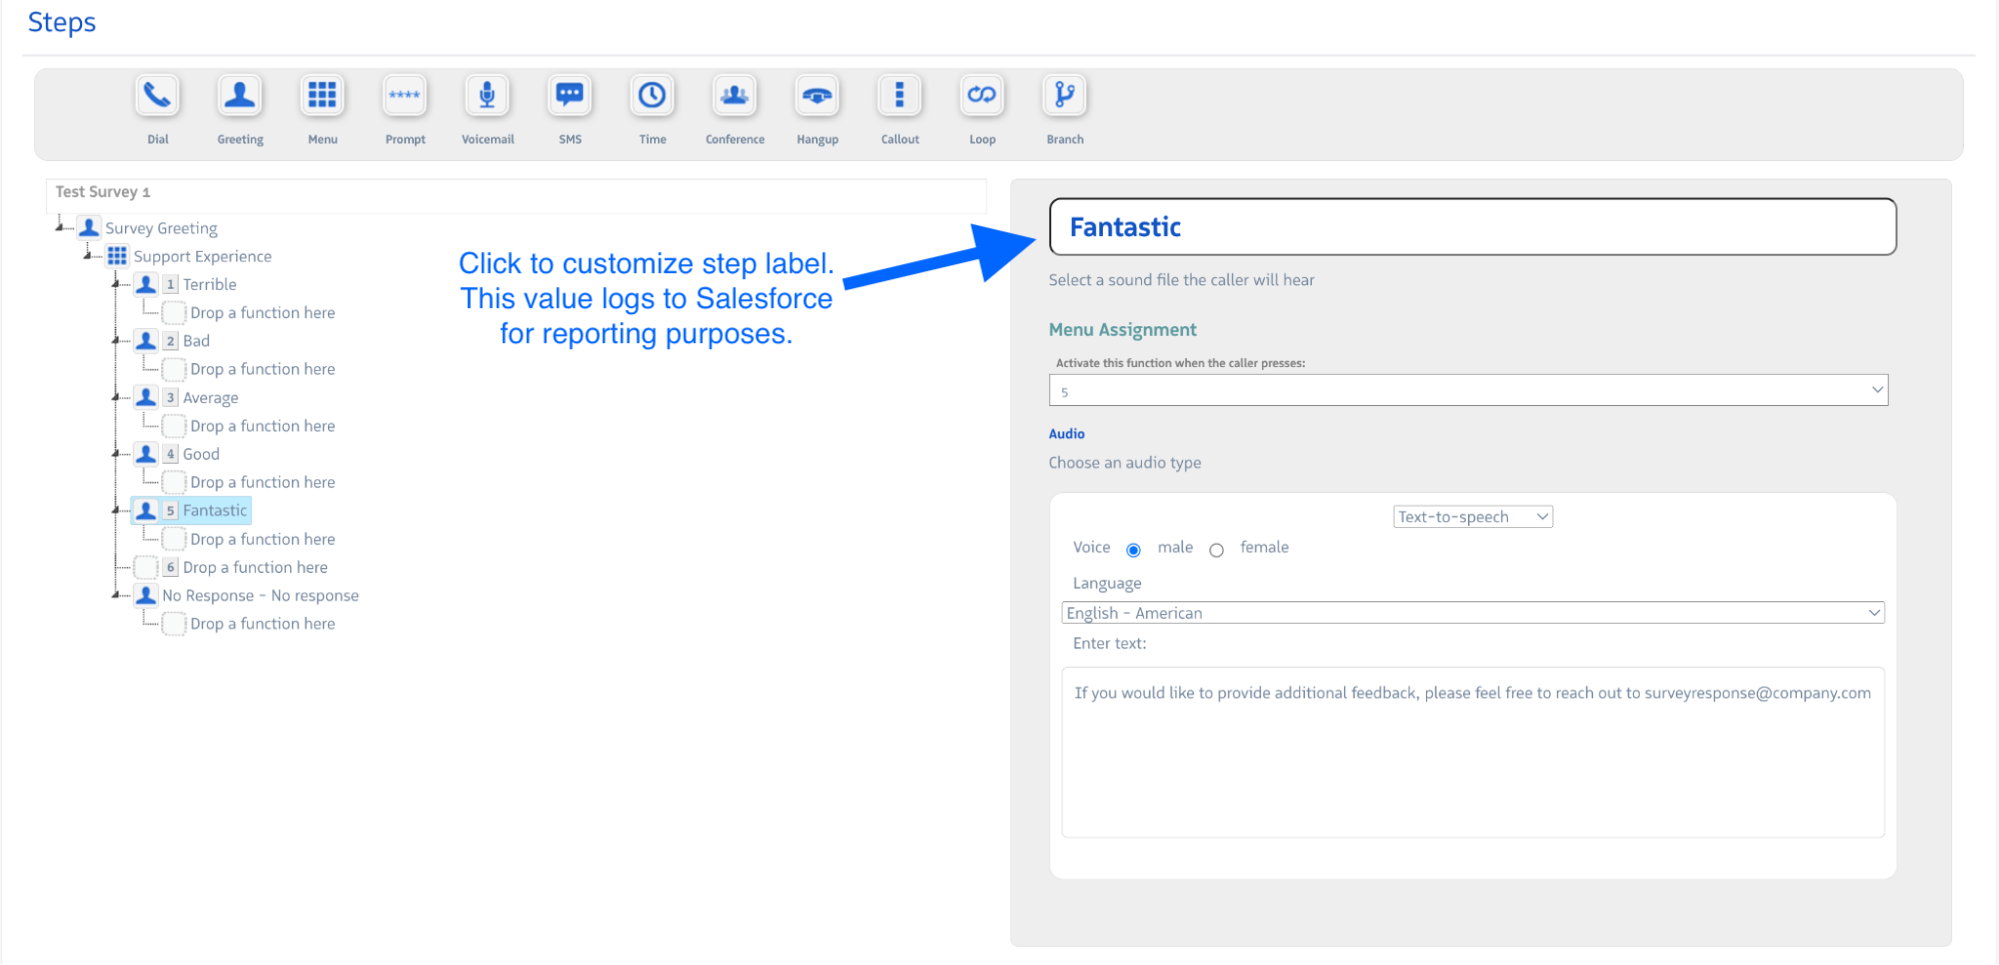
Inside each menu option, add a Greeting step to thank the caller for their response before the flow ends.
Start with a single-question survey. Once you’ve validated the flow and confirmed data is appearing in Salesforce, you can add additional questions.
Step 3: Activate the survey
Open the primary call flow (the one callers enter when they dial your number). In the Post Call Transfer field, select the survey call flow you just created.
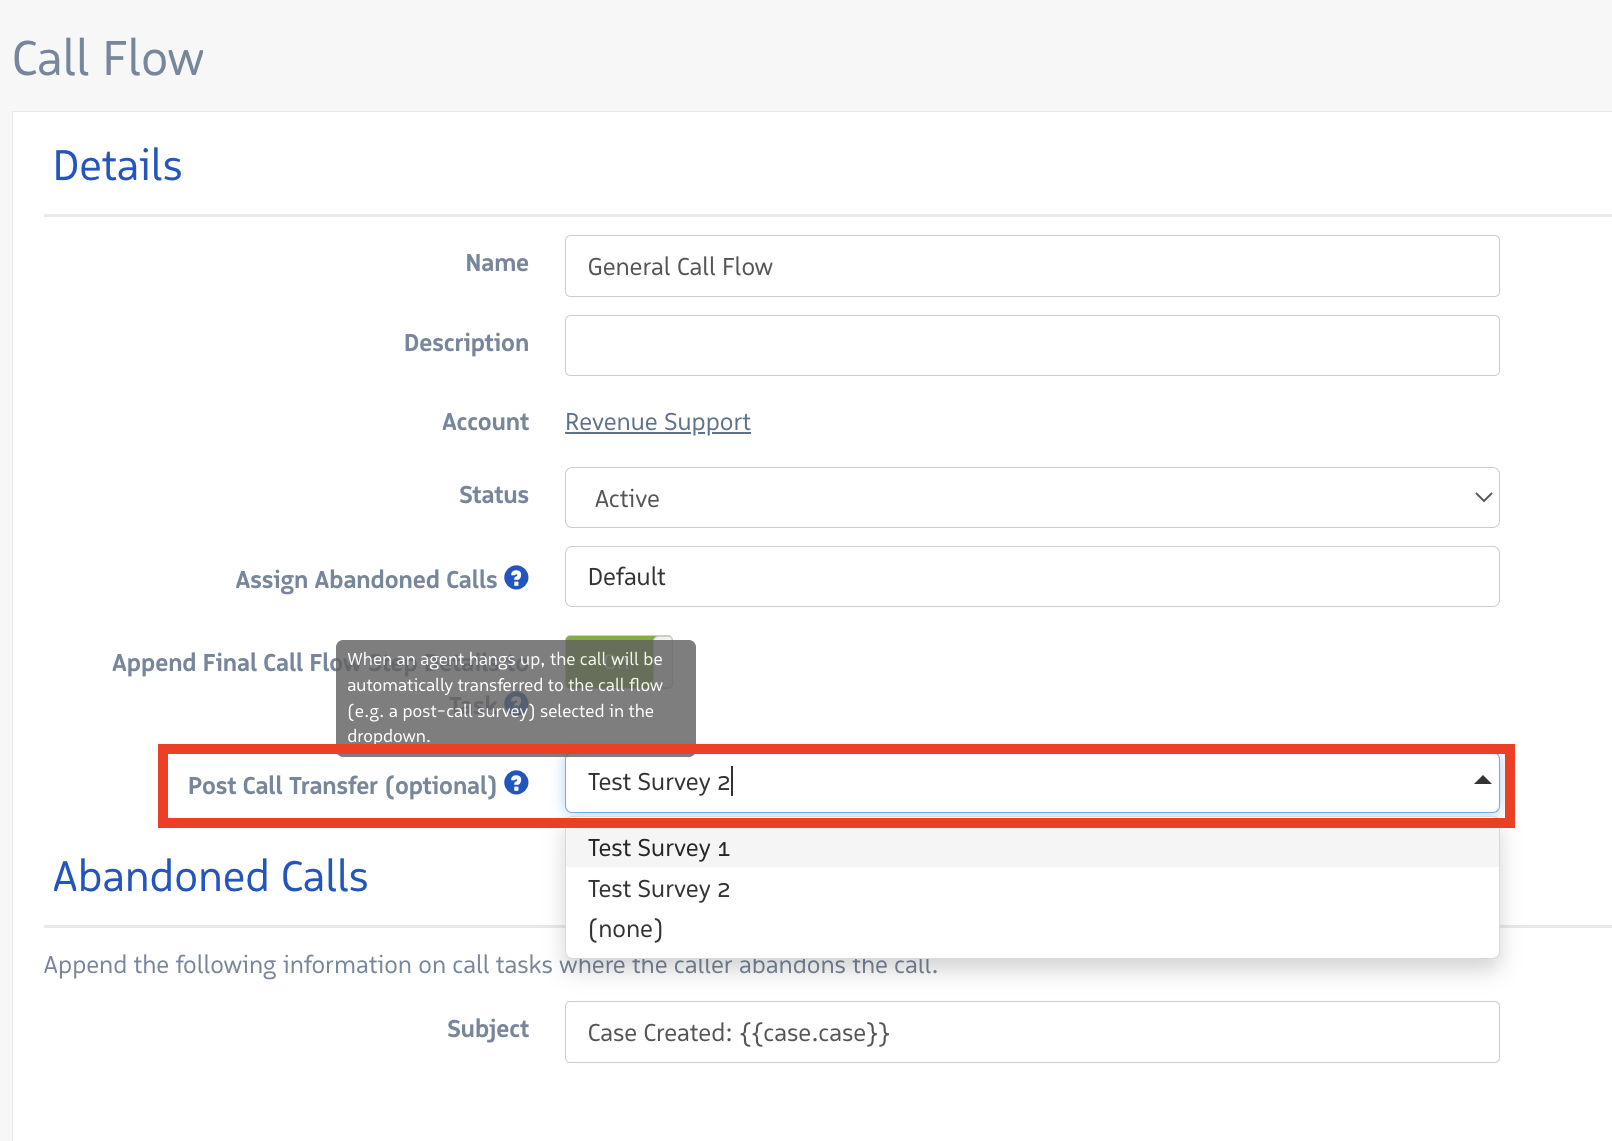
Click Save. The survey is now active — callers will be automatically transferred to the survey flow when the agent ends the call.
Track call flow data in Salesforce
Revenue.io logs each step a caller traverses in Salesforce via the Call Flow custom object (available on Revenue.io for Salesforce managed package v1.23 and later). This includes steps from the primary call flow and any post-call survey steps.
Users need Read access to the Call Flow and Call Flow Step objects to view this data. The Salesforce Connect User should have Read and Create access to both.
Report on survey results in Salesforce
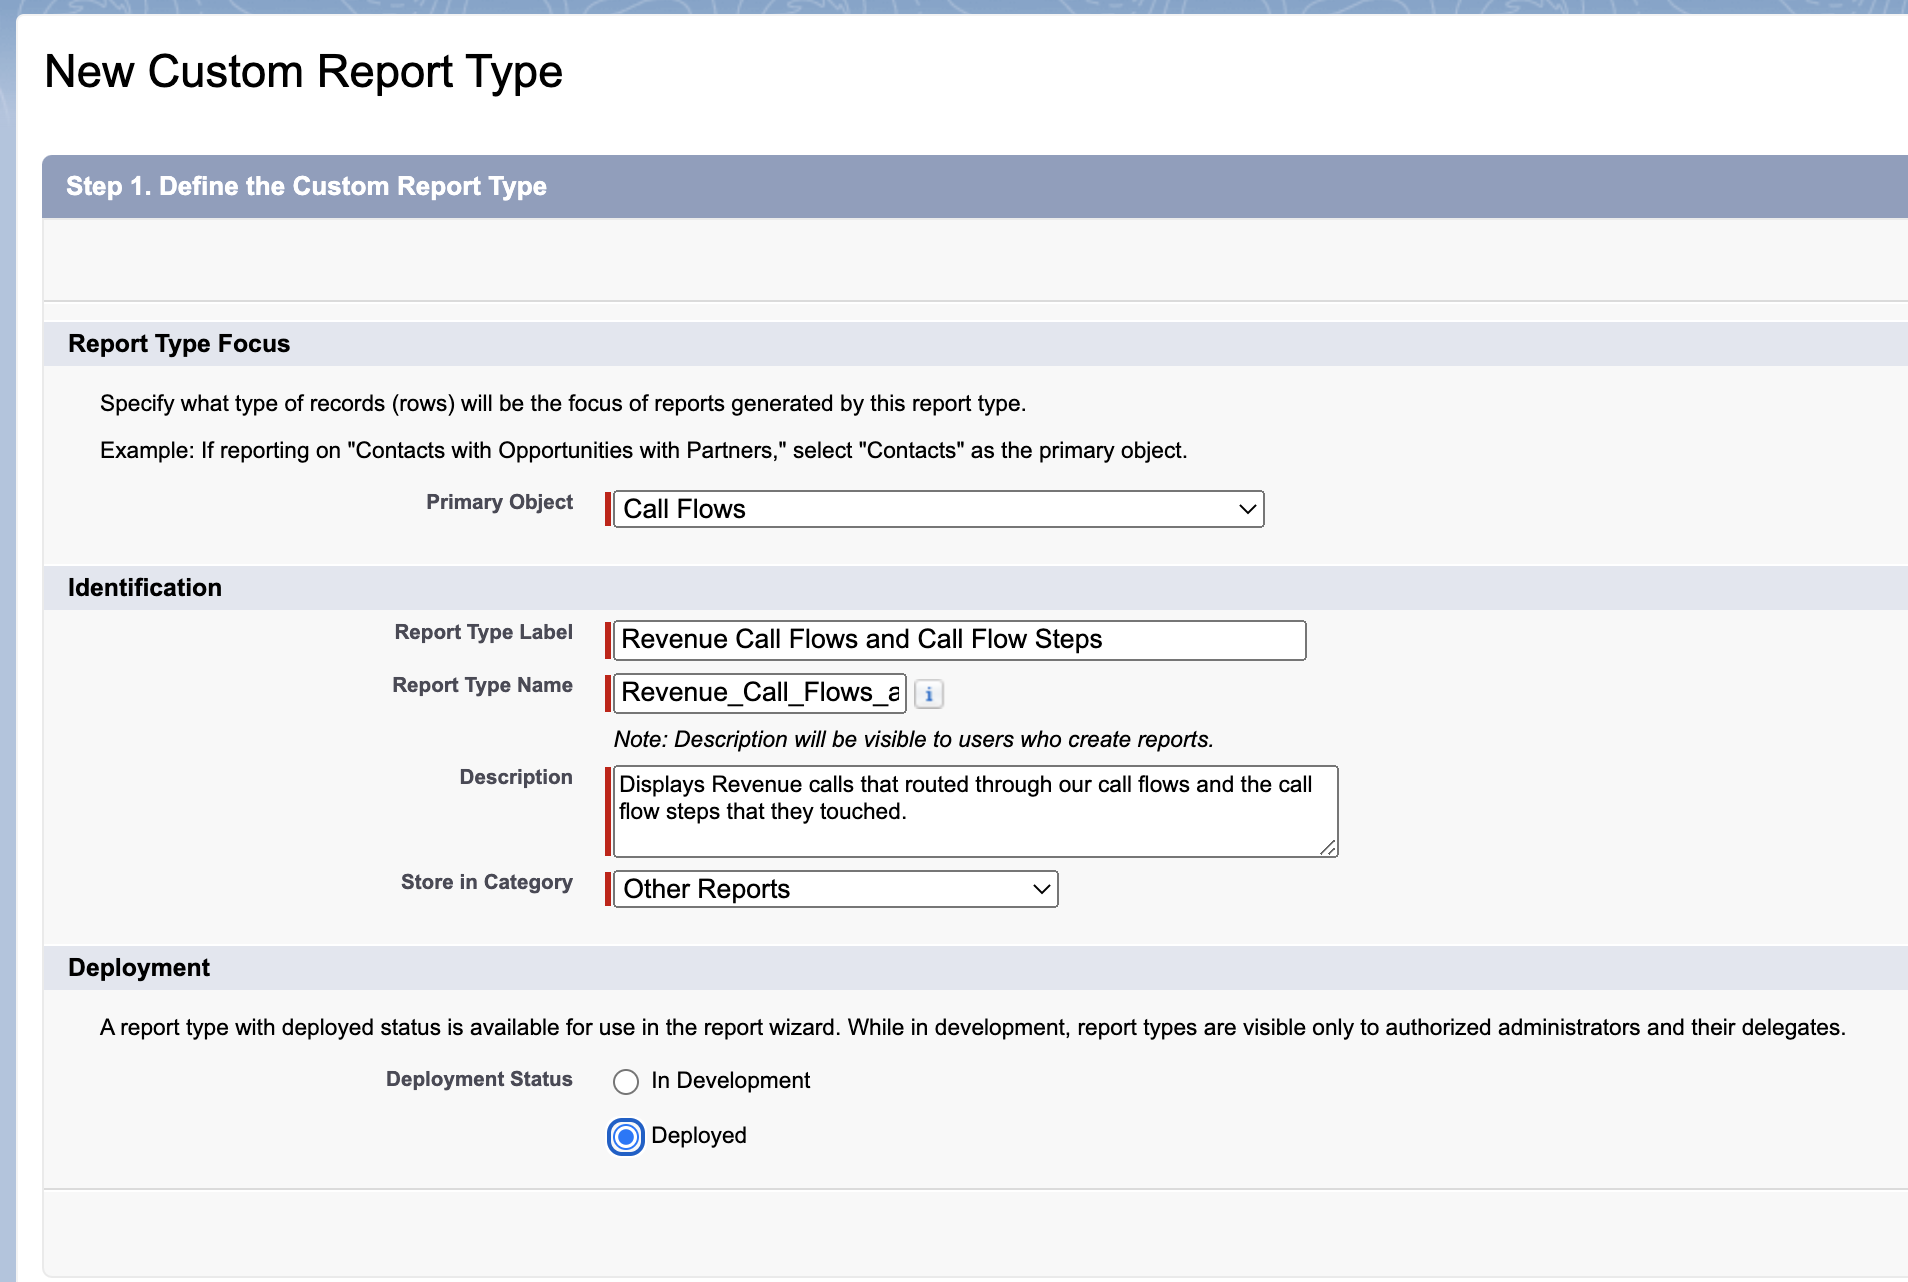
Create a custom report type
Survey responses are not visible in standard Salesforce reports. A Salesforce administrator must first create a custom report type.
- In Salesforce, go to Setup and search for Report Types
- Click New Custom Report Type
- Configure the primary object and label as shown:
- Click Next and define the record set:
- Primary Object: Call Flows
- Secondary Object: Call Flow Steps (Each “A” record must have at least one “B” record)
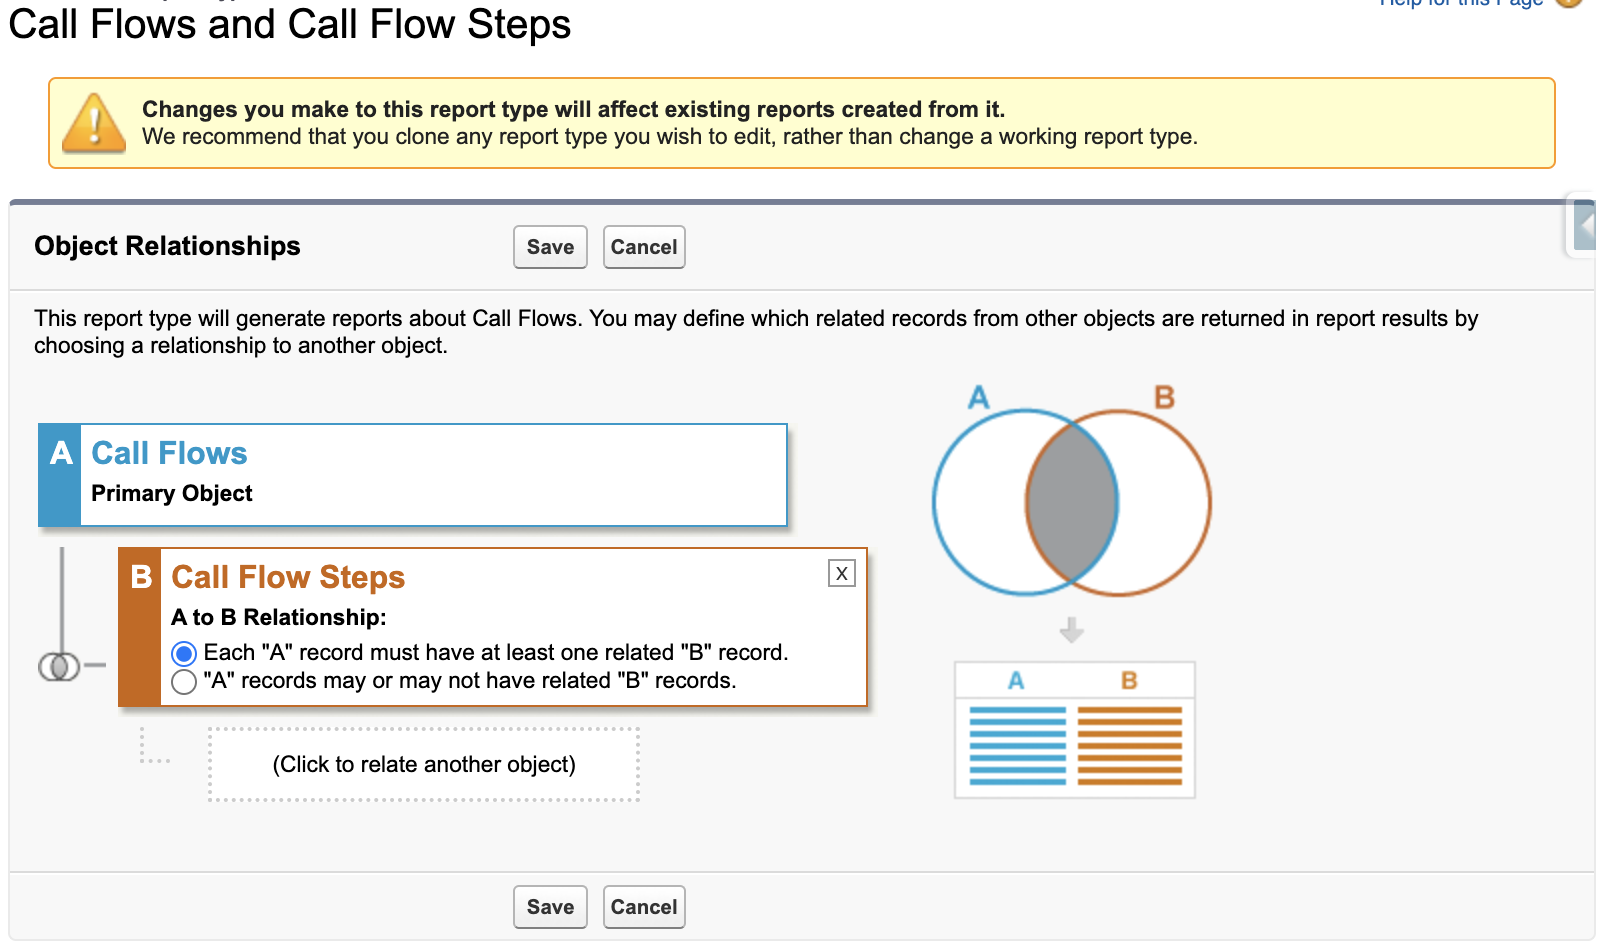
- Click Save
Build the report
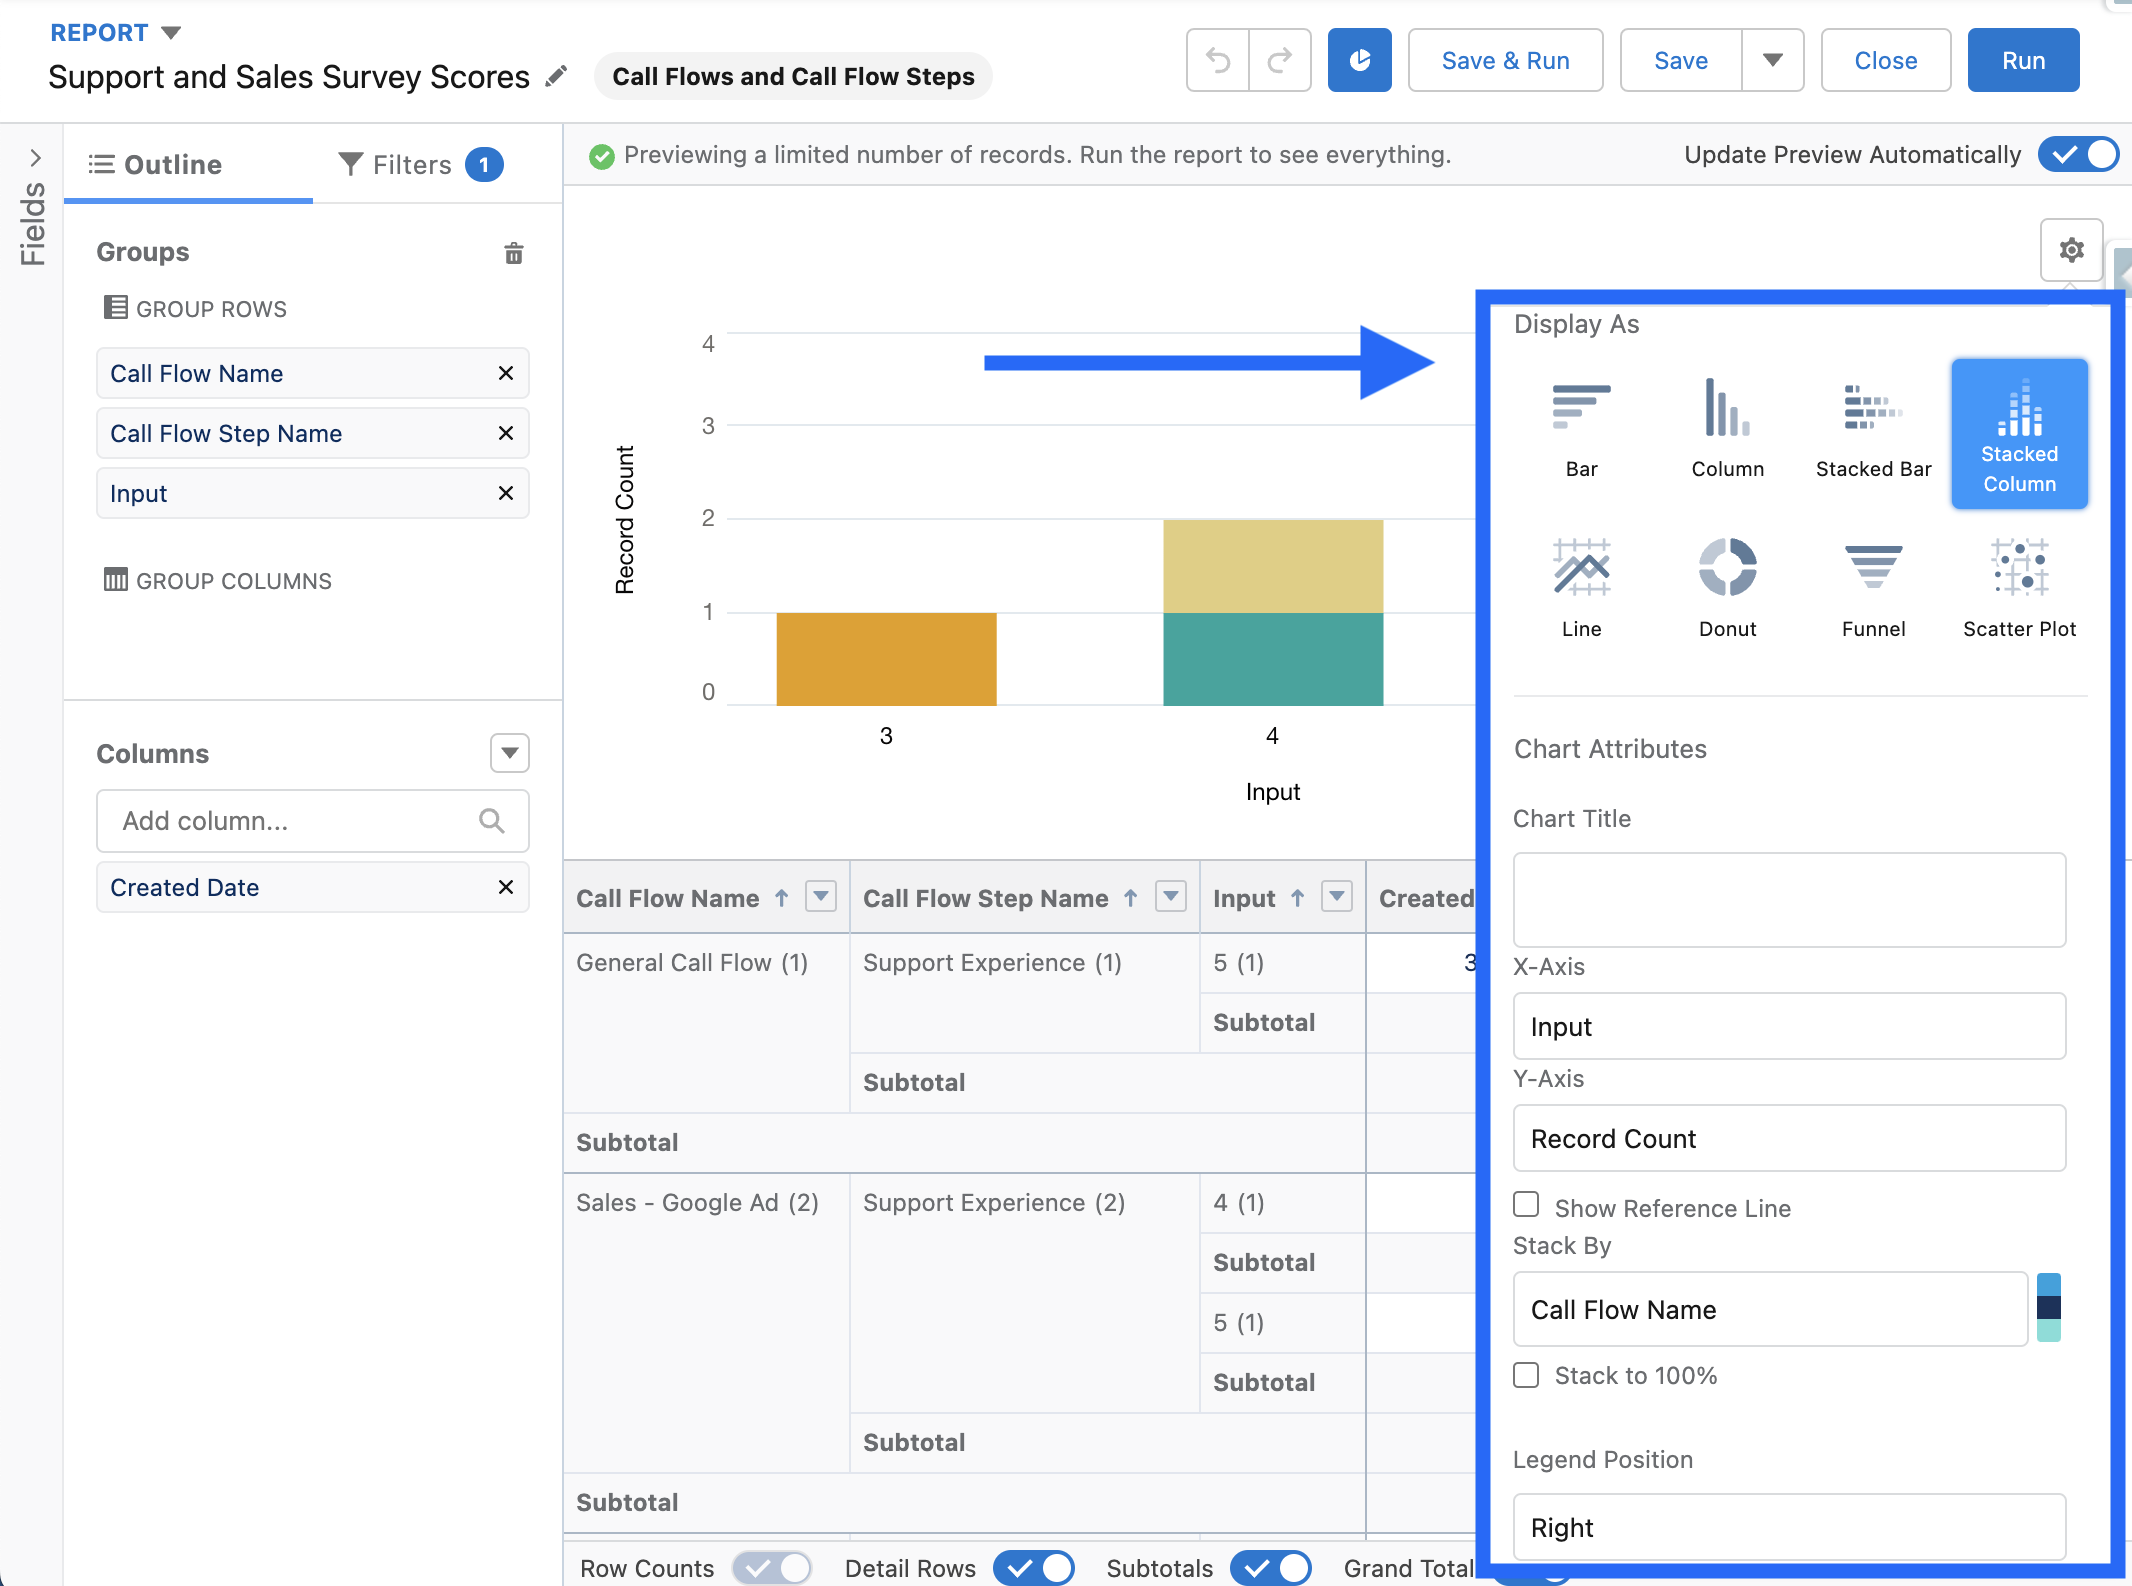
Create a new report using the Call Flows and Call Flow Steps report type.
Filter by step name: Add a filter for the Menu or Prompt step name you set in your survey flow (e.g., Support Experience). This isolates survey responses from other call flow step data. You can also add a date filter to limit results to a specific time period.
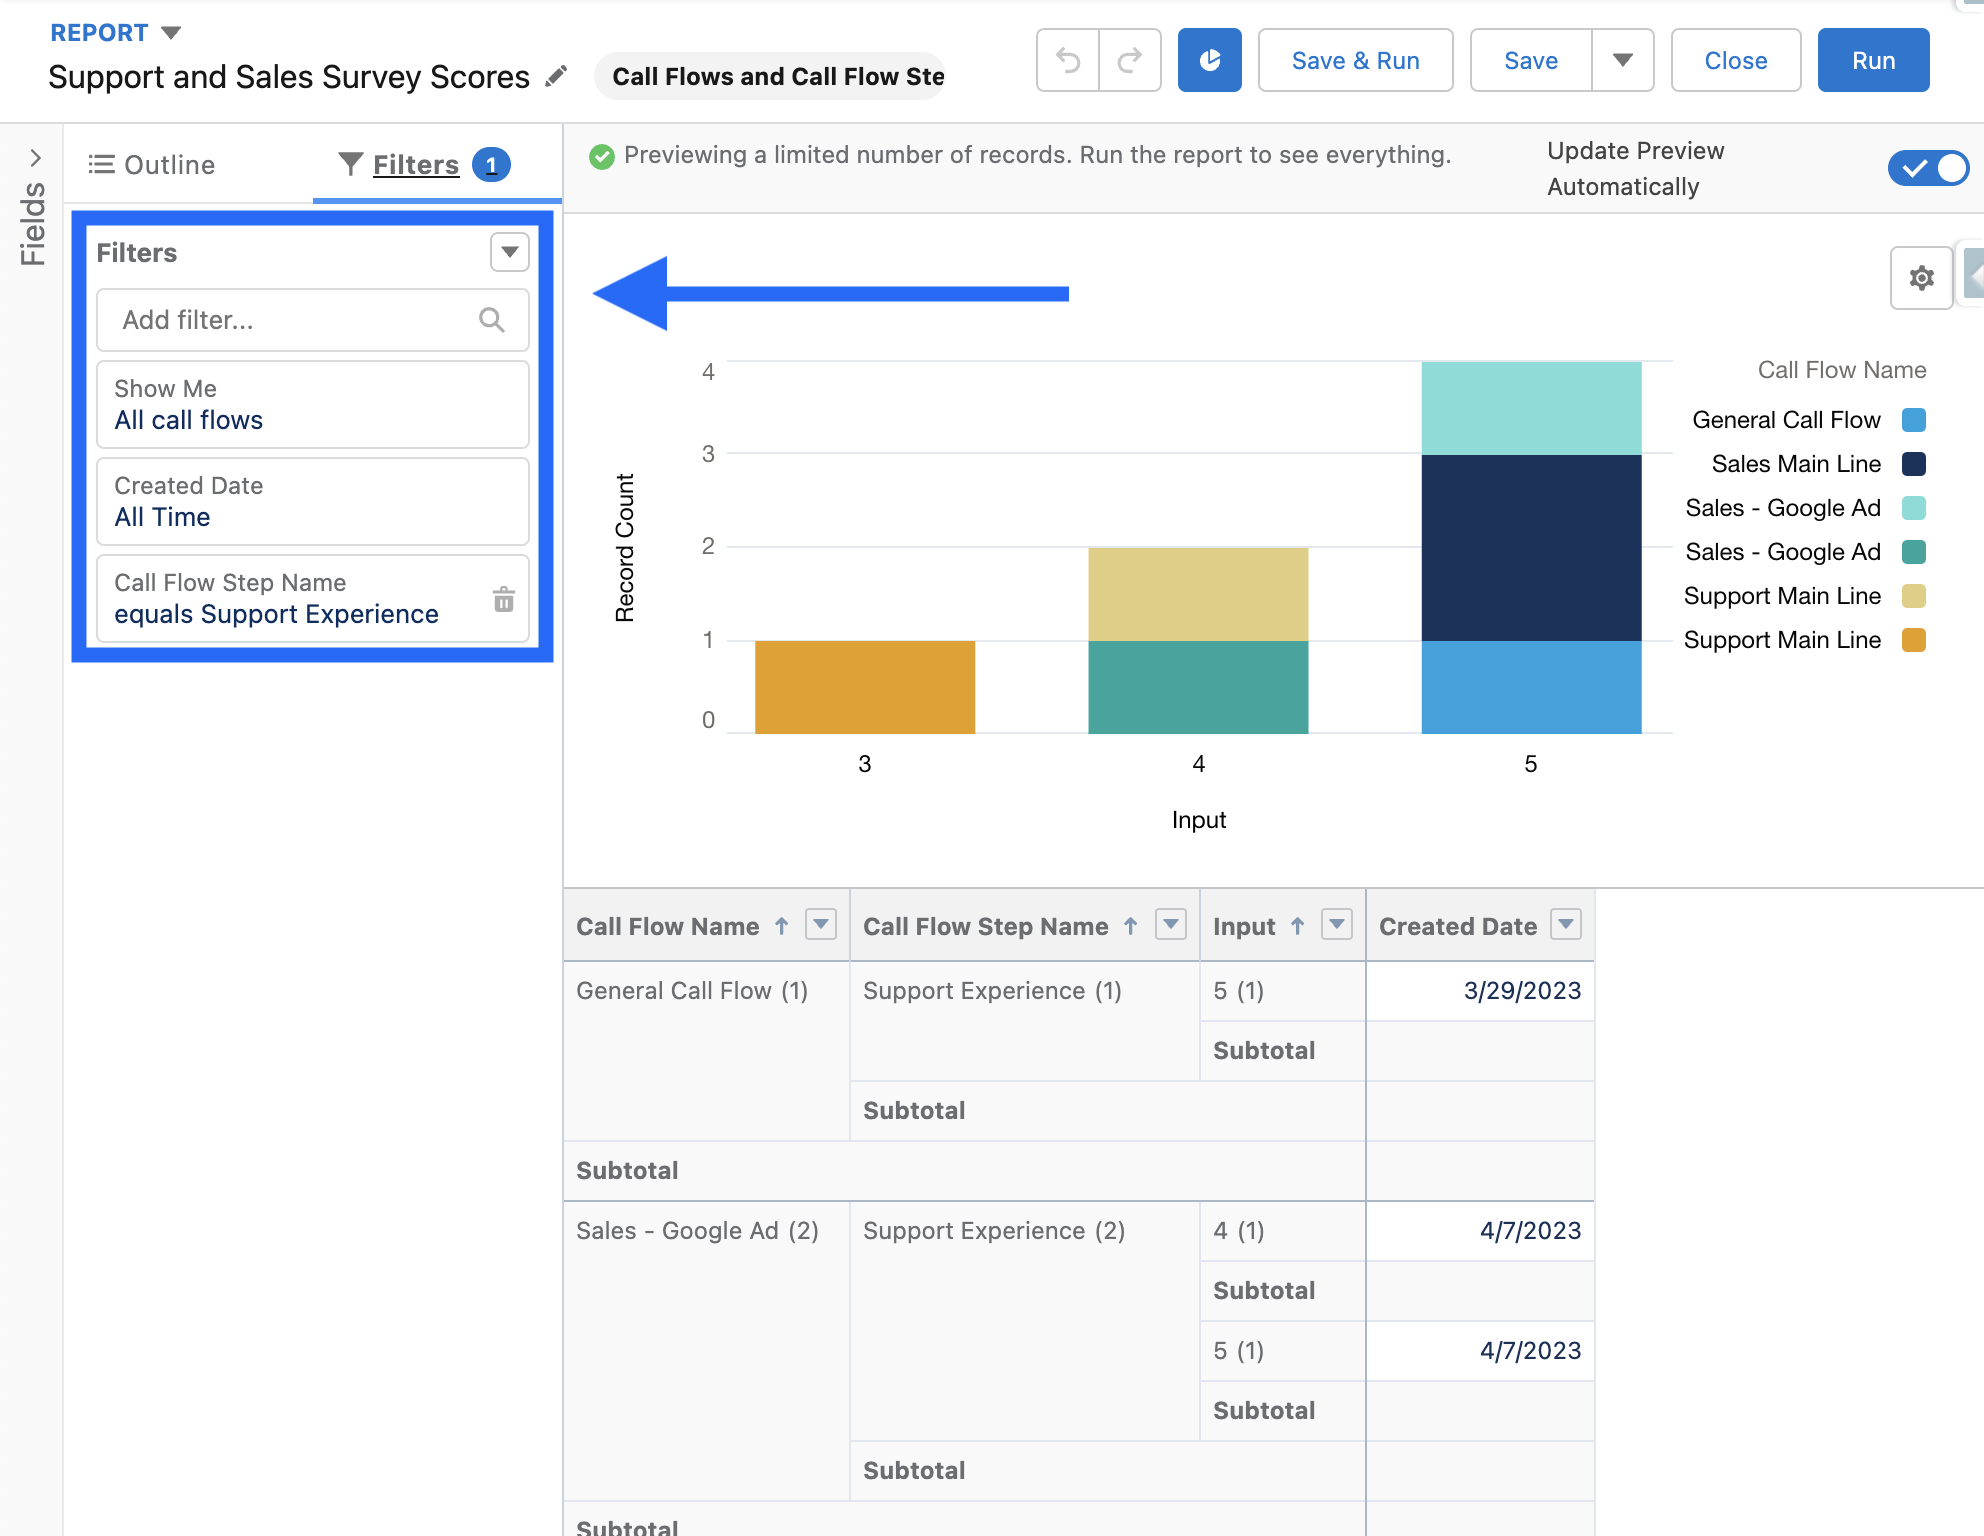
Configure fields: Group by Call Flow (Name) and Input so you can see response volumes per survey question. Add Created Date as a column for the detail view.
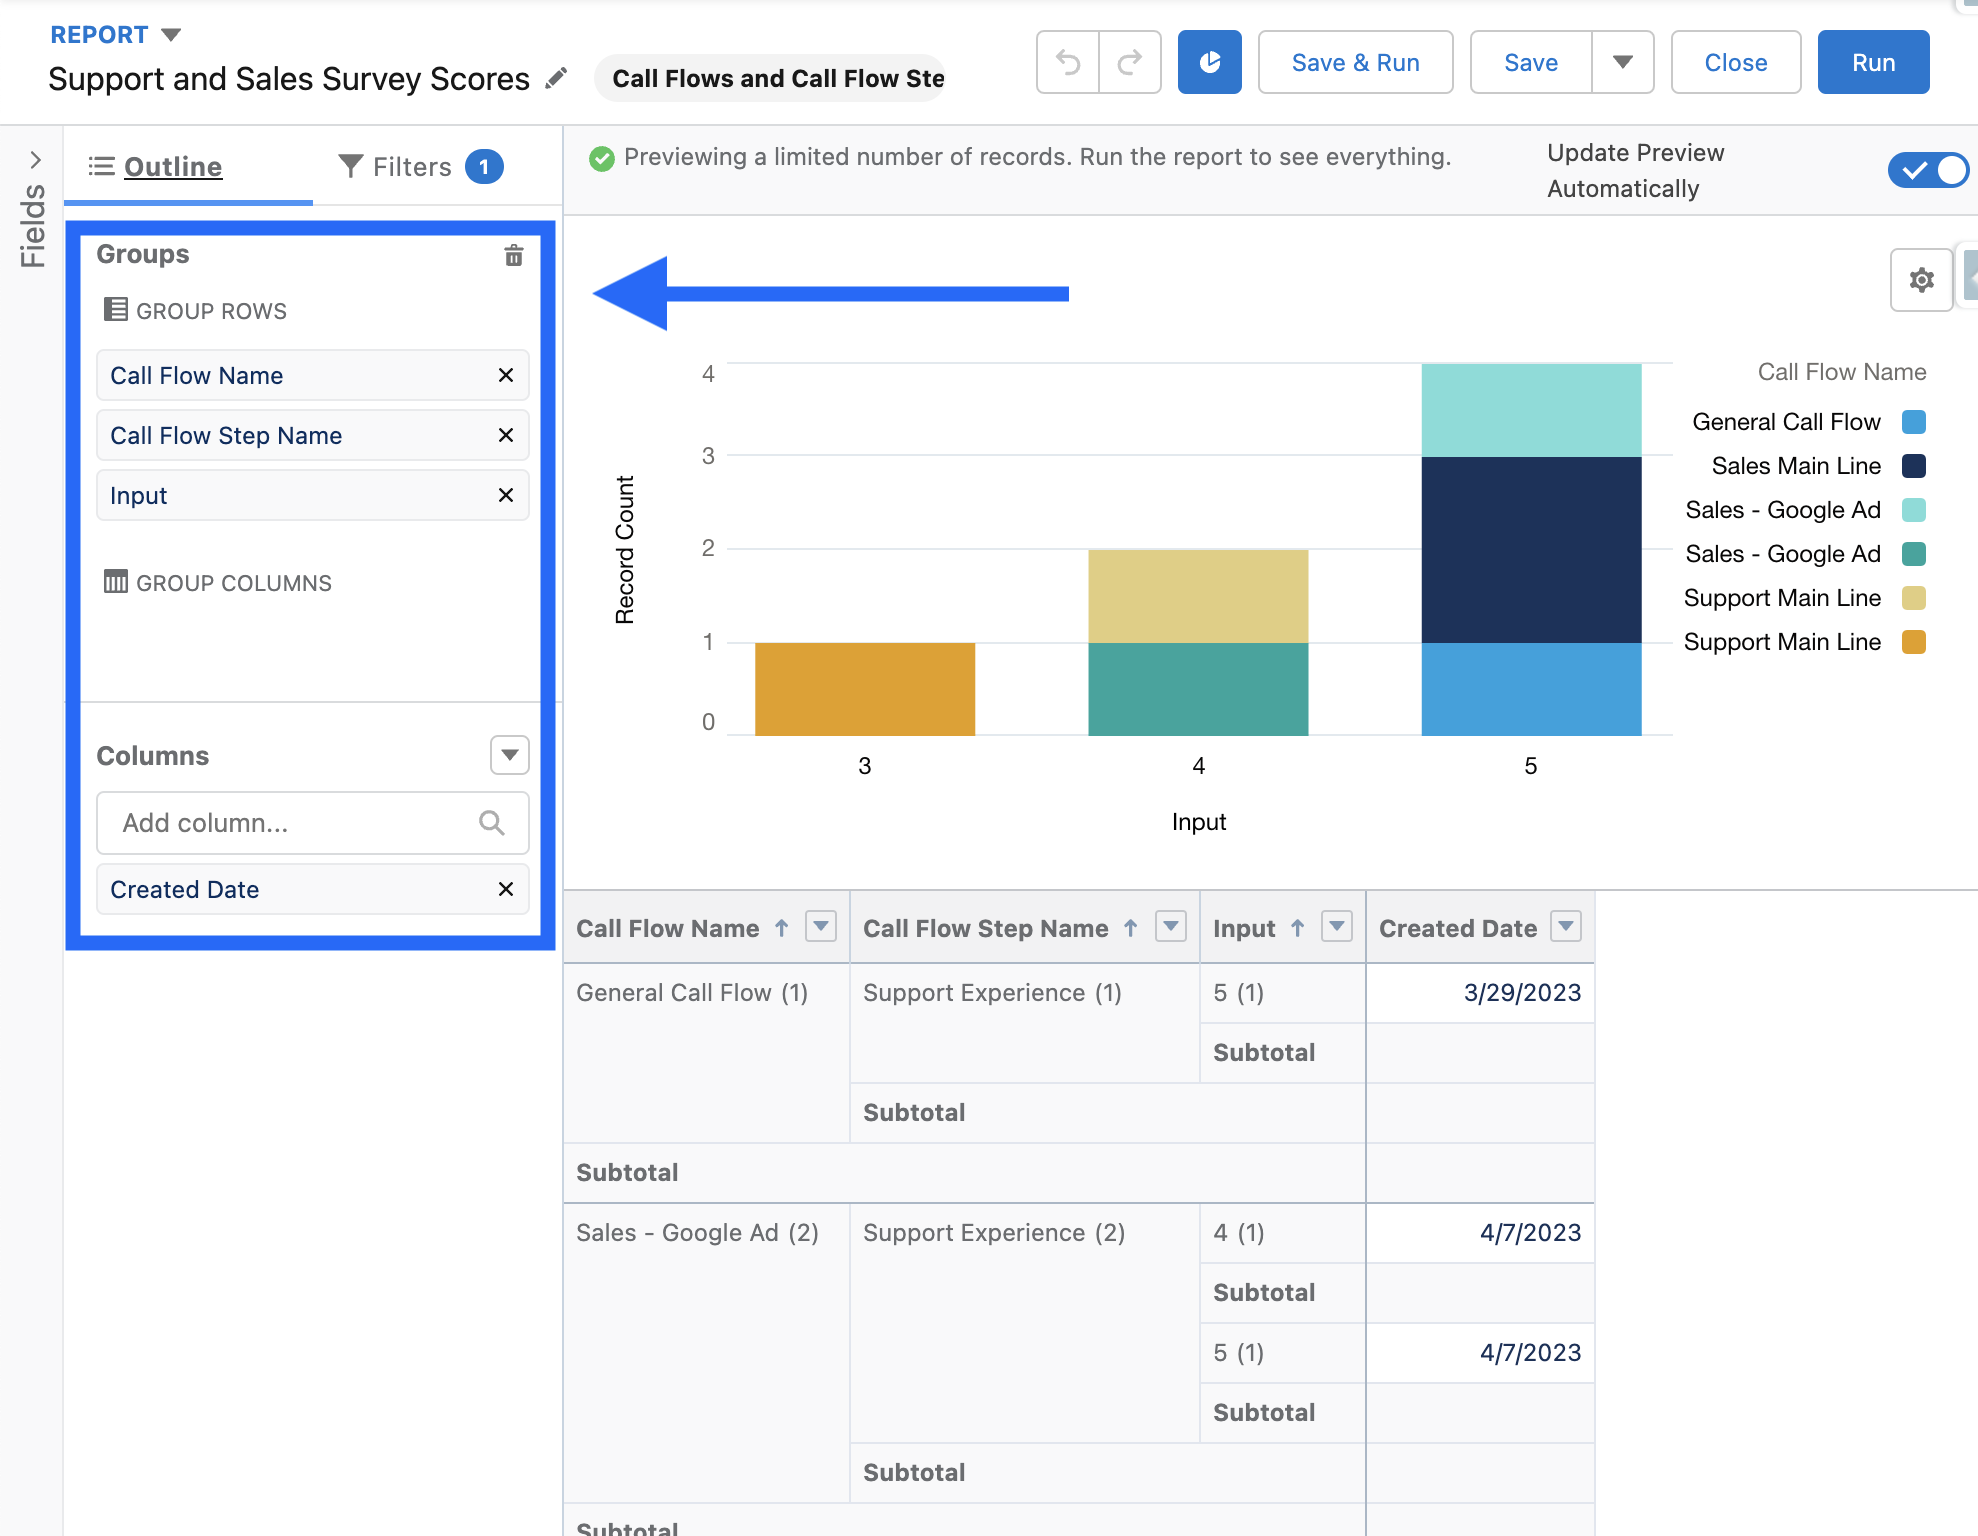
Add a chart: Plot Input on the X axis and Record Count on the Y axis, grouped by Call Flow Name. This gives you a clear view of response distribution across all call flows using the survey.