How to Use Call Forwarding
Revenue’s Call Forwarding feature makes it easy for reps to benefit from the data and call controls of the RingDNA Communications Hub while making and taking calls from any device.
Outbound Calls
Revenue’s Call Forwarding enables you to use the RingDNA Communication Hub’s call controls to quickly dial leads, forward calls and more. However the actual call will be connected to your device rather than RingDNA.
Inbound Calls
When prospects call your device, it will trigger a CTI screen pop on the RingDNA Communications Hub, giving you access to rich prospect data with every inbound call. This is a good option for sales reps that have already given their original number out to a lot of leads, but want to benefit from the enriched data offered by Revenue.
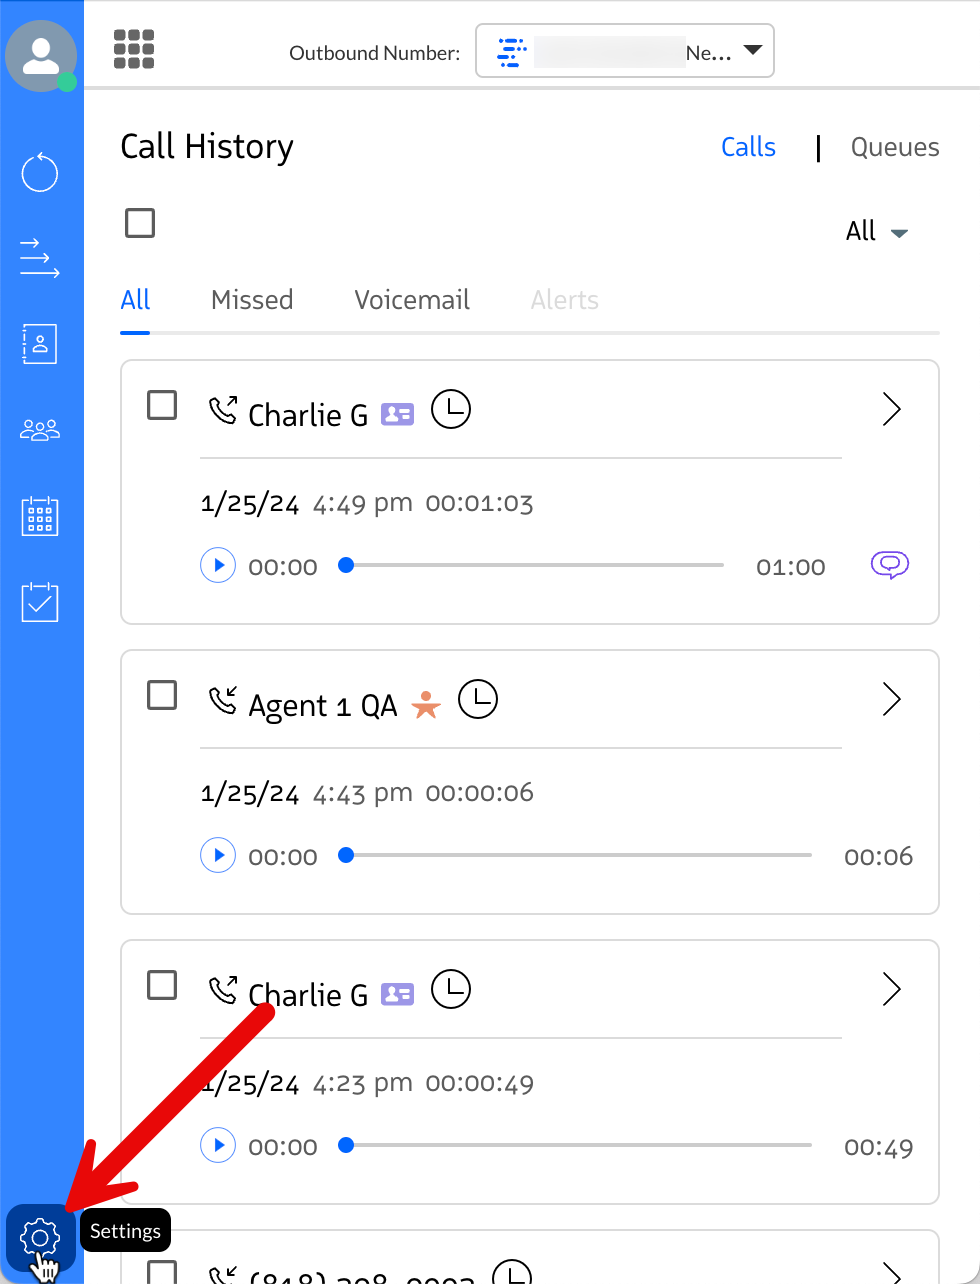
Turn on Call Forwarding
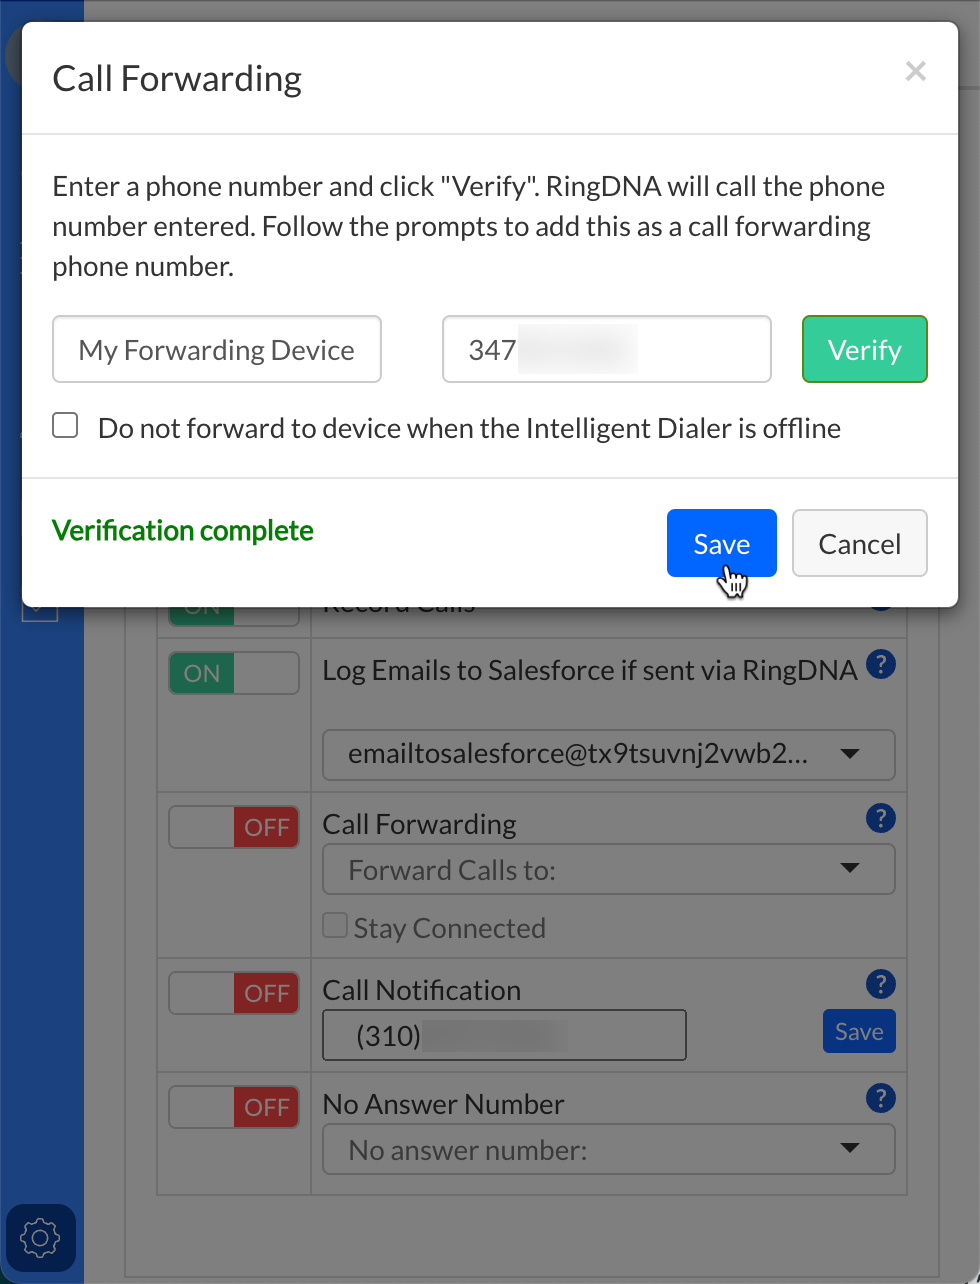
Click the Settings icon in the RingDNA Communications Hub.
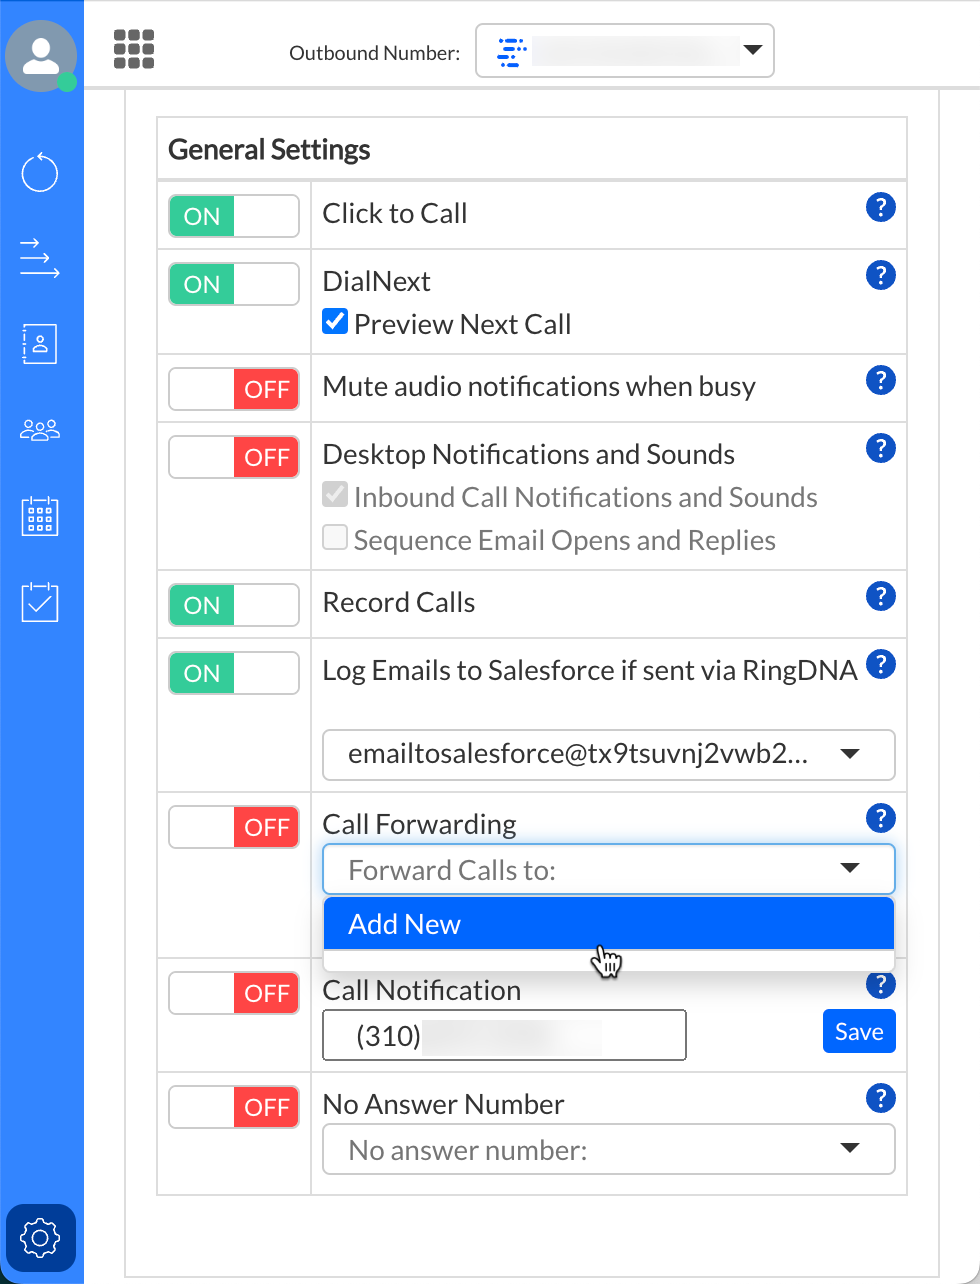
Click the Call Forwarding drop-down menu and select Add New.
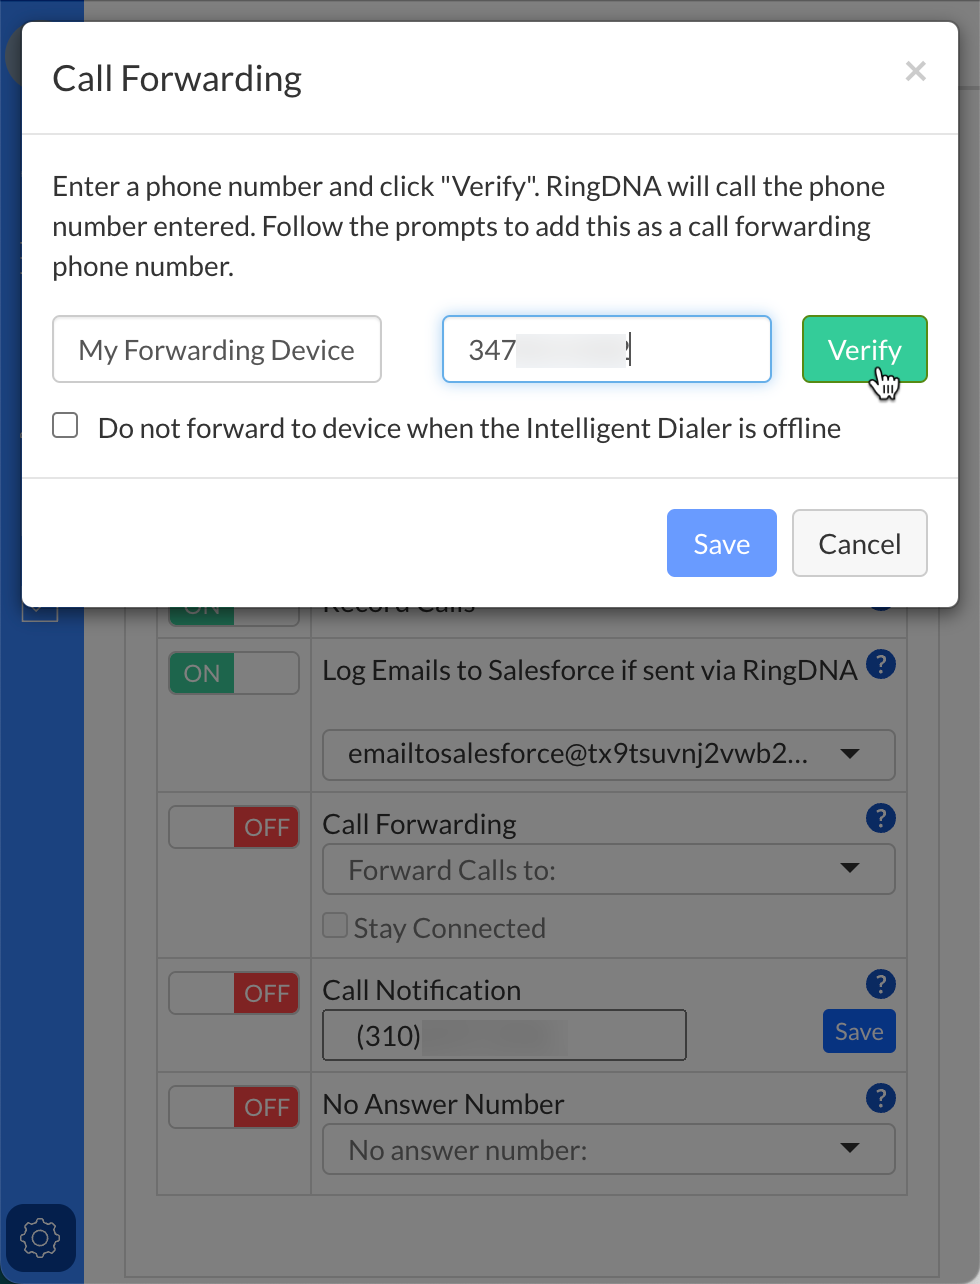
Enter your Call Forwarding device’s number and click Verify.
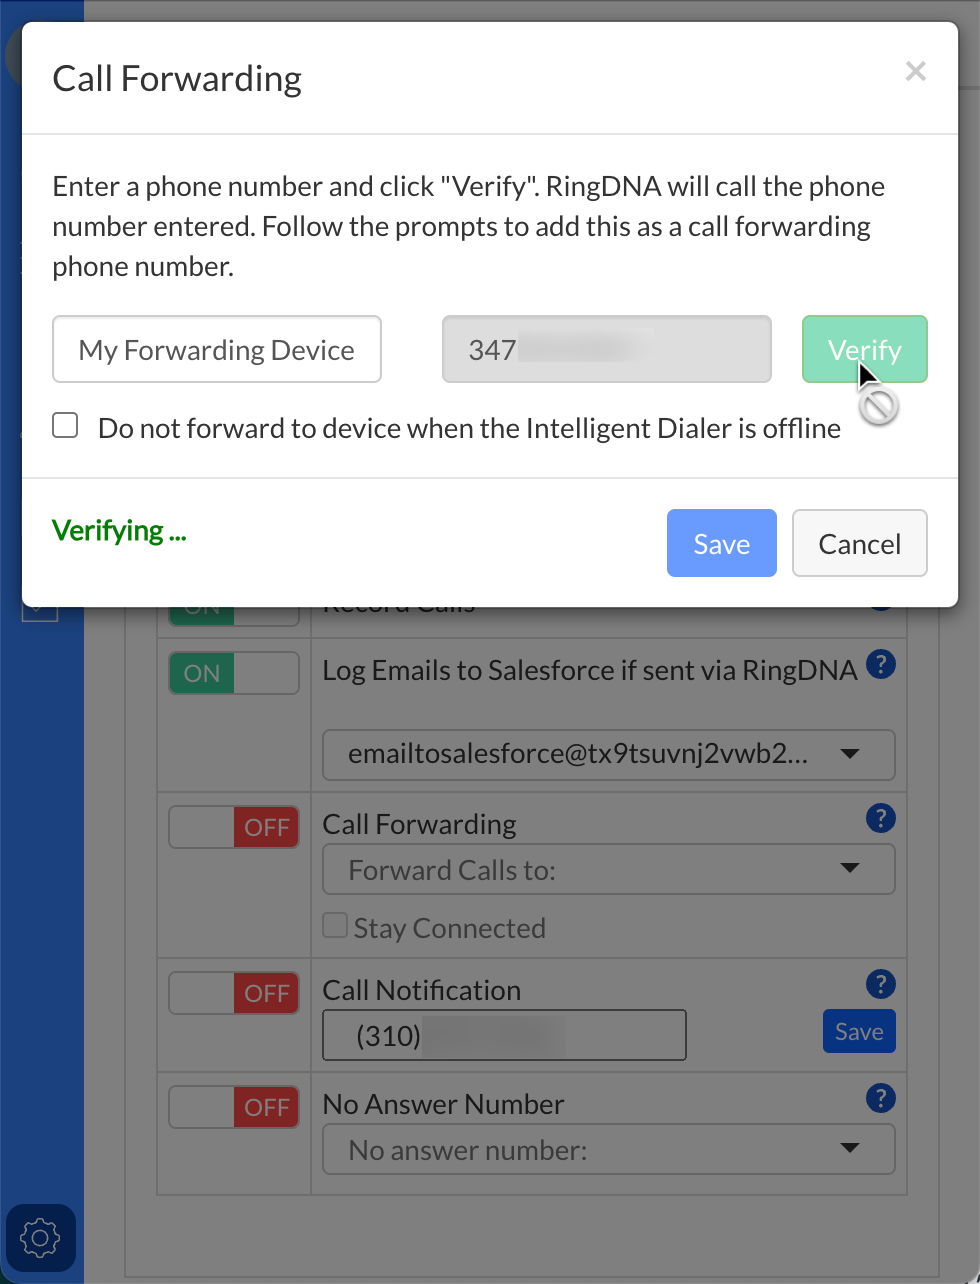
Your device receives an automated phone call asking you to verify it. Once the call connects, press 1 to verify the device.
After verifying your device, you’ll see a Verification complete prompt. Click Save to enable Call Forwarding.
Tip: You can improve efficiency and call quality with forwarded calls by enabling Stay Connected. This keeps a call connection open on forwarded calls and eliminates the need for RingDNA to call you when making calls with a desk phone or cell phone.
For more info on Stay Connected, click here.