Customizing User Statuses for RingDNA
Custom User Statuses allow RingDNA Communications Hub users to define free and busy statuses in the Dialer. Status values are reportable within the User Busy Presence report, which helps you understand how your Agents are spending their day.
Set users as busy by default setting
When the “Set users as busy by default” setting is enabled, users are set to the system Busy status when logging into the product or transitioning from offline or active statuses.
If the setting is disabled, users are set to the system Available status when logging into the product or transitioning from offline or active statuses.
Custom user statuses
To enable Custom User Statuses in the RingDNA Communications Hub, follow these steps:
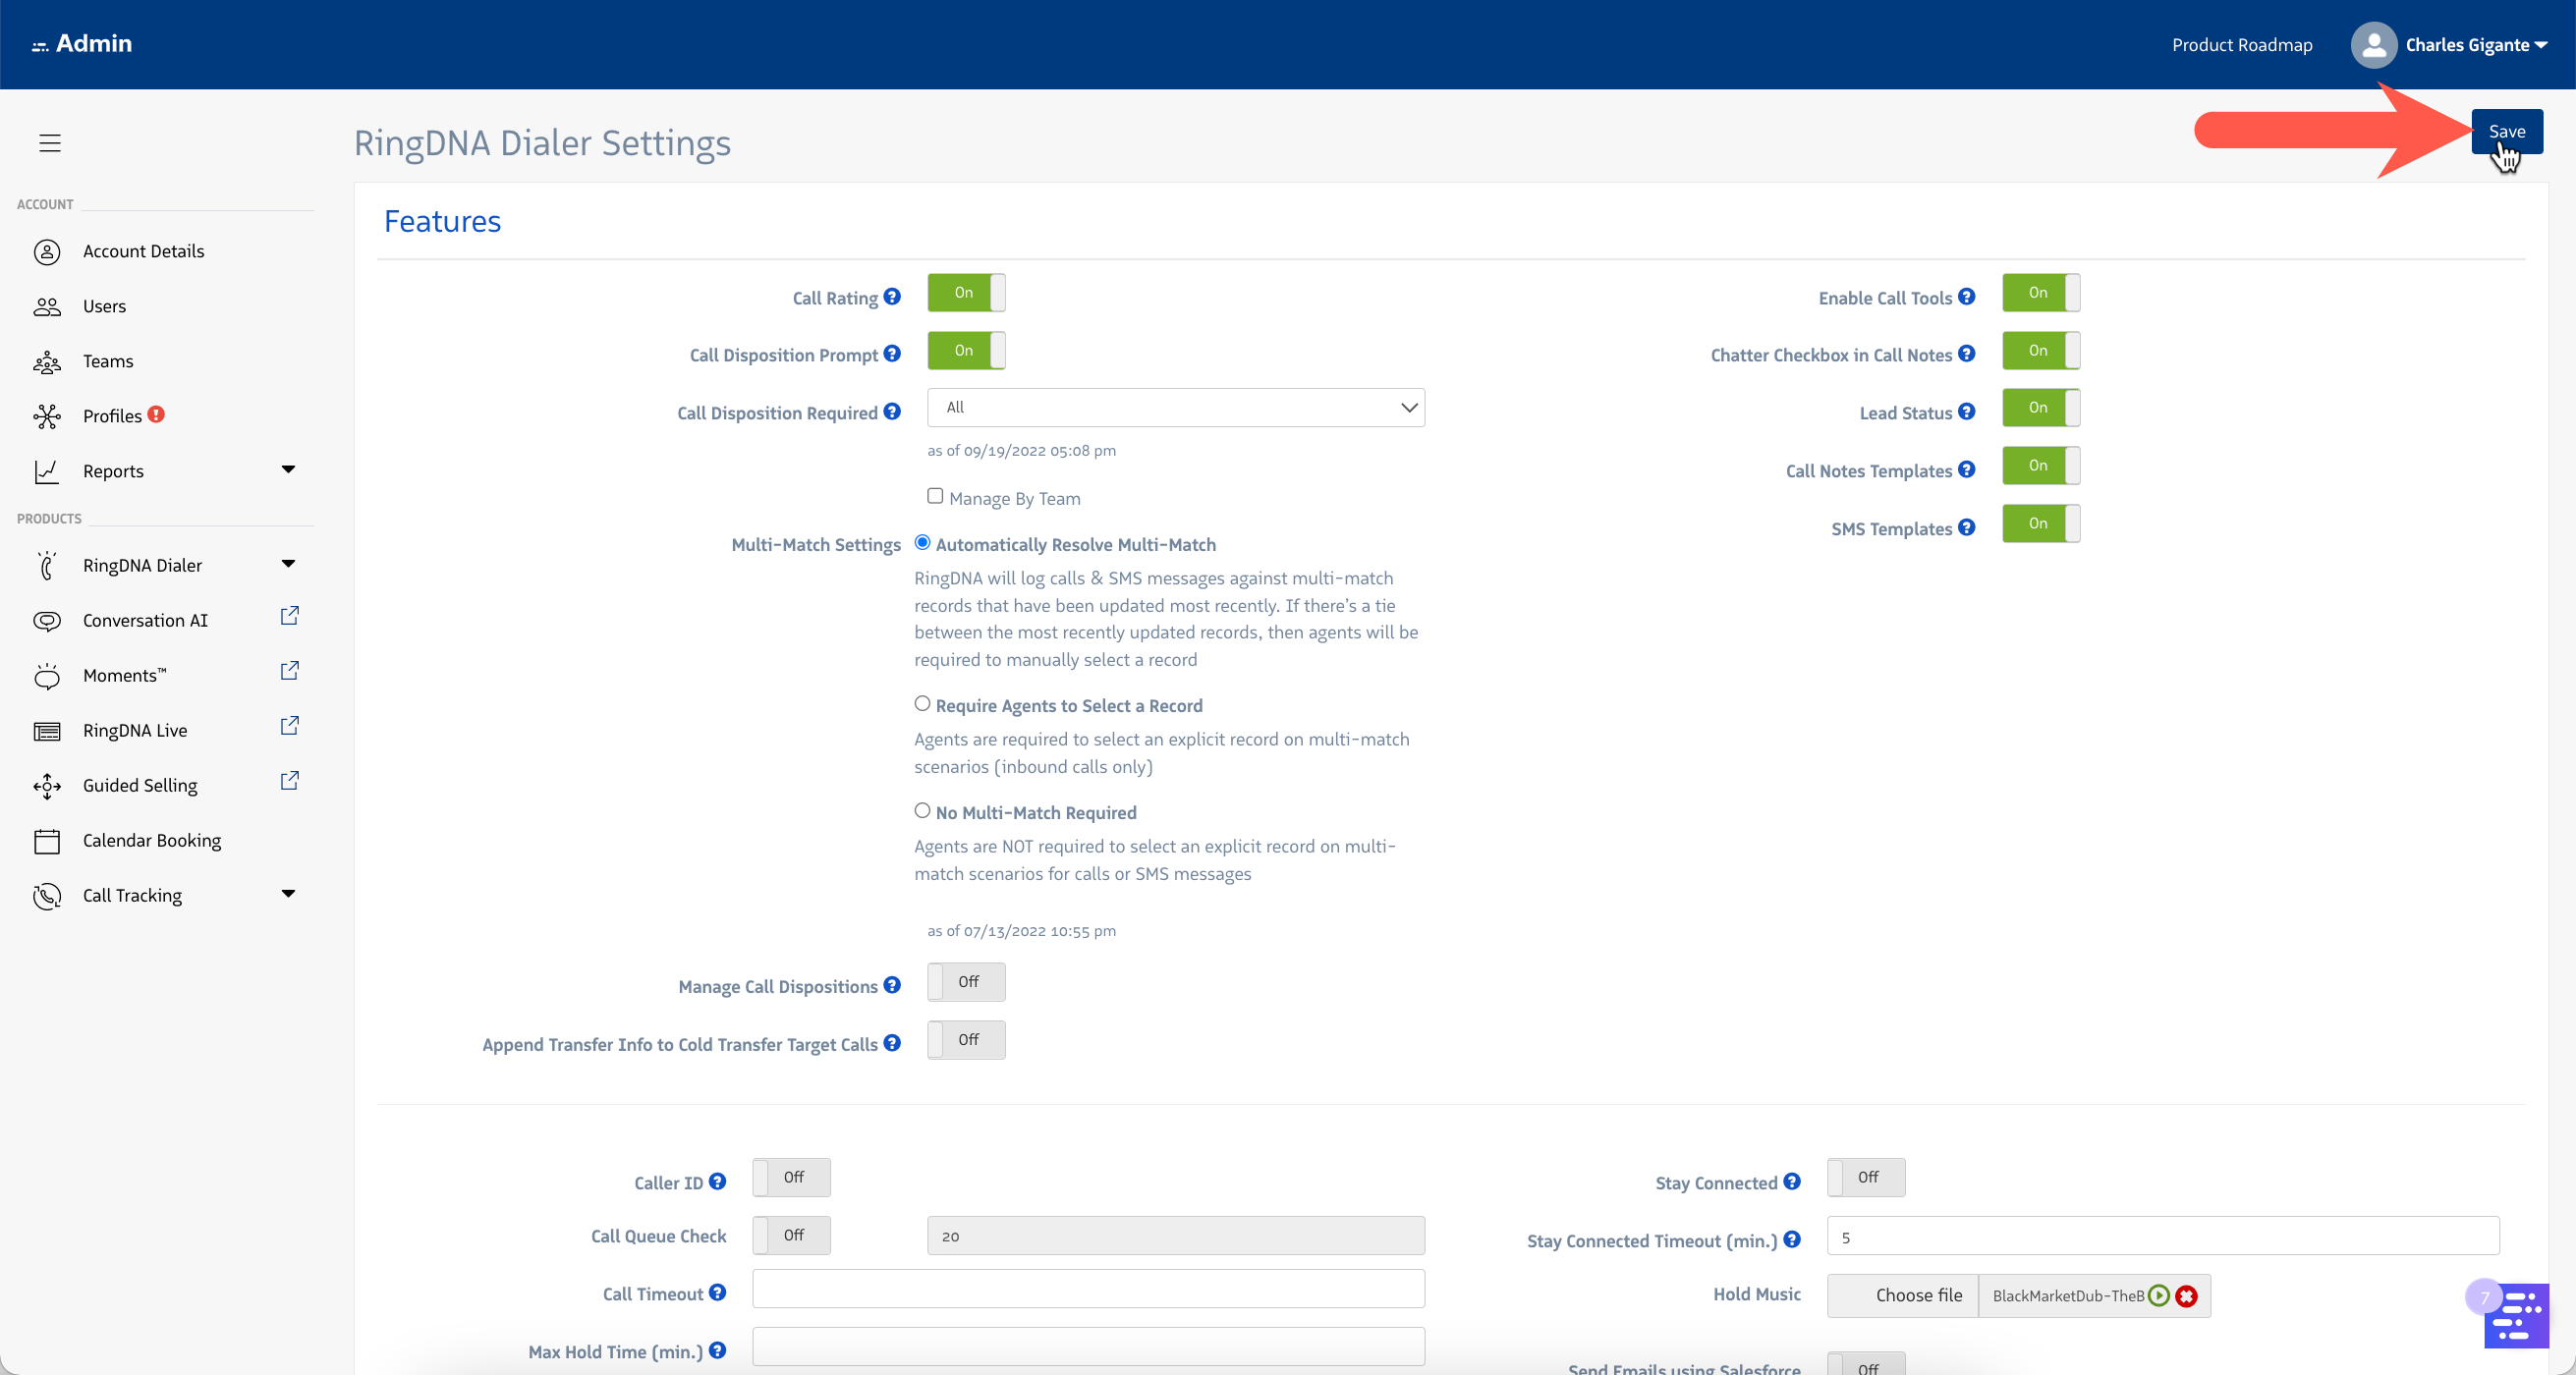
Log into the Admin Console
Navigate to RingDNA -> RingDNA Settings.
Scroll down to the User Presence section.
Note: If this section is not visible on the page, then please reach out to Revenue.io’s Support team to enable it.
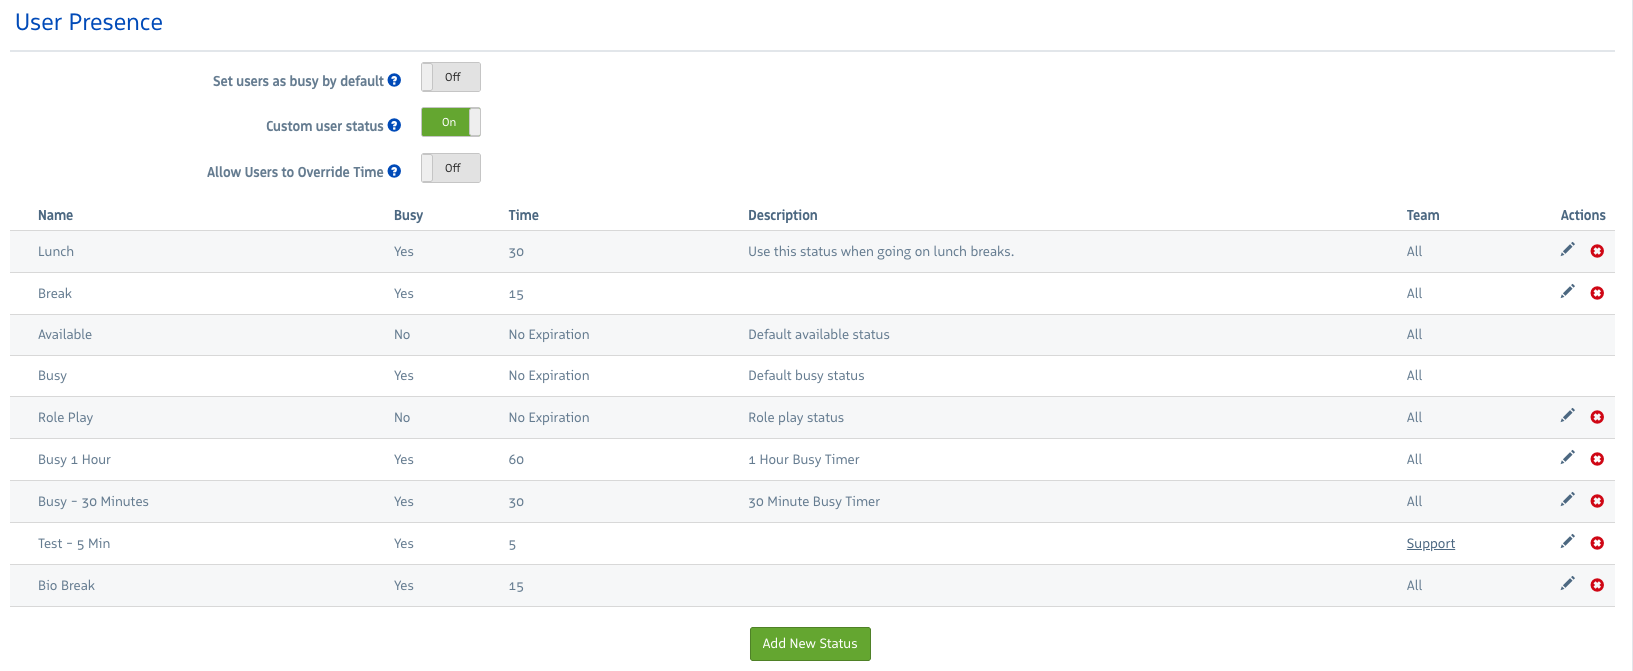
User Presence settings in Admin.
- By default, there are two system statuses always available to users of the RingDNA Dialer:
- Available
- Busy
Custom User Statuses can be added by clicking the Add New Status button:
On the Create New User Status modal window, Admins can configure the following settings for each Custom User Status:
Status Name - add a unique, descriptive name for the custom status (e.g. “Lunch Break”)
Busy - set whether the status should indicate that the Agent is busy or not.
- When set to yes, agents will not be available to take calls in the Dialer.
- When set to no, agents will be able to receive calls in the Dialer.
Description - Write a short description for the User Status.
Default Timing - Select how long your custom status should last. When the timer expires, the agent will see a warning that your status has ended. The agent’s status will not automatically return to “Available.”
Teams - Use this optional setting to apply the Custom User Status to specific Teams in your account. Leave blank to apply the status to all users in your account.
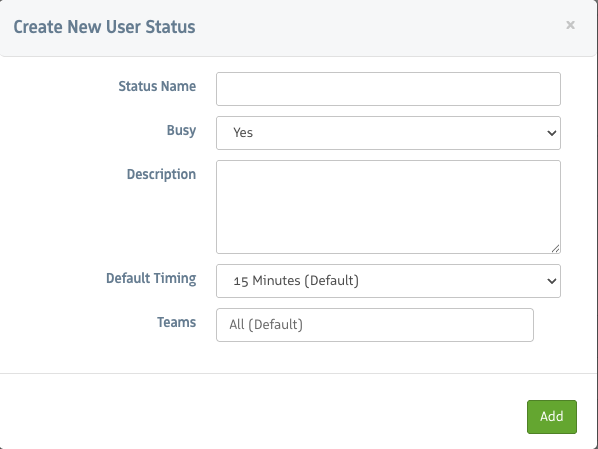
Create User Status settings
- After saving your new user status, the status is added to the table. From the table, Admins can view the relevant details of the status and either edit it by clicking the pencil icon or delete it by clicking the red delete button:
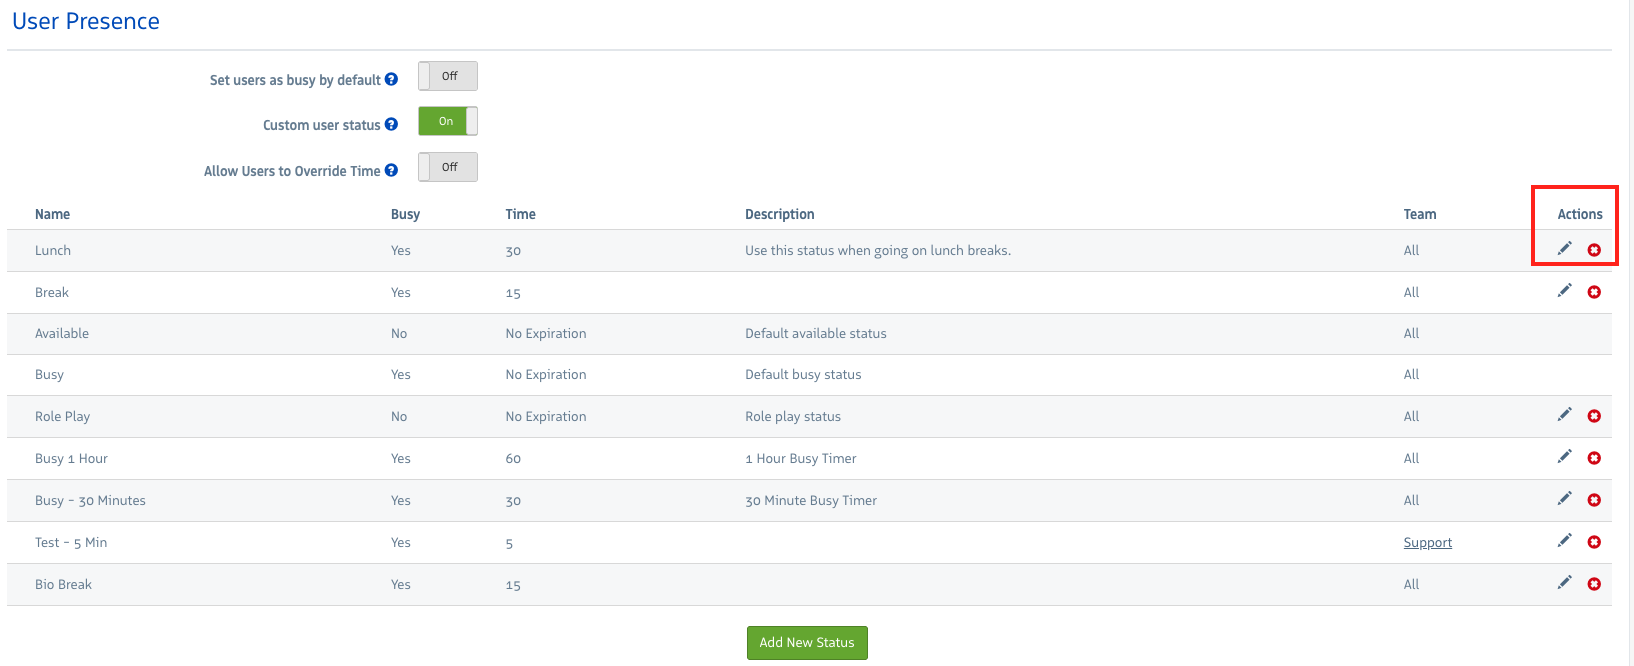
Edit and Delete user status
- Once a user status is created, Agents will be able to use it in the Dialer. For the above example, a status of “Lunch Break” was created, set to “Busy”, and with a duration of 1 hour. Agents who apply this status in the Dialer will be unavailable to take calls in the Dialer for 1 hour. Inbound calls during this time will be sent to voicemail. After 1 hour, their status will automatically return to “Available”, when they can resume taking calls.
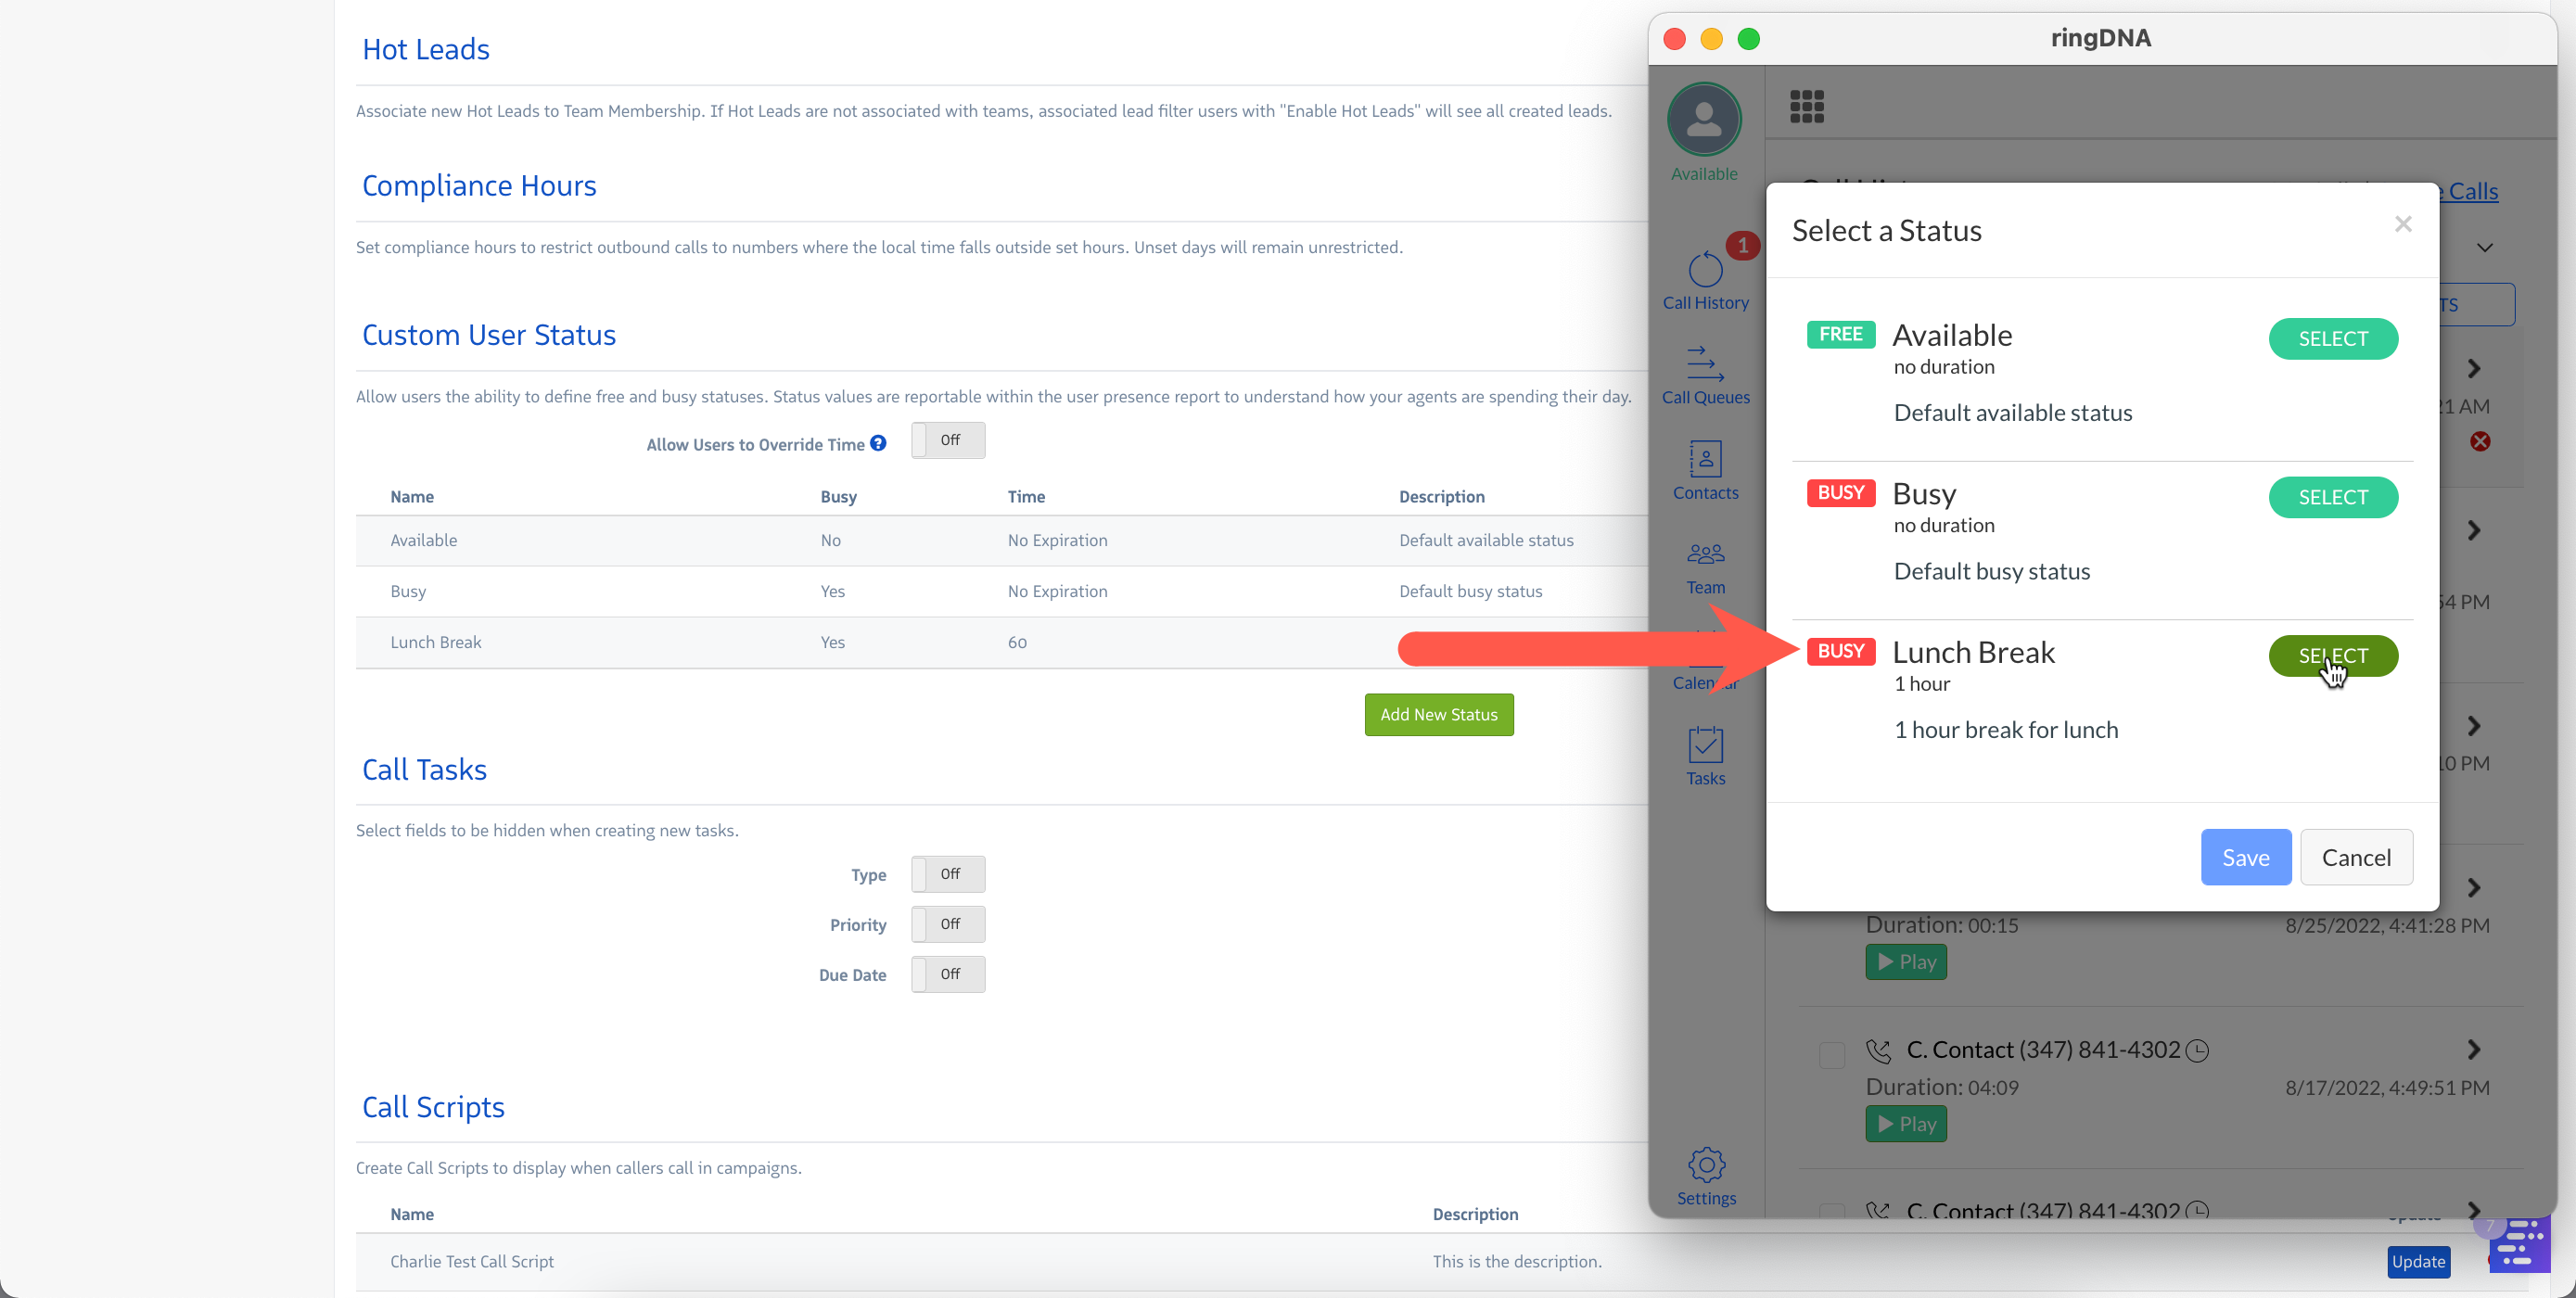
Lunch break status in Dialer
Agents see a timer indicating the remaining duration of the custom user status:
Lunch break status timer in Dialer
- Allow Users to Override Time - If enabled, when users are setting their user status, they are allowed to override the default time expiration.
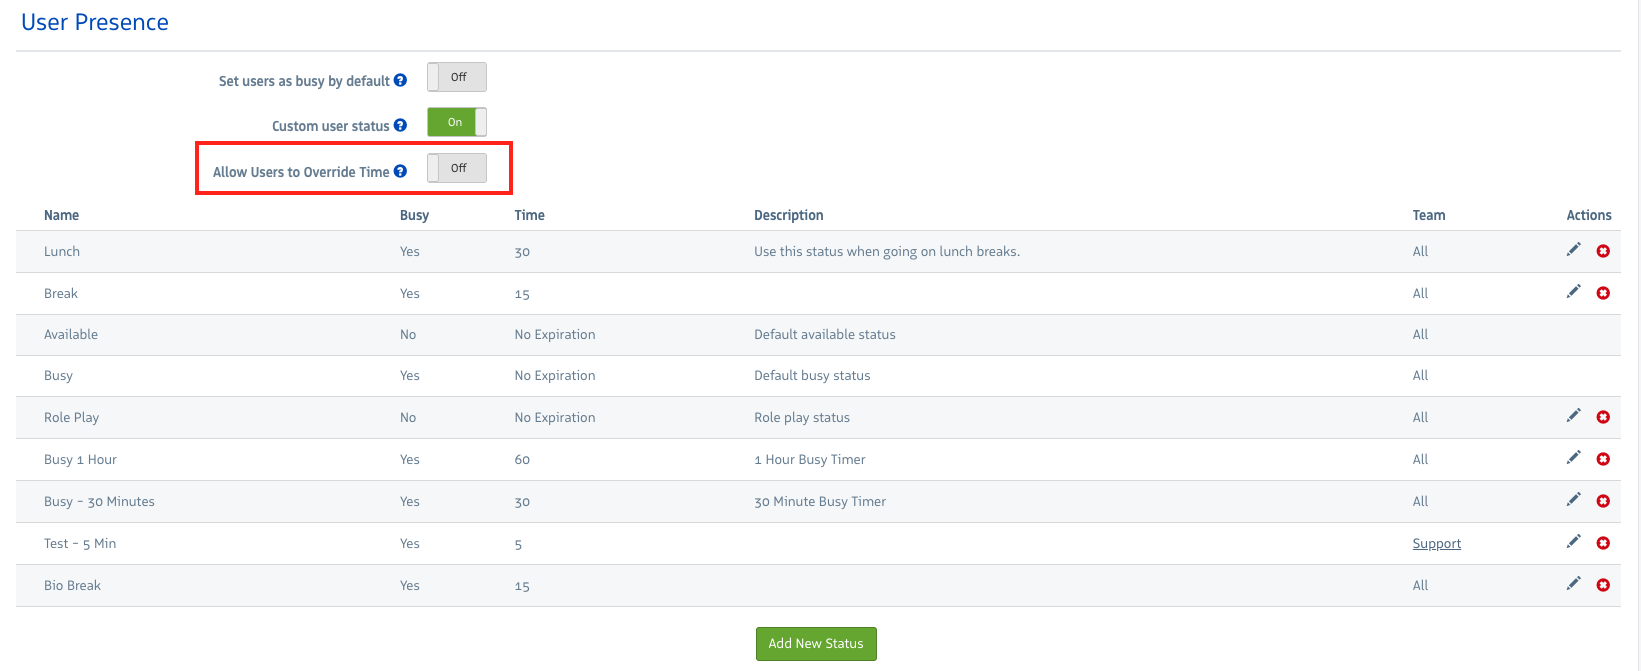
Allow Users to Override Time setting
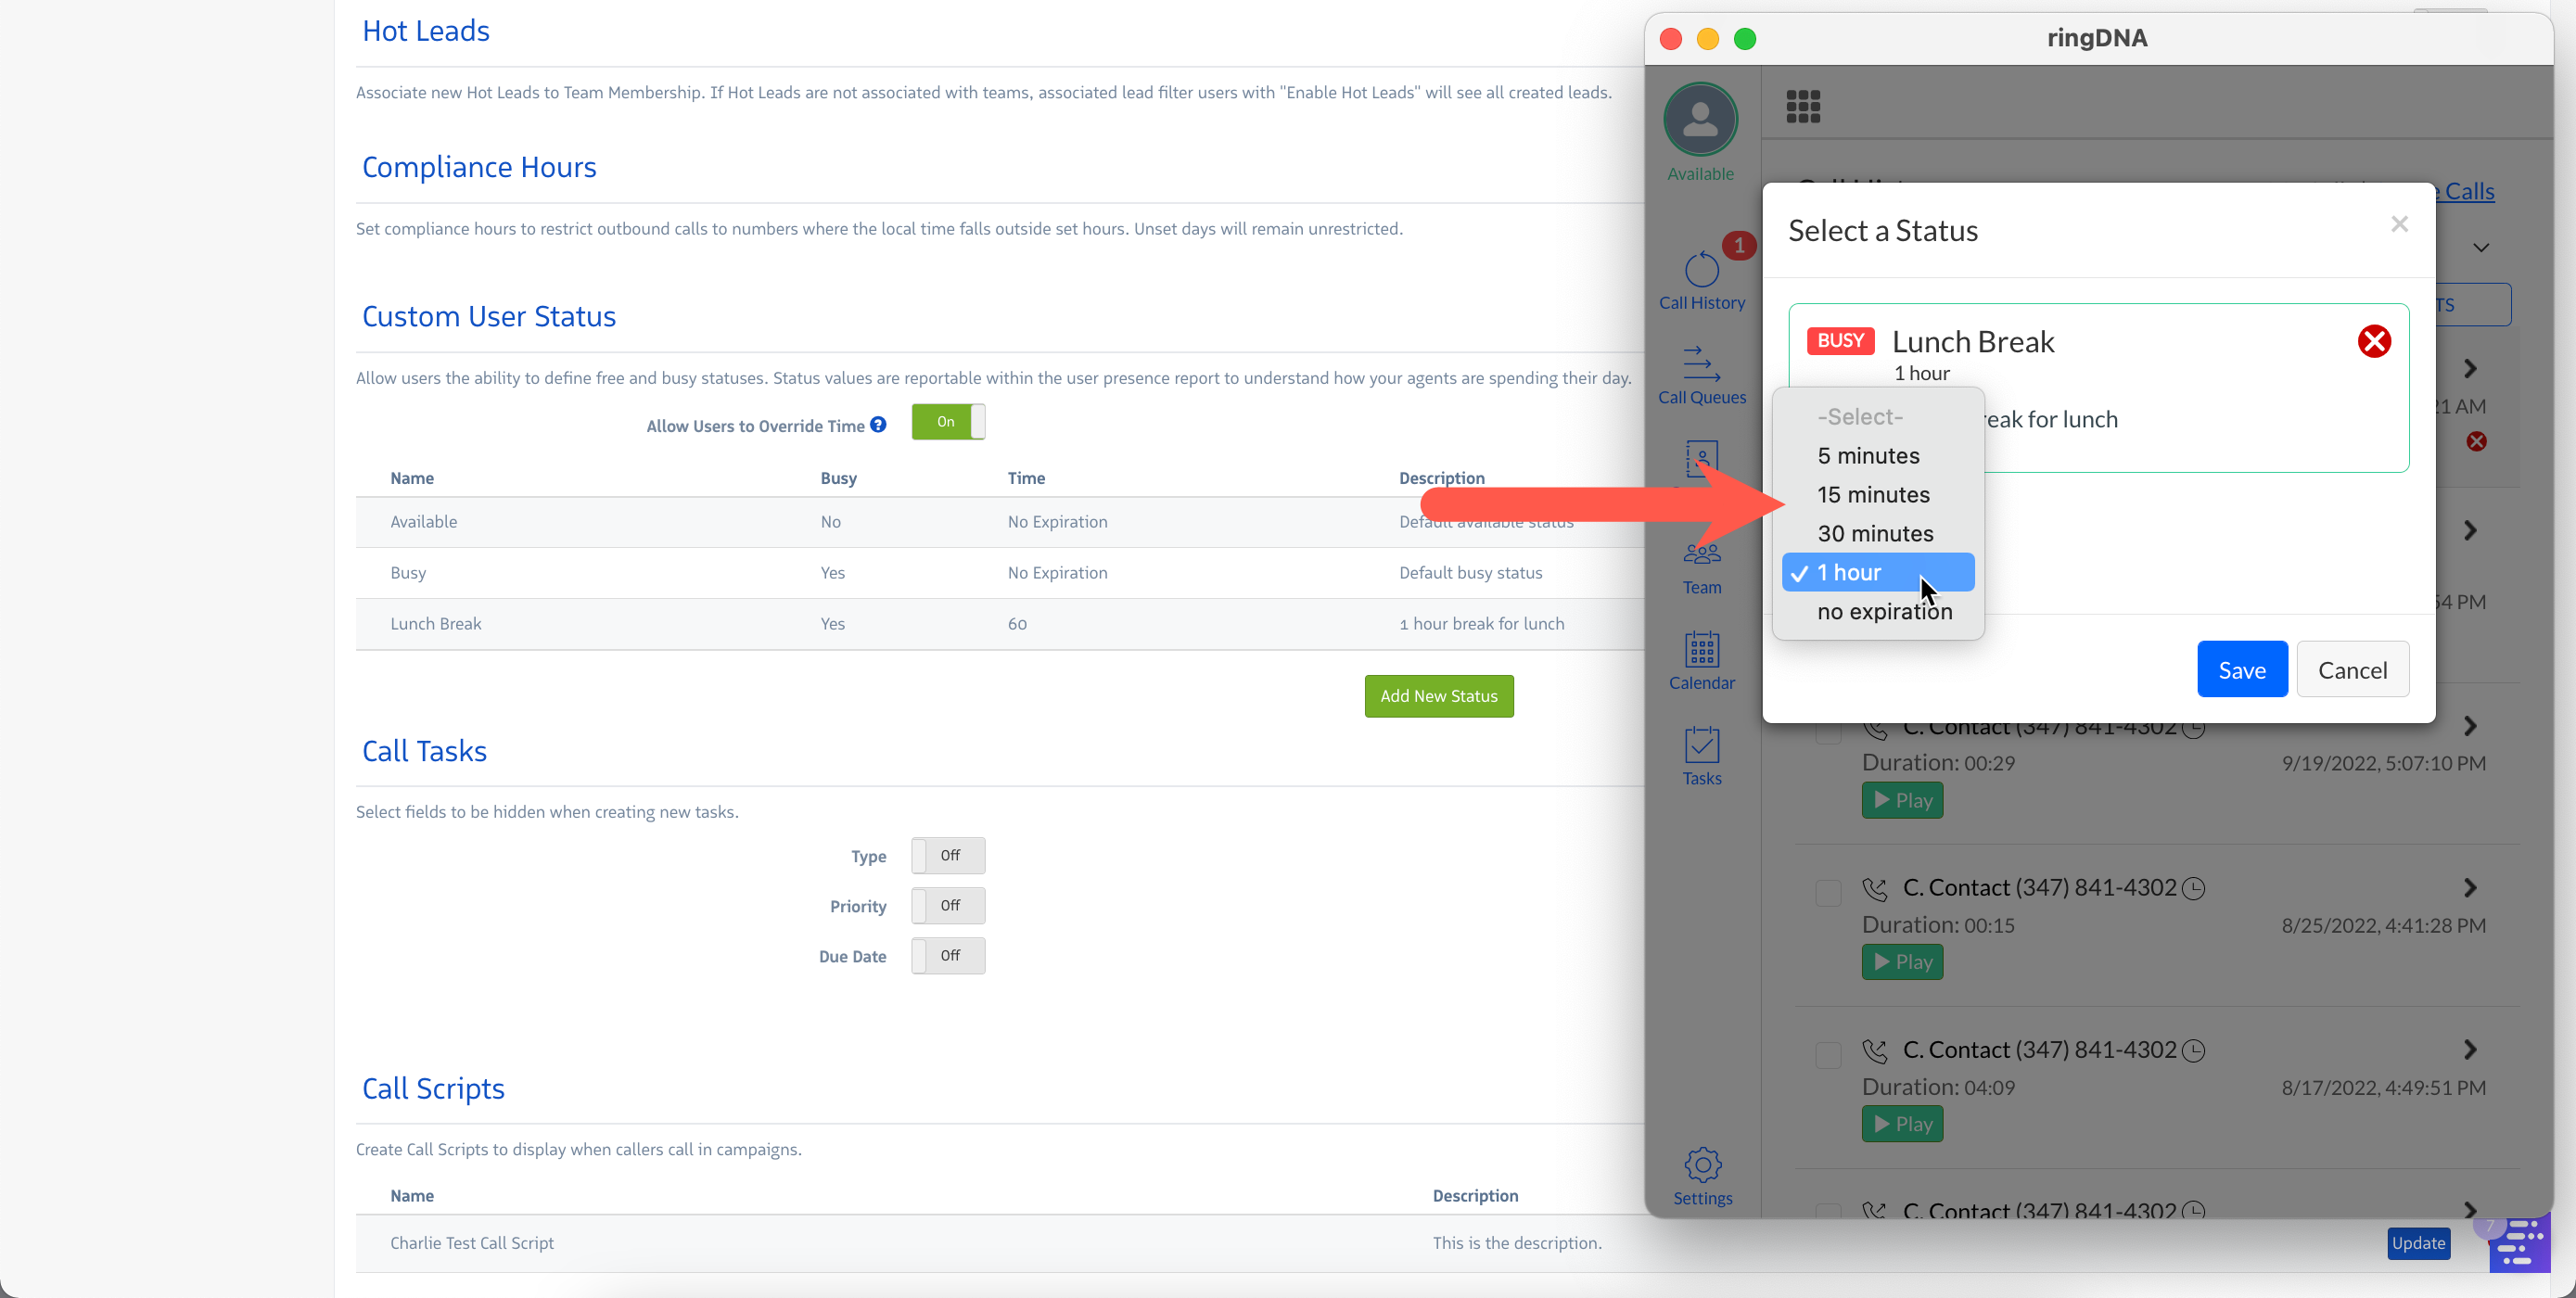
Override time setting in Dialer
- Scroll to the top of the screen and click Save