Setup an Email to Salesforce (BCC) Address in RingDNA
Agents can reduce clicks and improve productivity by initiating Salesforce emails within the RingDNA Communications Hub.
When an email is sent from the RingDNA Communications Hub, all email activities are logged back to Salesforce automatically in real-time, giving reps additional context and team leaders an instant paper trail with prospects.
Set up Email to Salesforce
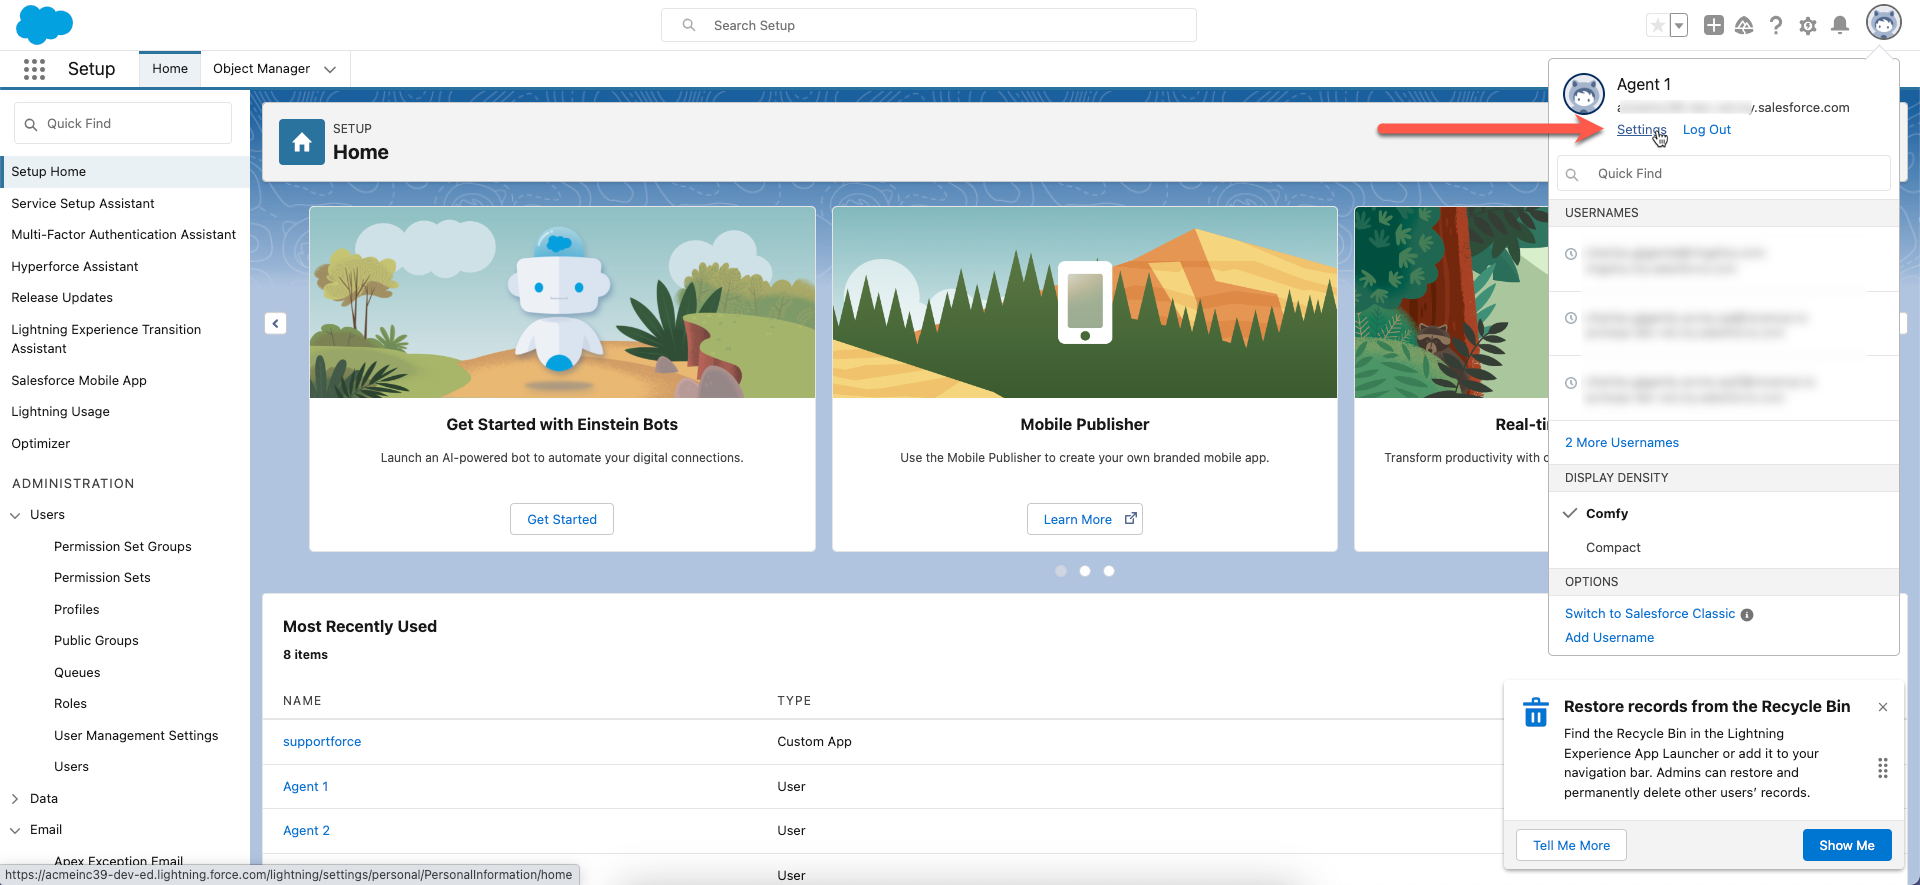
Log in to your Salesforce Org, click your user avatar in the menu bar, and select Settings.
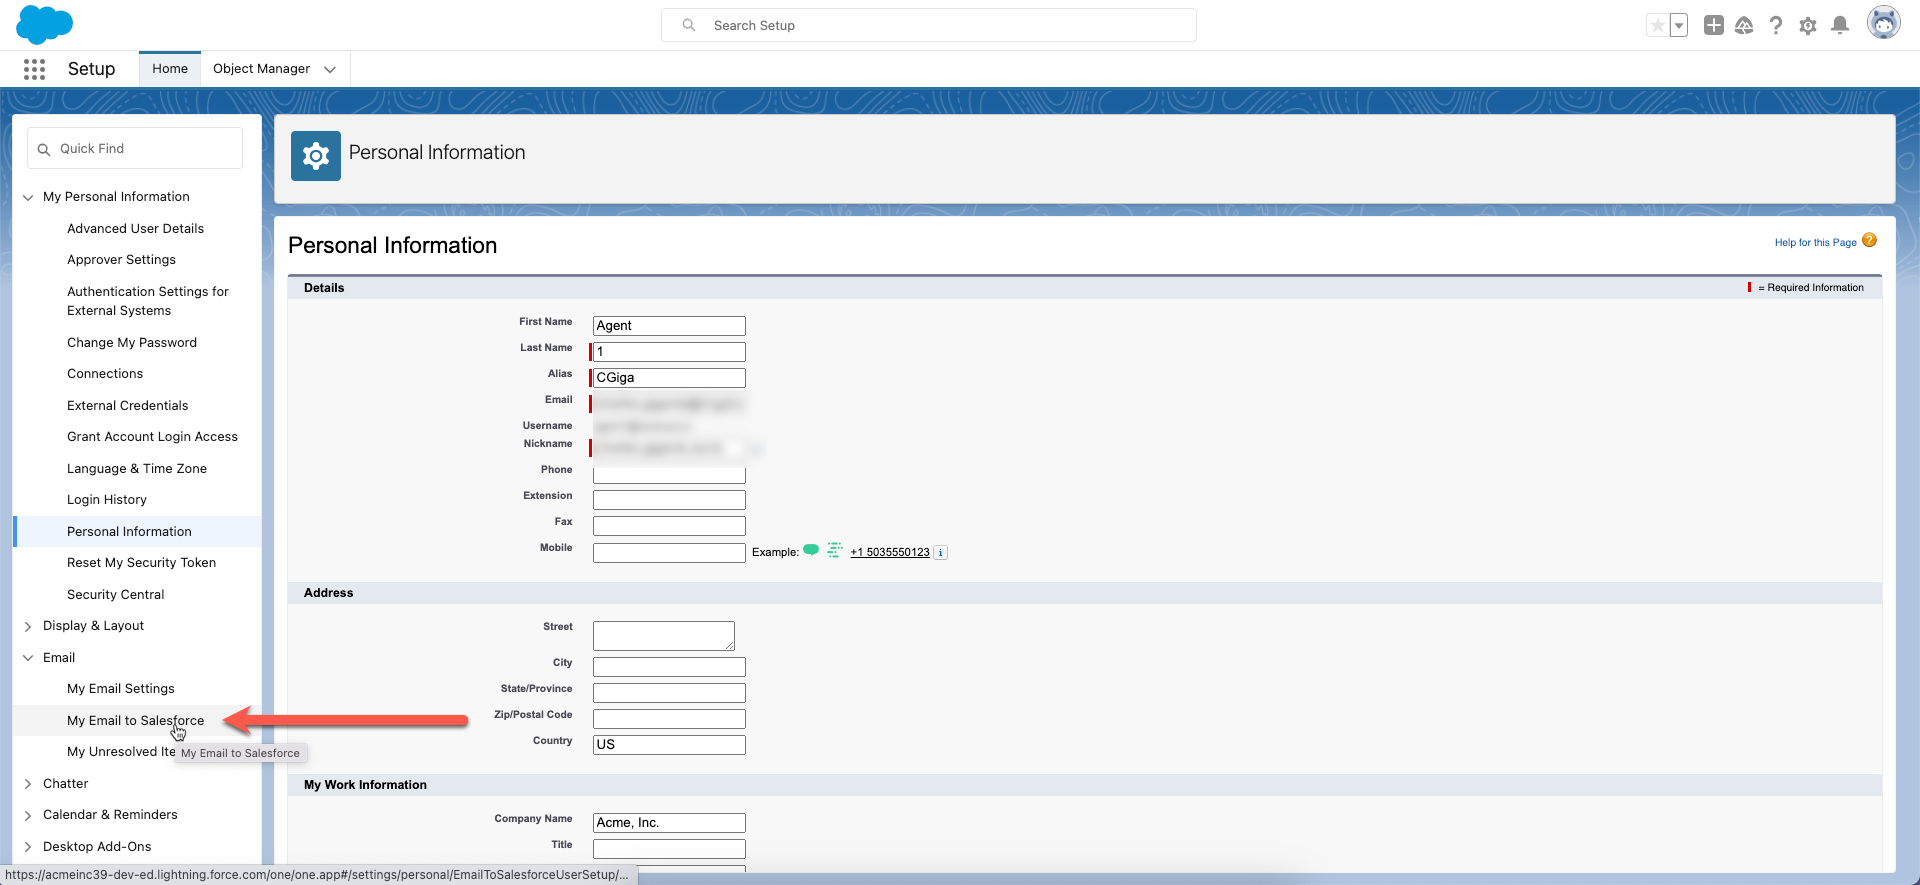
Click Email in the sidebar and select My Email to Salesforce.
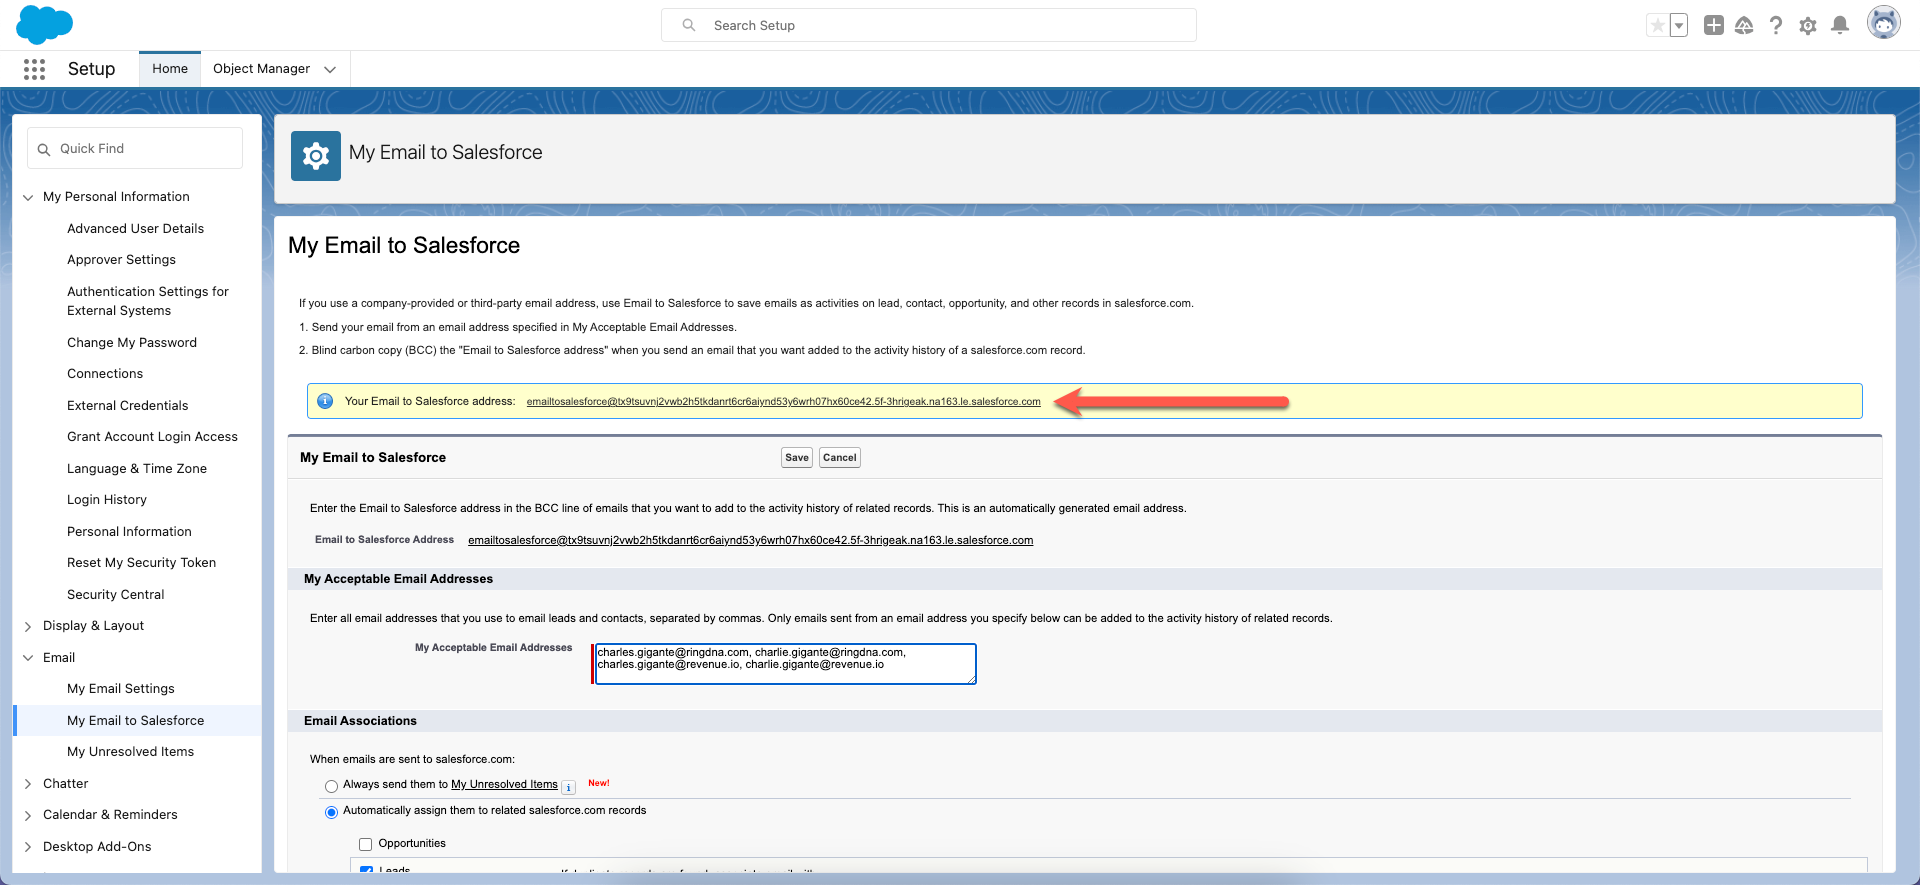
Copy the address in the Your Email to Salesforce field.
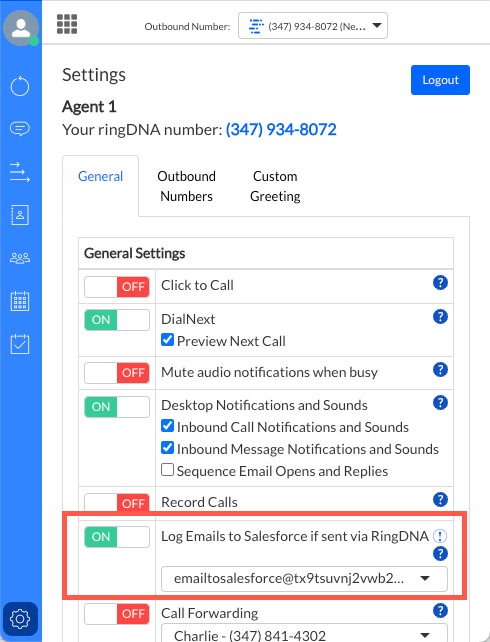
Open RingDNA and select Settings. Turn on the Log Emails to Salesforce feature and paste the address into the Email field.
Log an Email using Email to Salesforce (BCC Address)
When an email address is present on a Lead or Contact’s page in RingDNA, an email icon appears next to the address.
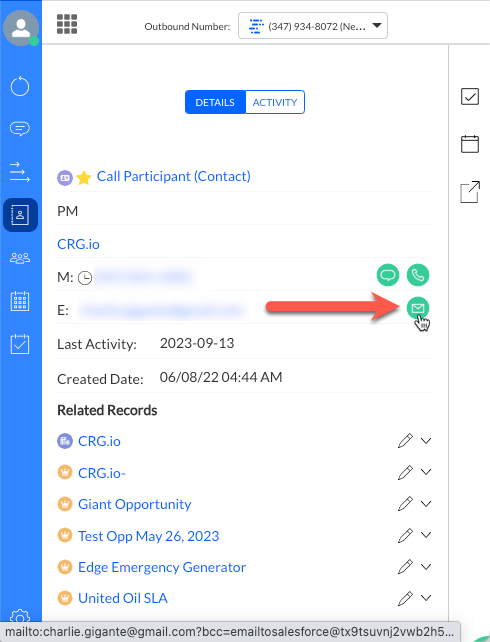
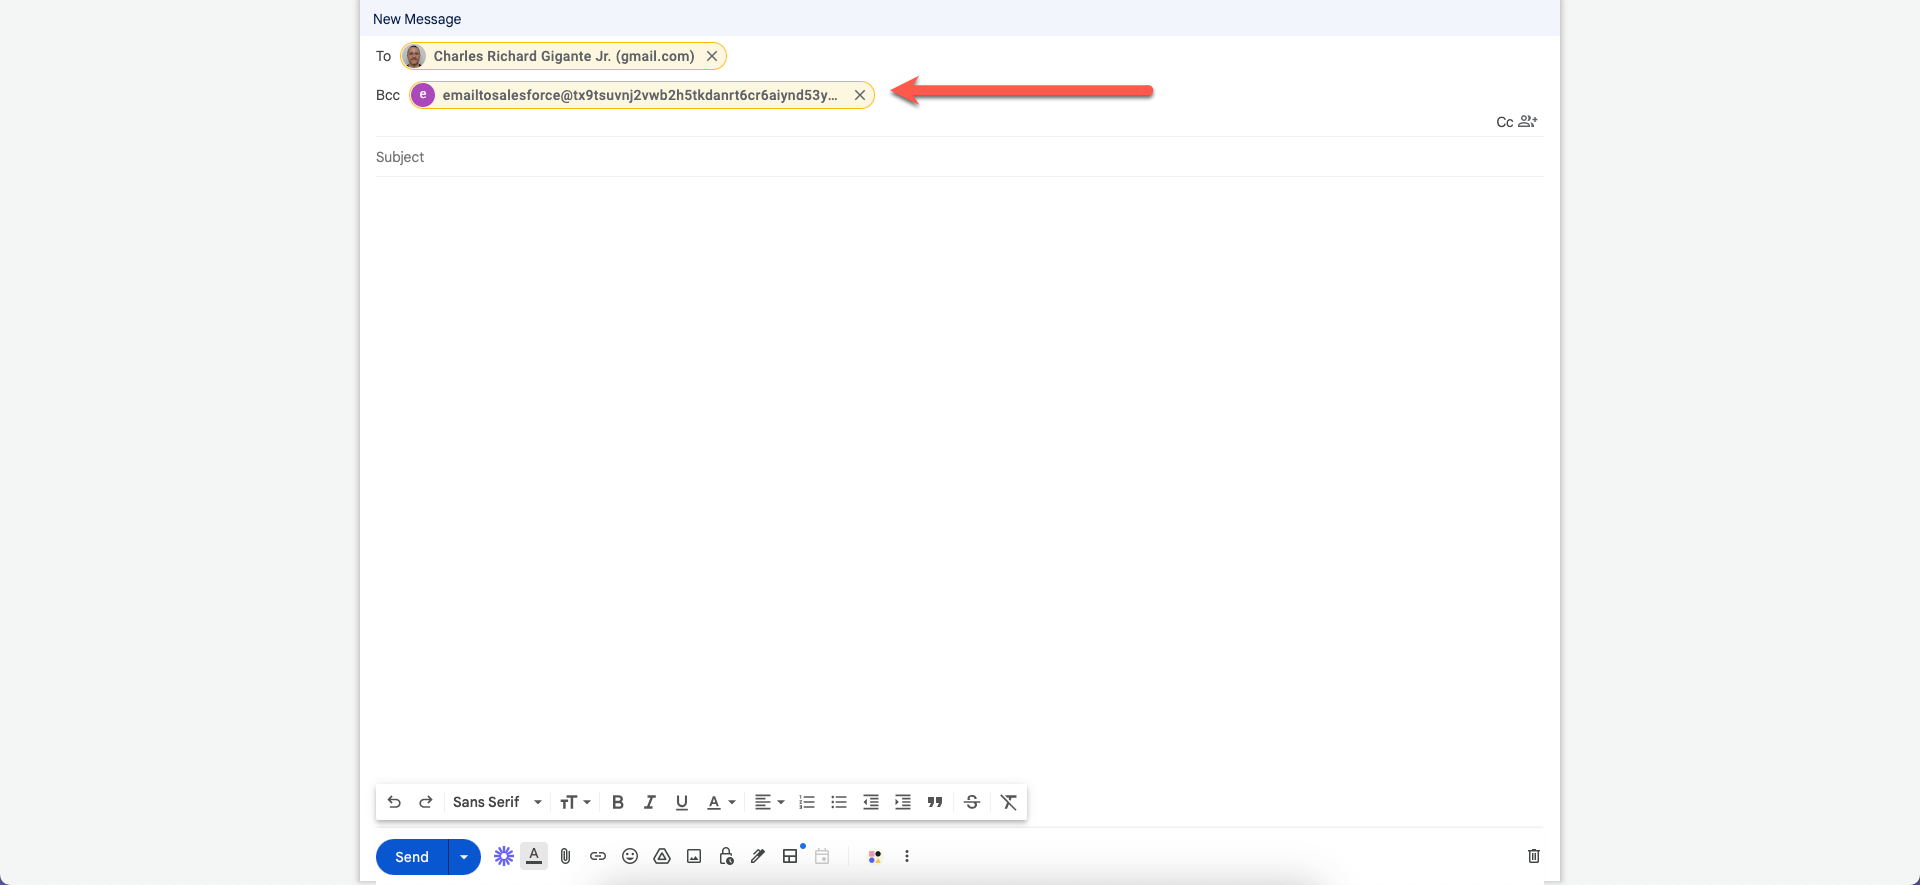
Click the icon. RingDNA opens your native email client in a new tab, and your Email to Salesforce address automatically appears in the bcc field.
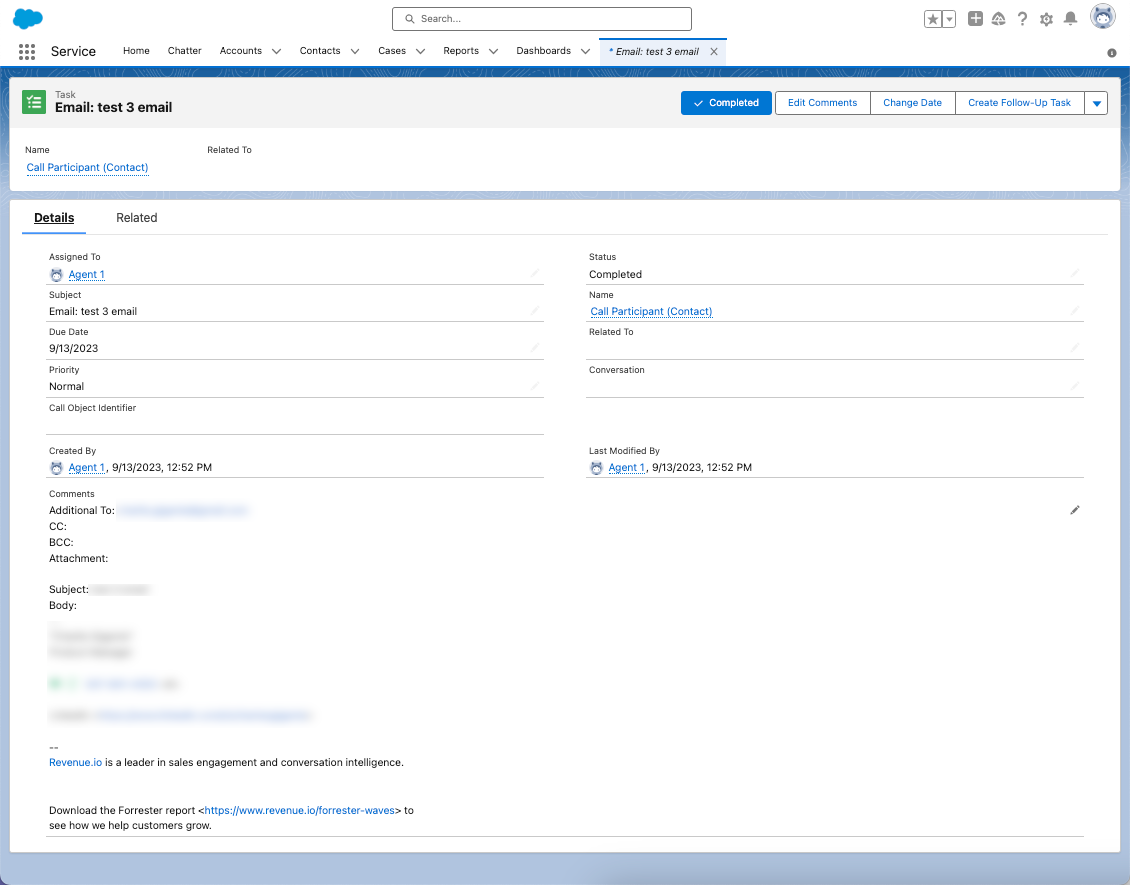
After the email is sent, the email activity appears in RingDNA.

The task is logged to Salesforce.