Create a Sequence
Create and configure a sequence to guide participants through the sales process. Follow the steps below to create a new sequence, define criteria and actions, and activate it.
How to access Sequences
- Open Salesforce.
- Click the icon (App Launcher) in the Salesforce header to open the app menu.
- Search for Guided Selling.
- Click the
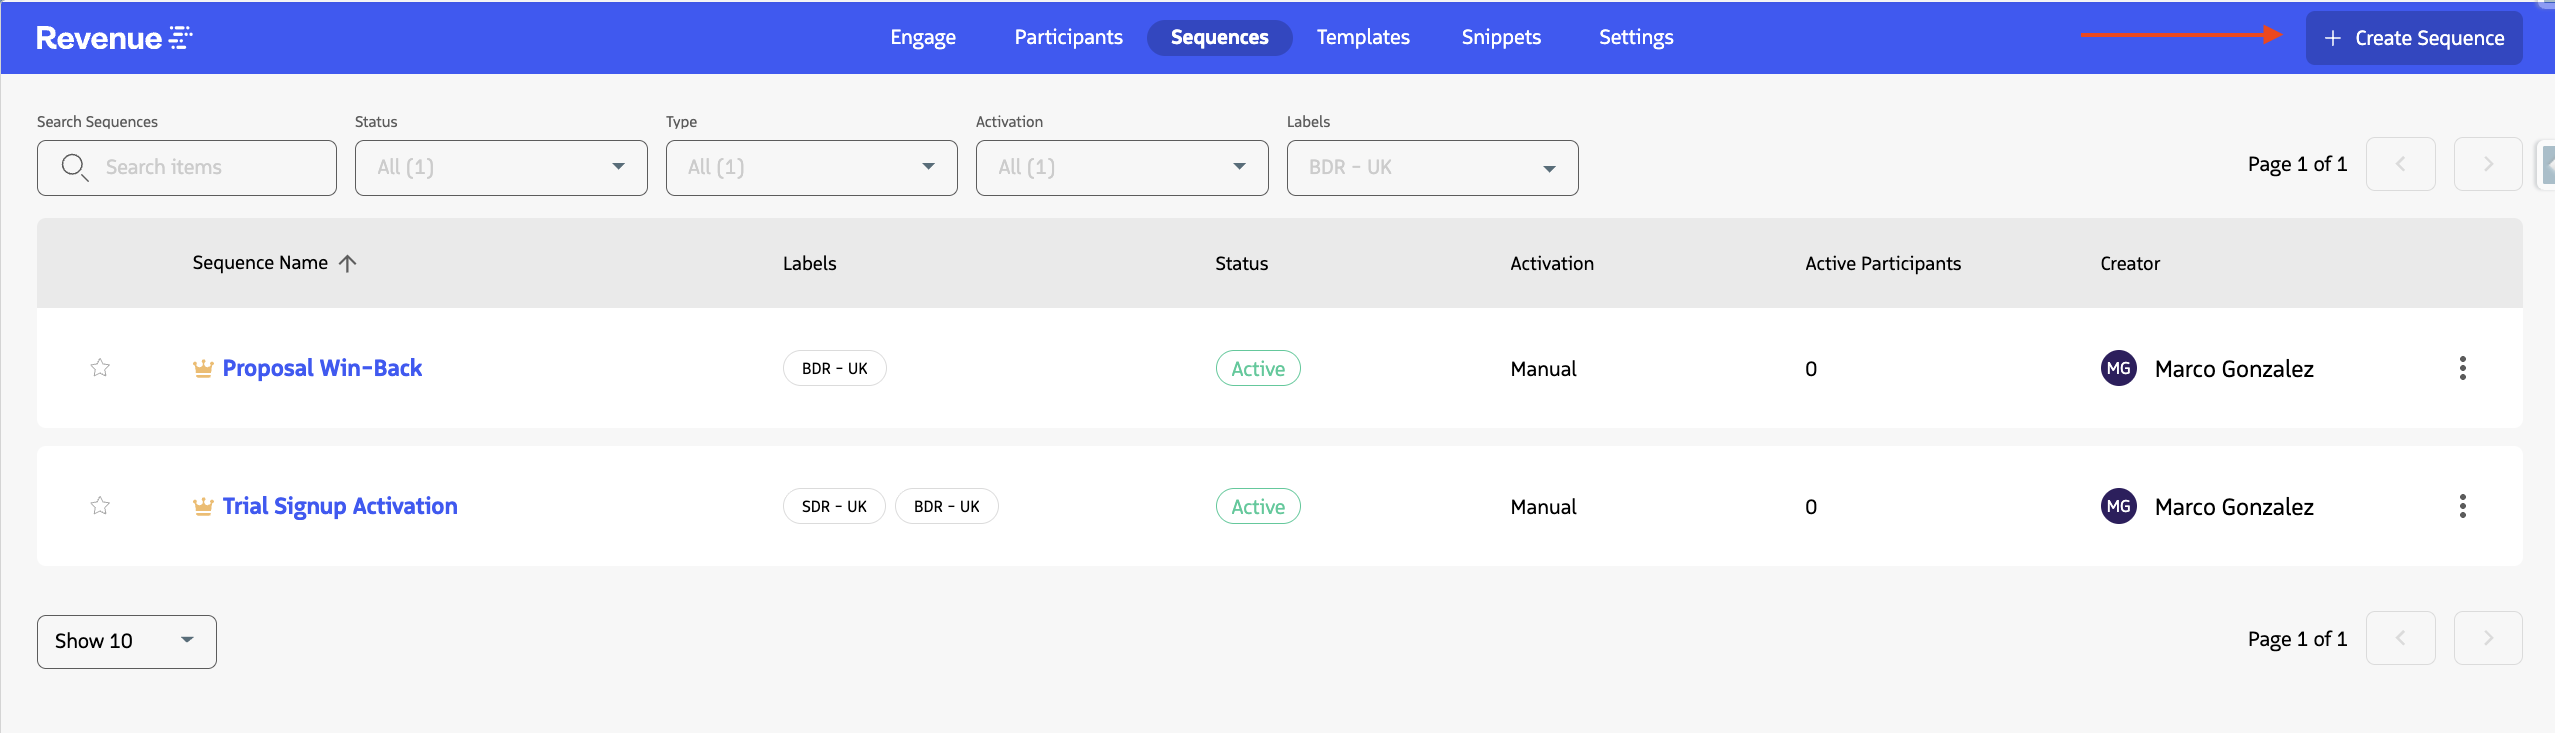
Sequencestab. - Click
Create Sequenceat the top right of the page.
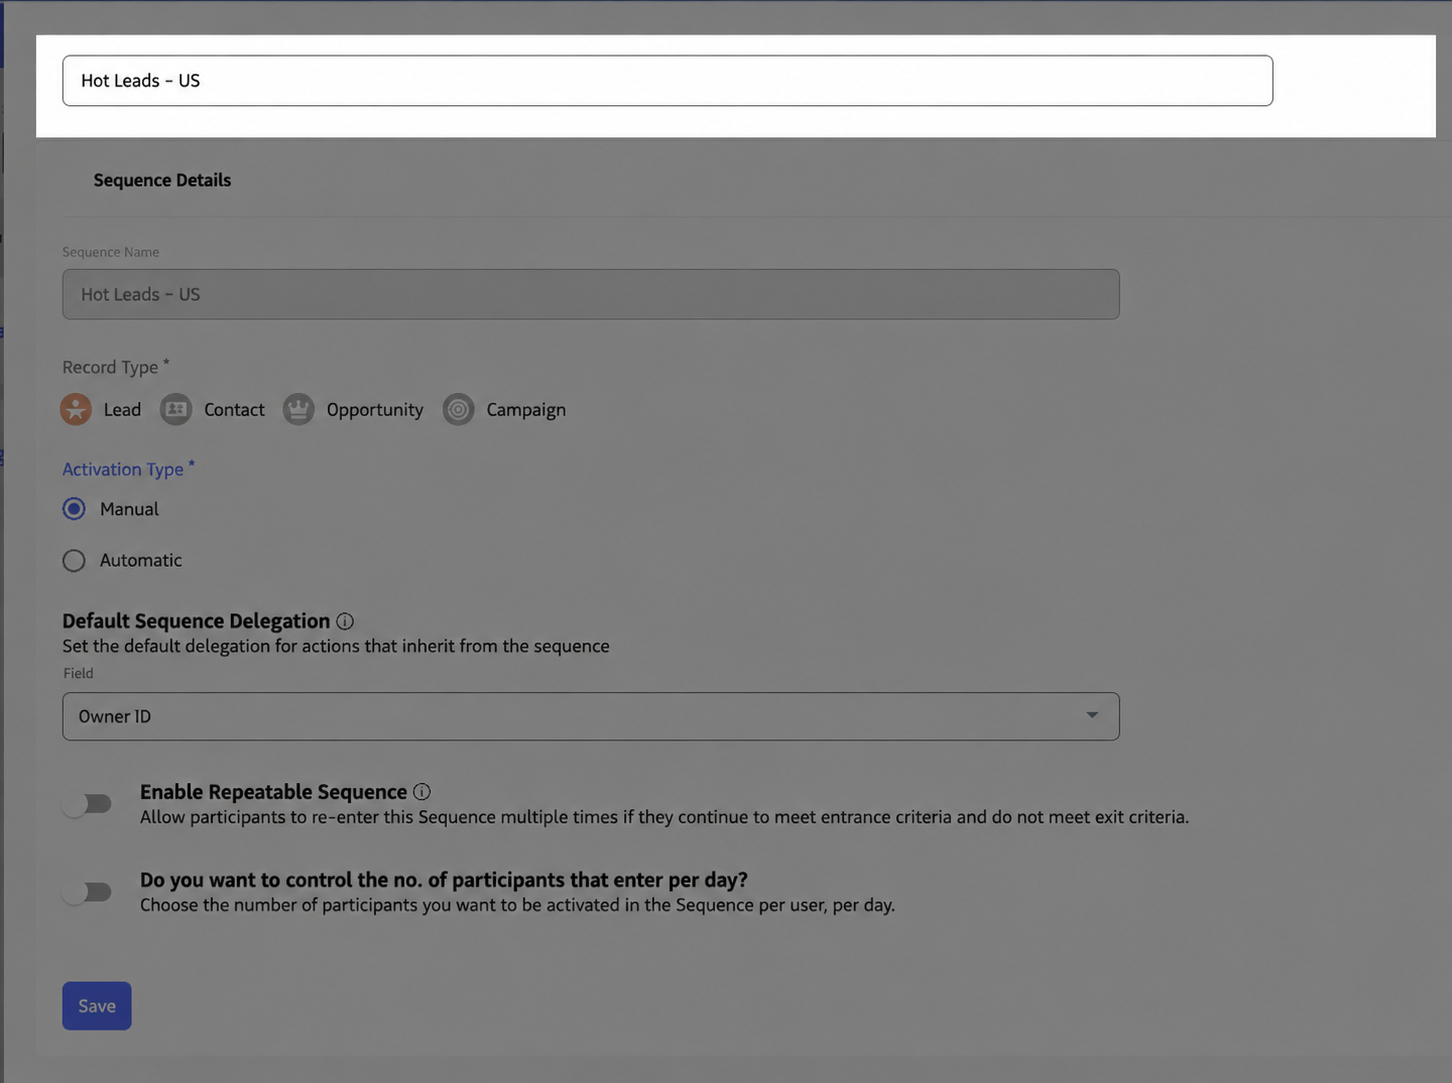
Enter a Sequence name
Enter a clear, recognizable name that describes the purpose of the sequence.
You do not need to encode every organizational detail, such as team, region, campaign, or industry, into the sequence name. Use sequence labels to organize sequences and make them easier to filter. Labels can also be used to narrow the Add to Sequence list when enrolling a participant from Engage.
Configure Sequence details
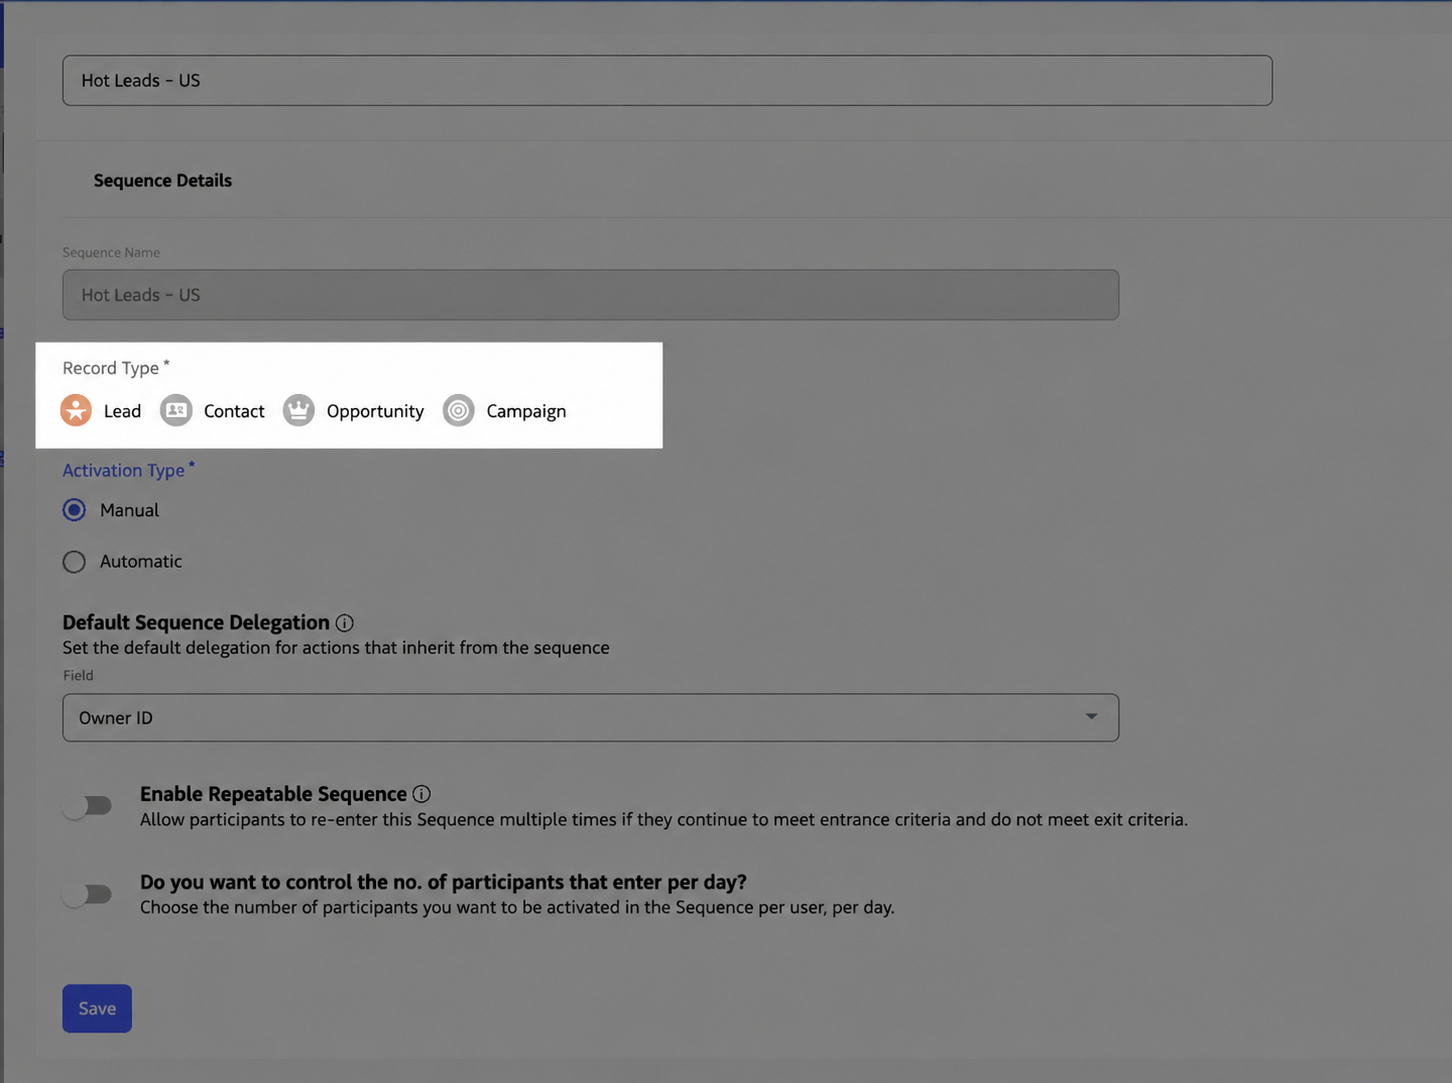
Select the record type
The Record Type (Lead, Contact, Opportunity, or Campaign) defines which records can be enrolled in the sequence and which fields are available for criteria and delegation. Record type cannot be changed after the sequence is saved. For more information, see Record Types.
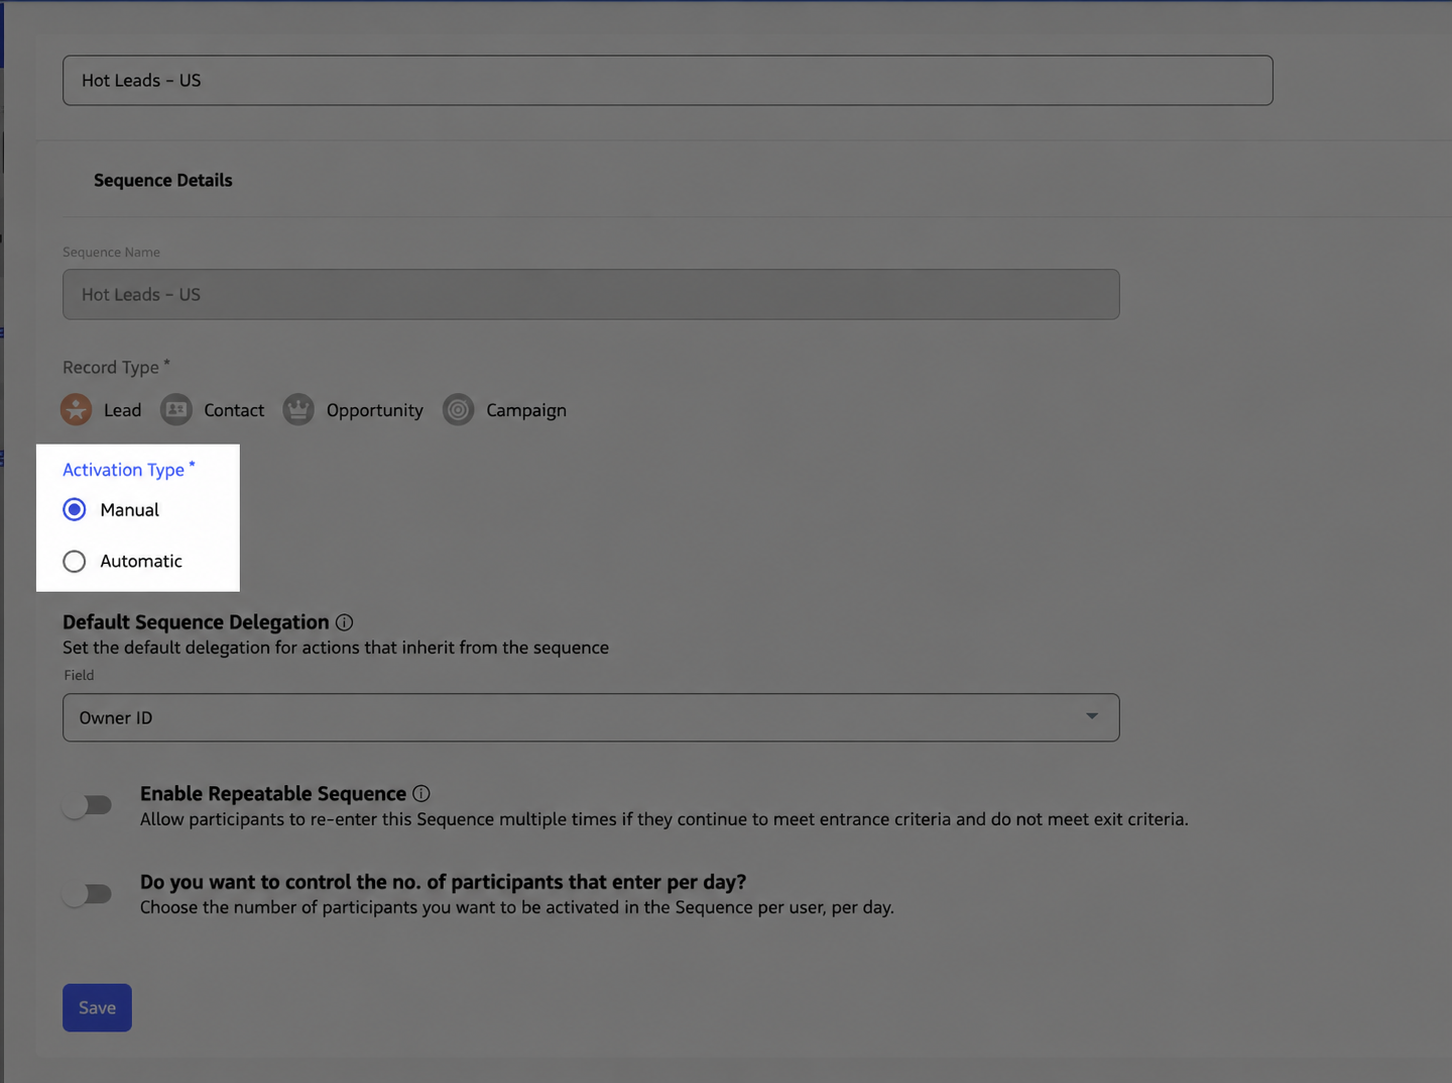
Choose activation type
Activation type controls how participants enter the sequence: Manual (enrolled only by user action, from an individual record or from a list view) or Automatic (enrolled when they meet entrance criteria). For automatic sequences you must set a priority (P1–P5); participants can be in only one sequence at a time, and priority determines which sequence wins when multiple sequences match. For more information, see Activation Type & Priority.
If this is your first time creating a sequence, start with Manual. This is also a good approach if you want to validate a sequence before automating it. You can change a sequence from Manual to Automatic later.
Advanced settings
You can configure delegation, repeatable (re-entry), and slow drip before saving. Each option is described below.
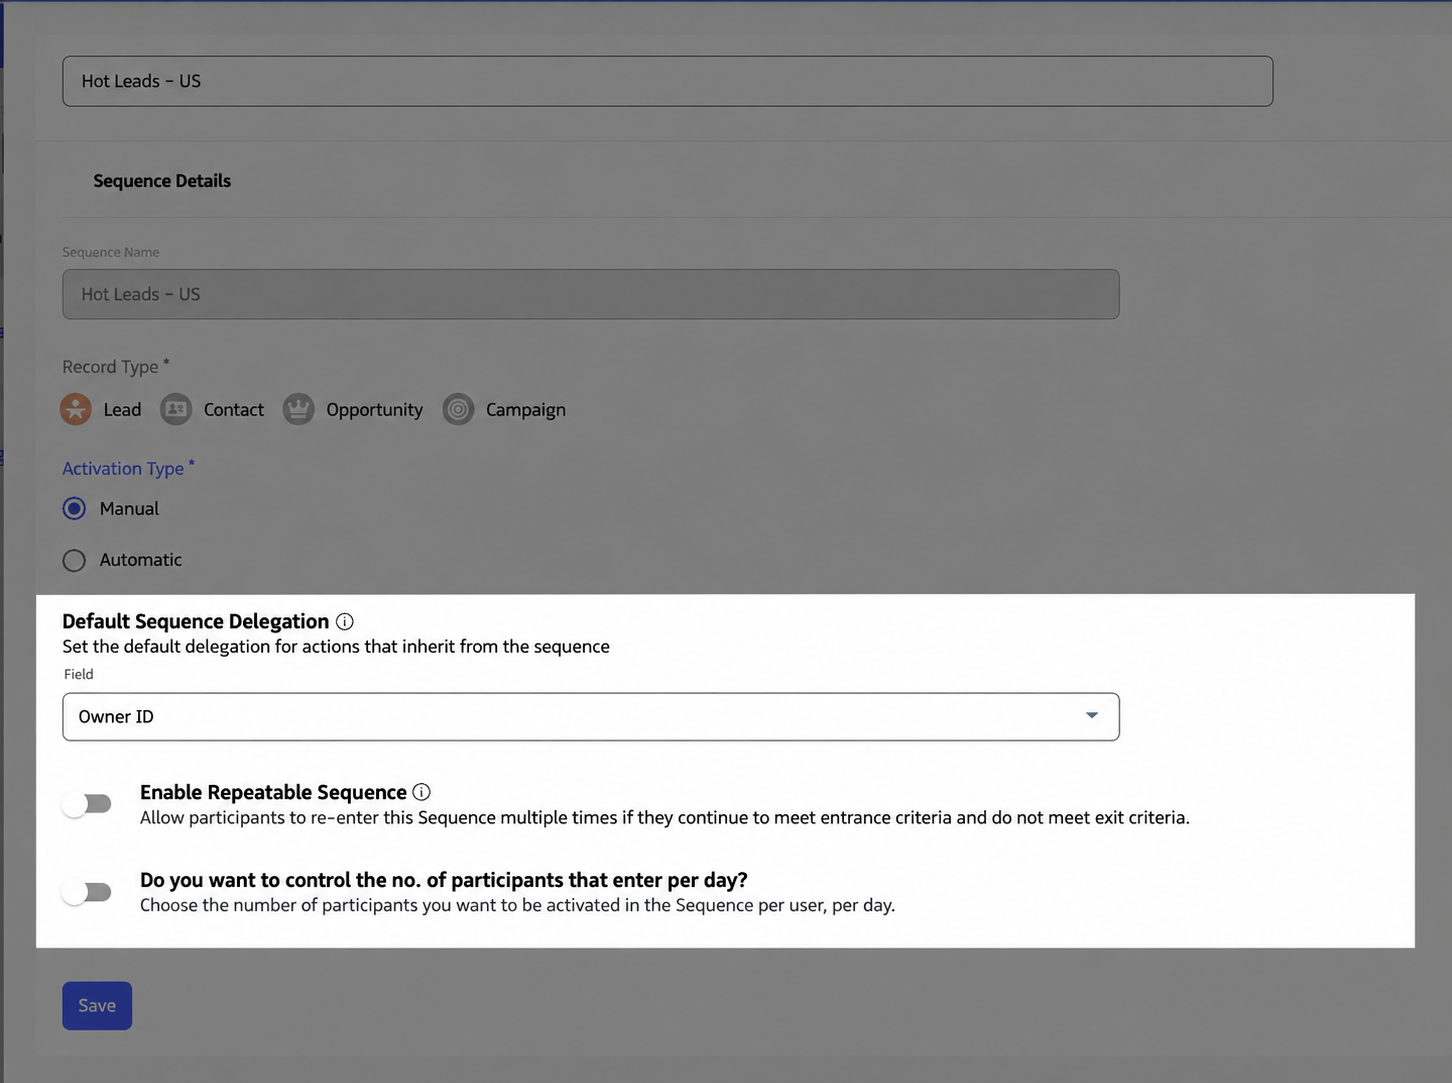
- Delegation — Use when the record owner is not the user who will run the sequence. Delegation assigns who owns and executes participant actions (for example, via a User lookup on the record). You can set it at the sequence level or override per action. For more information, see Sequence & Action Delegation.
- Repeatable — A repeatable sequence lets the same participant re-enter after completing all actions and exiting, as long as they still match entrance criteria and do not match exit criteria; useful for nurture or re-engagement. For more information, see Repeatable Sequences.
- Slow Drip — For sequences that match a large number of records, Slow Drip limits how many participants are activated per day so users are not overwhelmed. For more information, see Slow Drip.
Click Save to continue to the next steps.
Define entrance and exit criteria
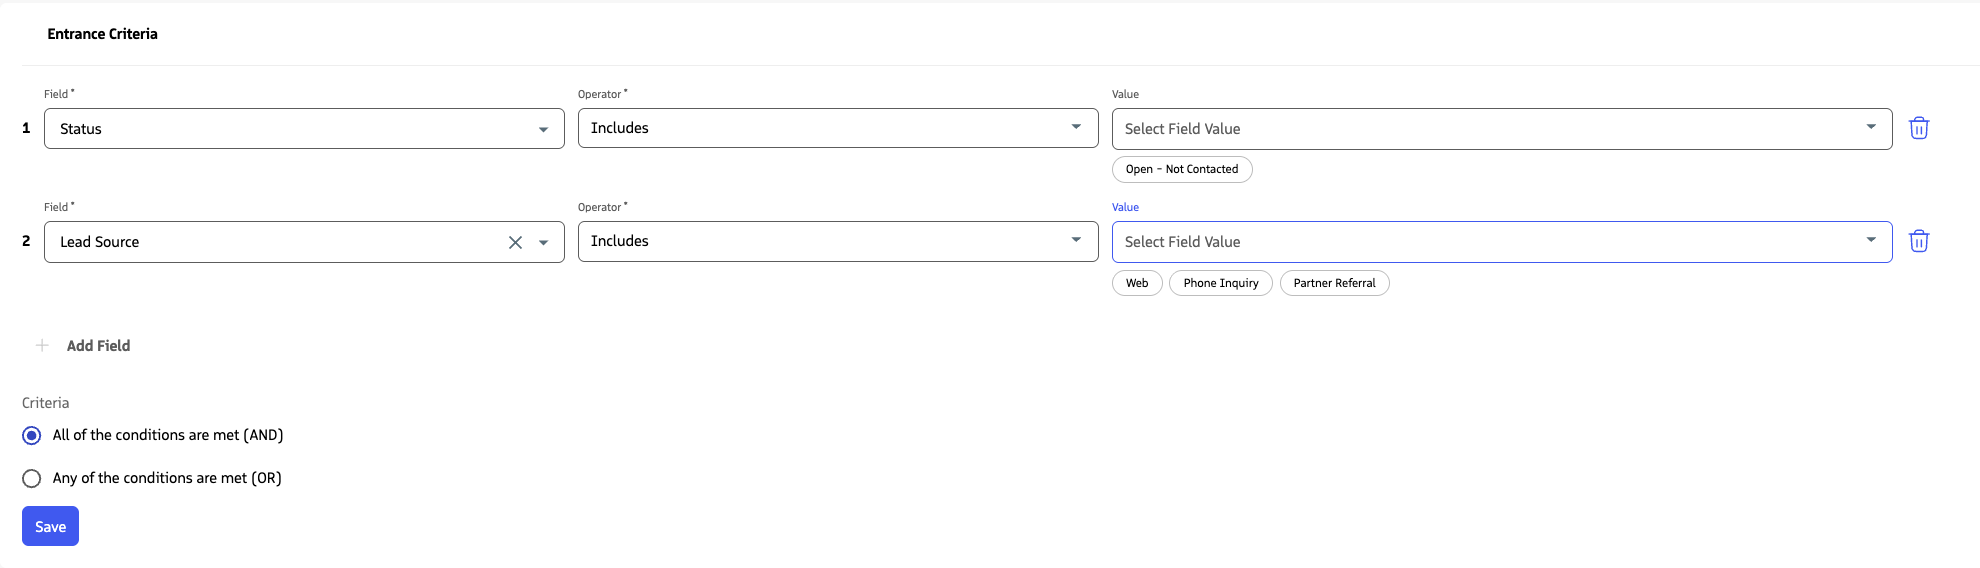
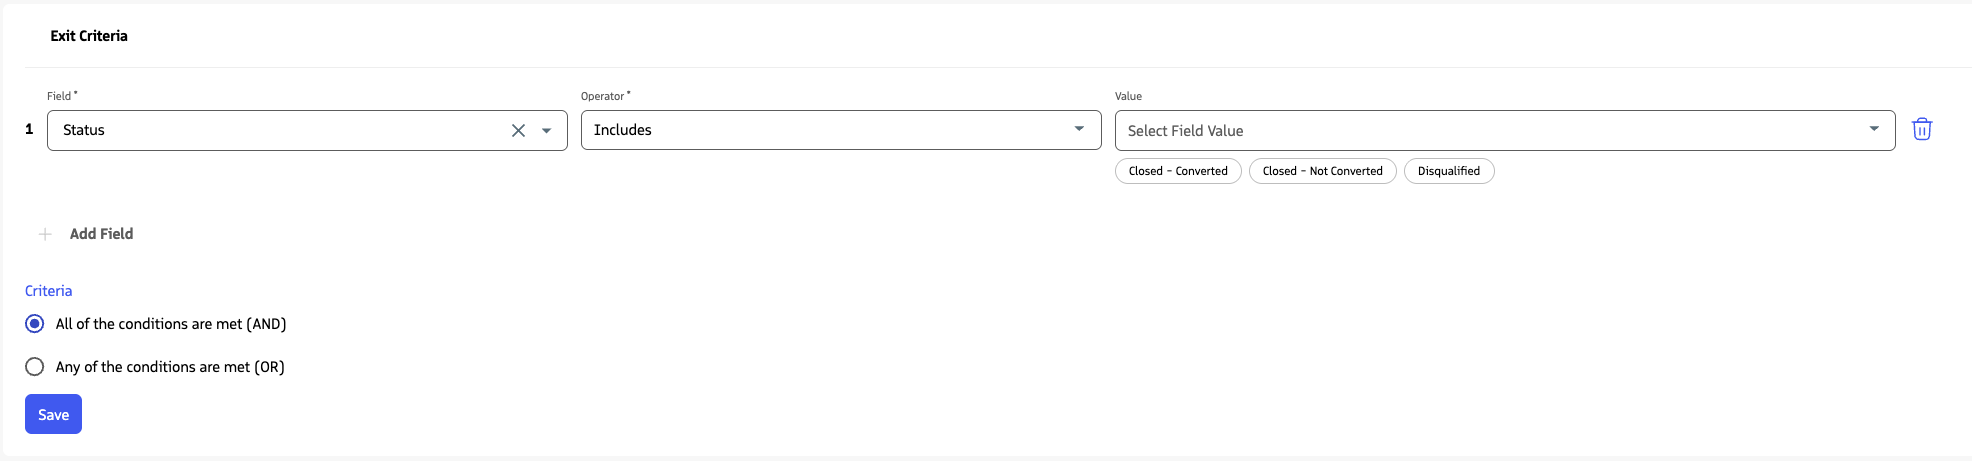
Entrance criteria determine when a record can be added to the sequence (using field, operator, and value). Exit criteria determine when a participant is automatically removed. The fields available depend on the record type. For more information, see Sequence Entry & Exit Criteria.
Configure entrance criteria so only the right records enter the sequence. Add one or more conditions (field, operator, value).
Select how conditions combine: AND (all must match), OR (any one must match), or CUSTOM — for more than three criteria, build a custom expression such as
1 AND (2 OR 3).Click
Save.
Configure exit criteria so participants are removed when appropriate (for example, when they engage or are disqualified). Check that the criteria logic (AND, OR, or CUSTOM) is correct.
Click
Save.
Define Actions
Actions are the steps in the sequence: Call, SMS, Email, and Task. Each action appears on the user’s Engage tab. For more information, see Actions.
- Click
+ Create Action. - Select the action type: Call, Email, SMS, or Task.
- Give the action a name. The name is displayed on the user’s
Engagetab. - Optionally, choose a template (for SMS or Email actions). For more details on templates, see Templates.
- Set Priority. Priority affects the action’s position on the user’s
Engagetab. - Set the Timing (when the action is due relative to the previous action).
- Optionally, set advanced options such as field update, criteria condition, and action delegation.
- Click
Save. Repeat for any additional actions.
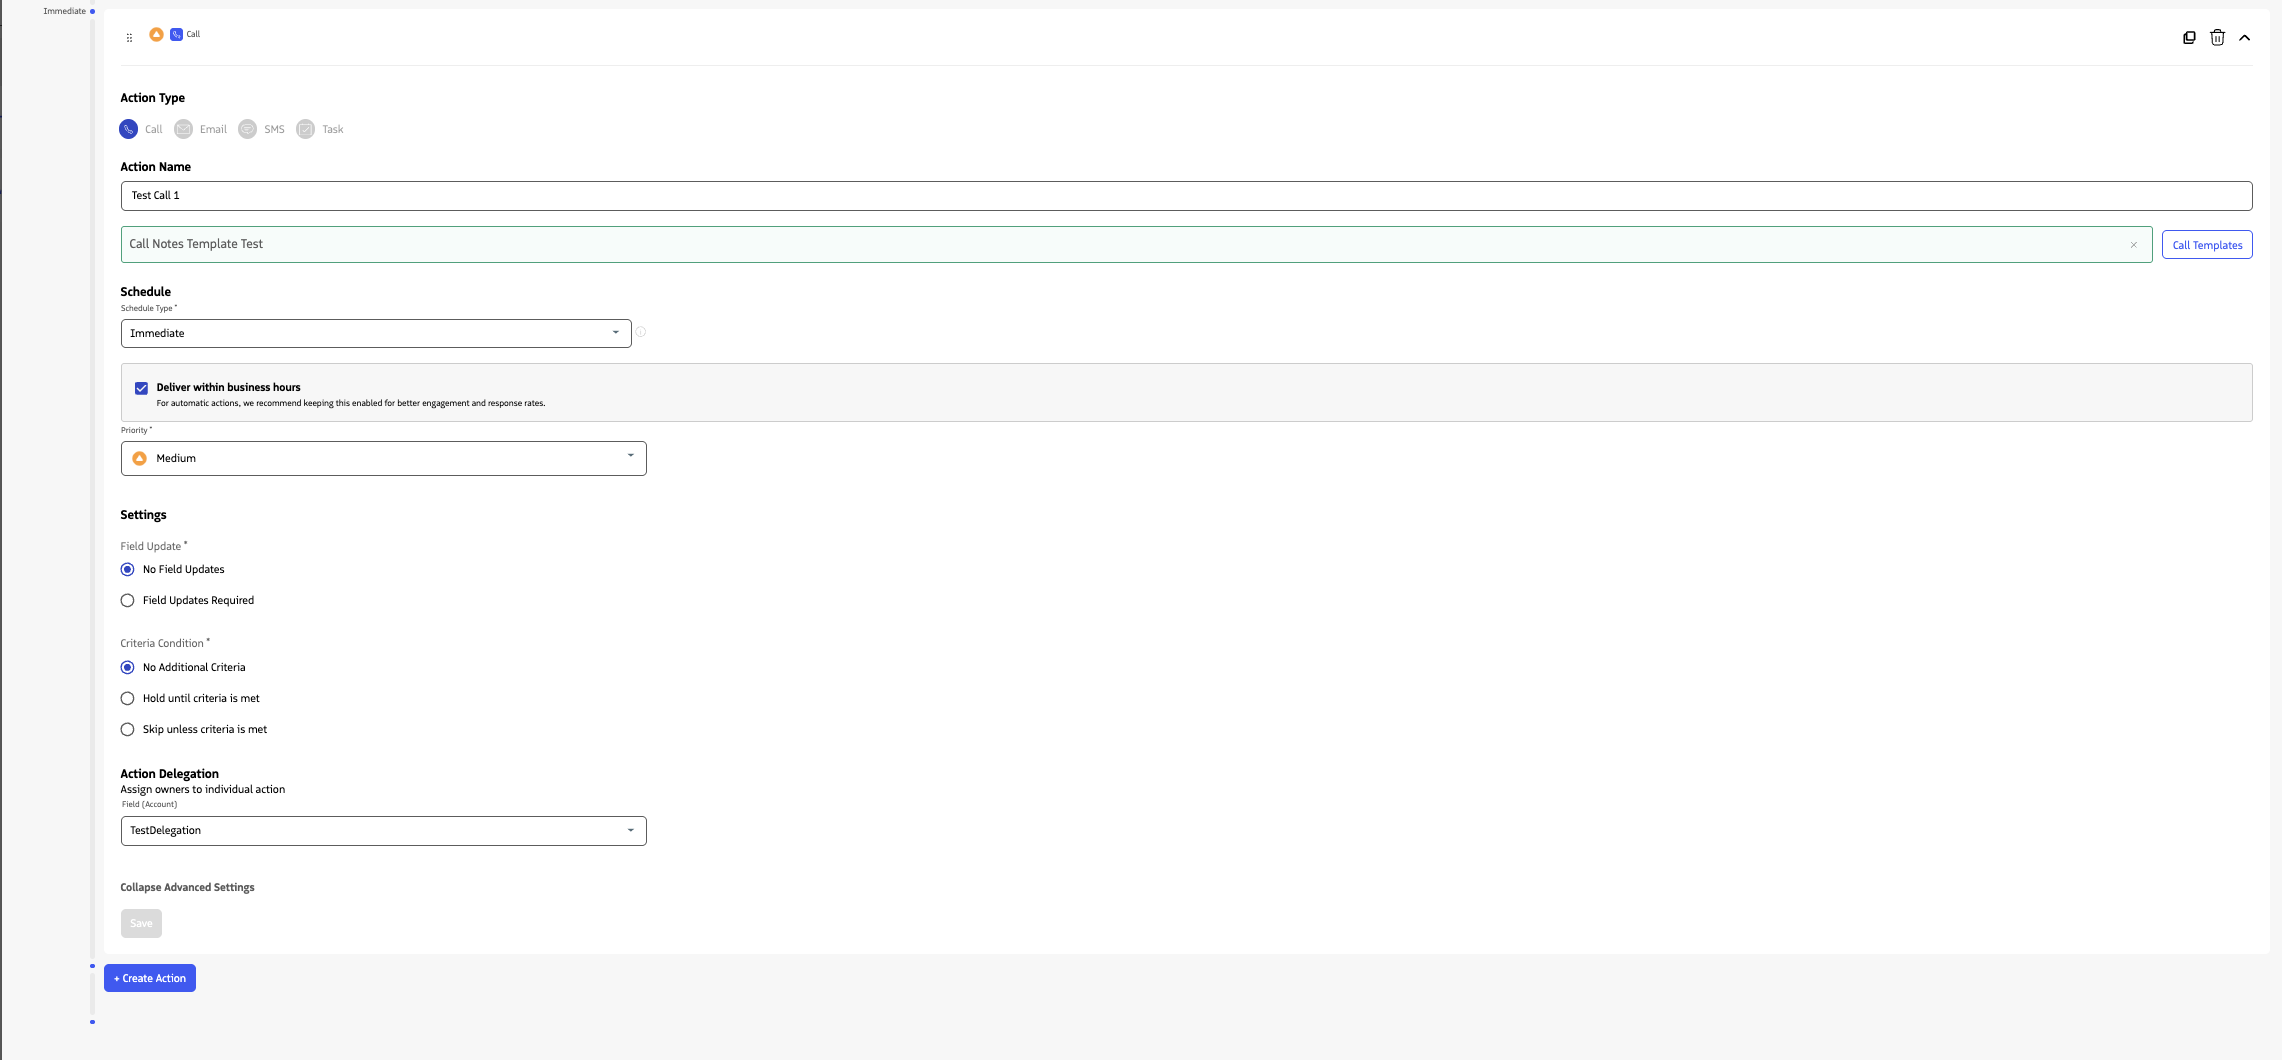
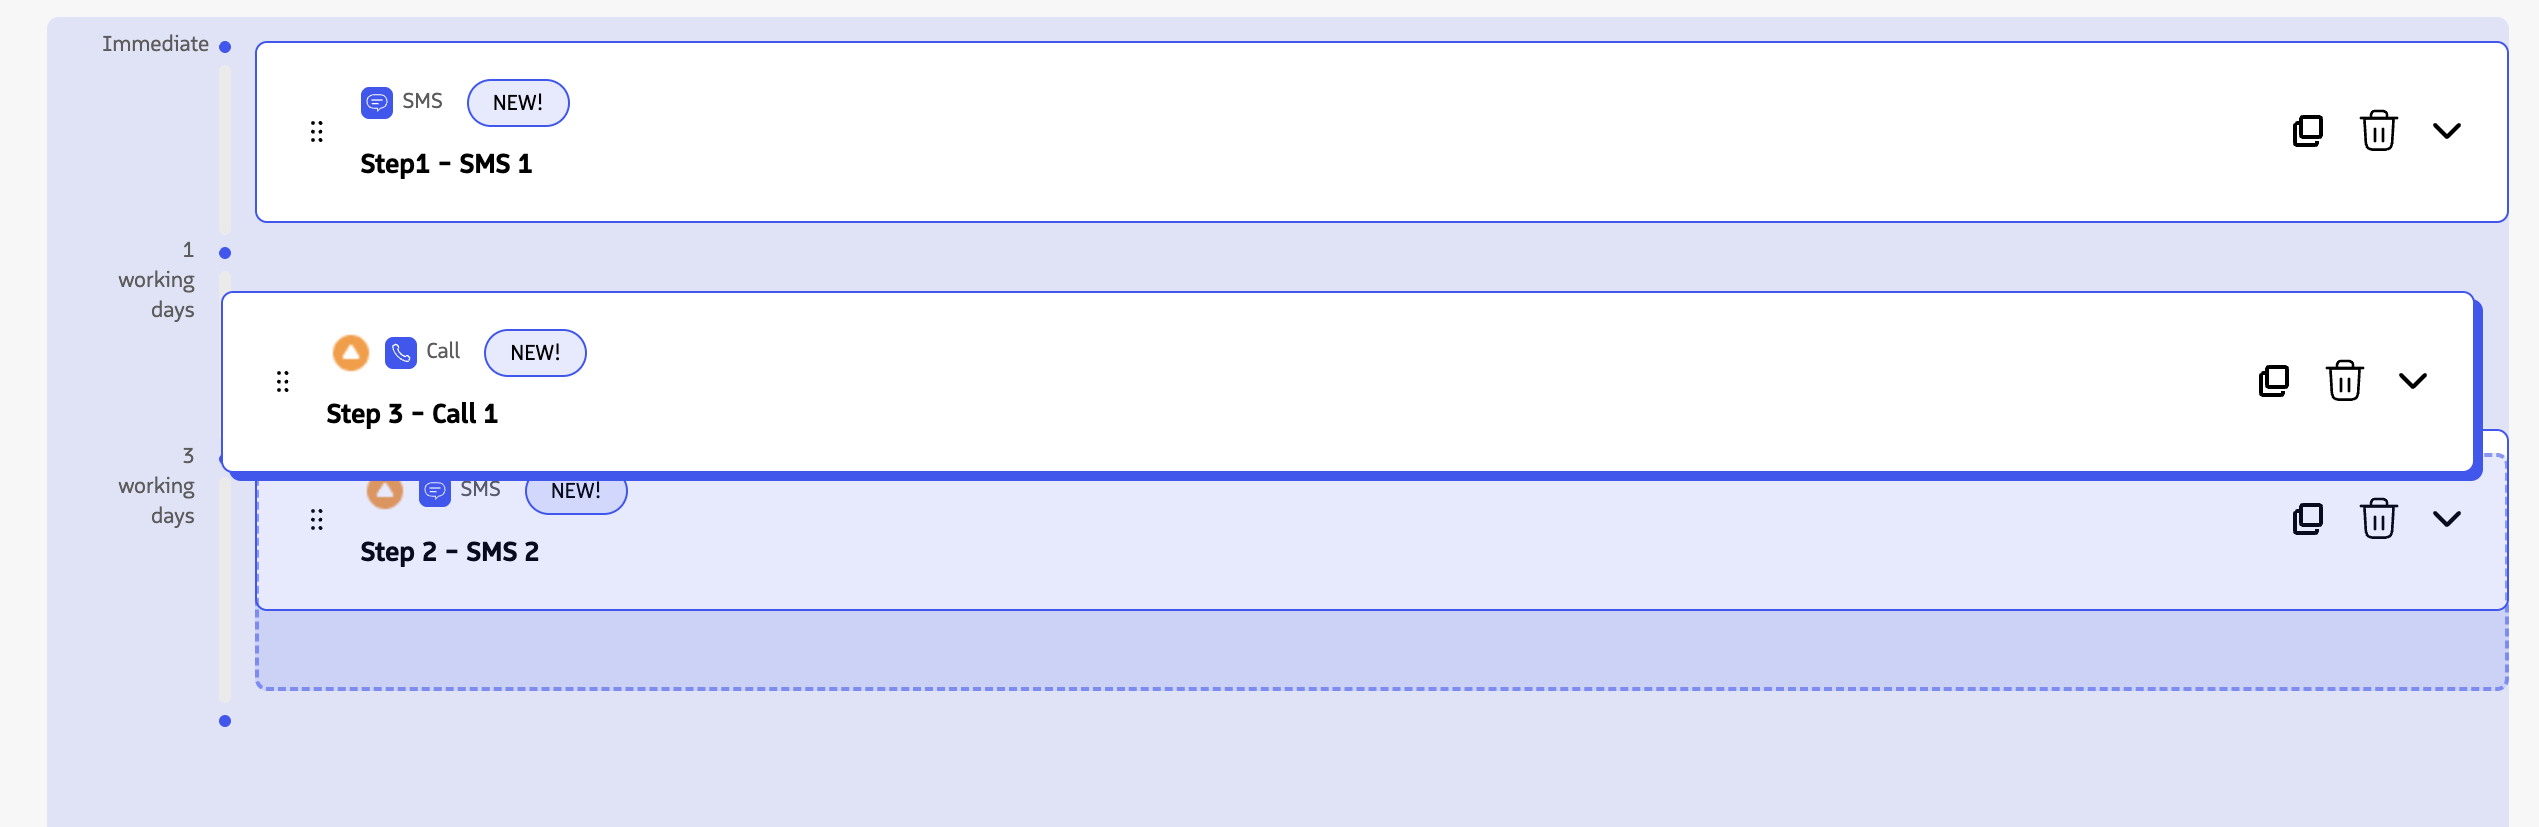
You can re-order actions by dragging them by the icon before you finish your sequence.
Activate Sequence
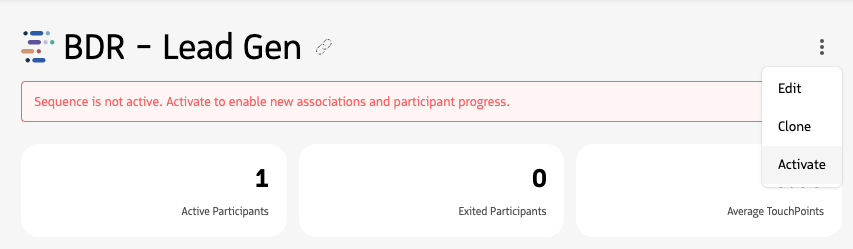
After you create a sequence, it is not active. A sequence must be Active before participants can be enrolled.
- Click
Saveto save the sequence. - Click
Activateat the top to activate the sequence.
Activating an Automatic sequence with an automatic first action
Take additional care when activating an Automatic sequence whose first action is an automatic Email or SMS.
When you activate the sequence, Guided Selling immediately begins associating records that currently meet the entrance criteria. If the first action is also configured as Automatic and is due immediately, those newly added participants can receive the email or SMS almost immediately after activation.
Because activation can result in outbound messages without further user action, Guided Selling displays an activation warning that includes the expected participant count. Review the sequence criteria, first action, and participant count before continuing.
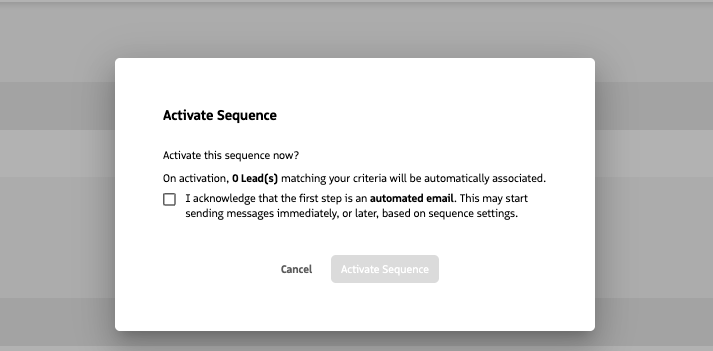
The additional acknowledgment is shown only when the sequence configuration creates this immediate-send risk. Manual sequences and Automatic sequences that do not start with an automatic Email or SMS do not require this warning.
Automatic sequences, activation can take several minutes or longer while the system processes participants. Until that finishes, you cannot activate another sequence. If you try, you see an alert: There is already a Sequence activation processing. For why only one activation runs at a time and how Salesforce administrators can monitor enrollment batches, see automatic Sequence activation limits.