Participant Overview
The Participant Overview provides a participant-focused workspace for reviewing contact information, current sequence enrollment, sequence progress, actions, Quick Actions, email, and activity history.
You can access the Participant Overview from a Lead or Contact record in Salesforce. You can also open it from other areas of Guided Selling, such as Engage, where clicking a participant name opens the Participant drawer.
Open Participant Overview
You can access the Participant Overview from several areas in Guided Selling:
- From a Salesforce Lead or Contact record, scroll to the Participant Overview.
- From Participants, click the participant’s Name.
- From Engage, click the participant’s Name to open the Participant drawer.
- From a Sequence’s Participants tab, click the participant’s Name to open the Participant drawer.
When opened from Participants, Engage, or a Sequence’s Participants tab, Participant Overview opens in a drawer. The drawer provides the same participant information, tabs, and action controls available from the Lead or Contact record.
Participant Overview Layout
Participant Overview is organized into three tabs:
- Actions: Review the participant’s current sequence, sequence progress, current and upcoming actions, and Quick Actions.
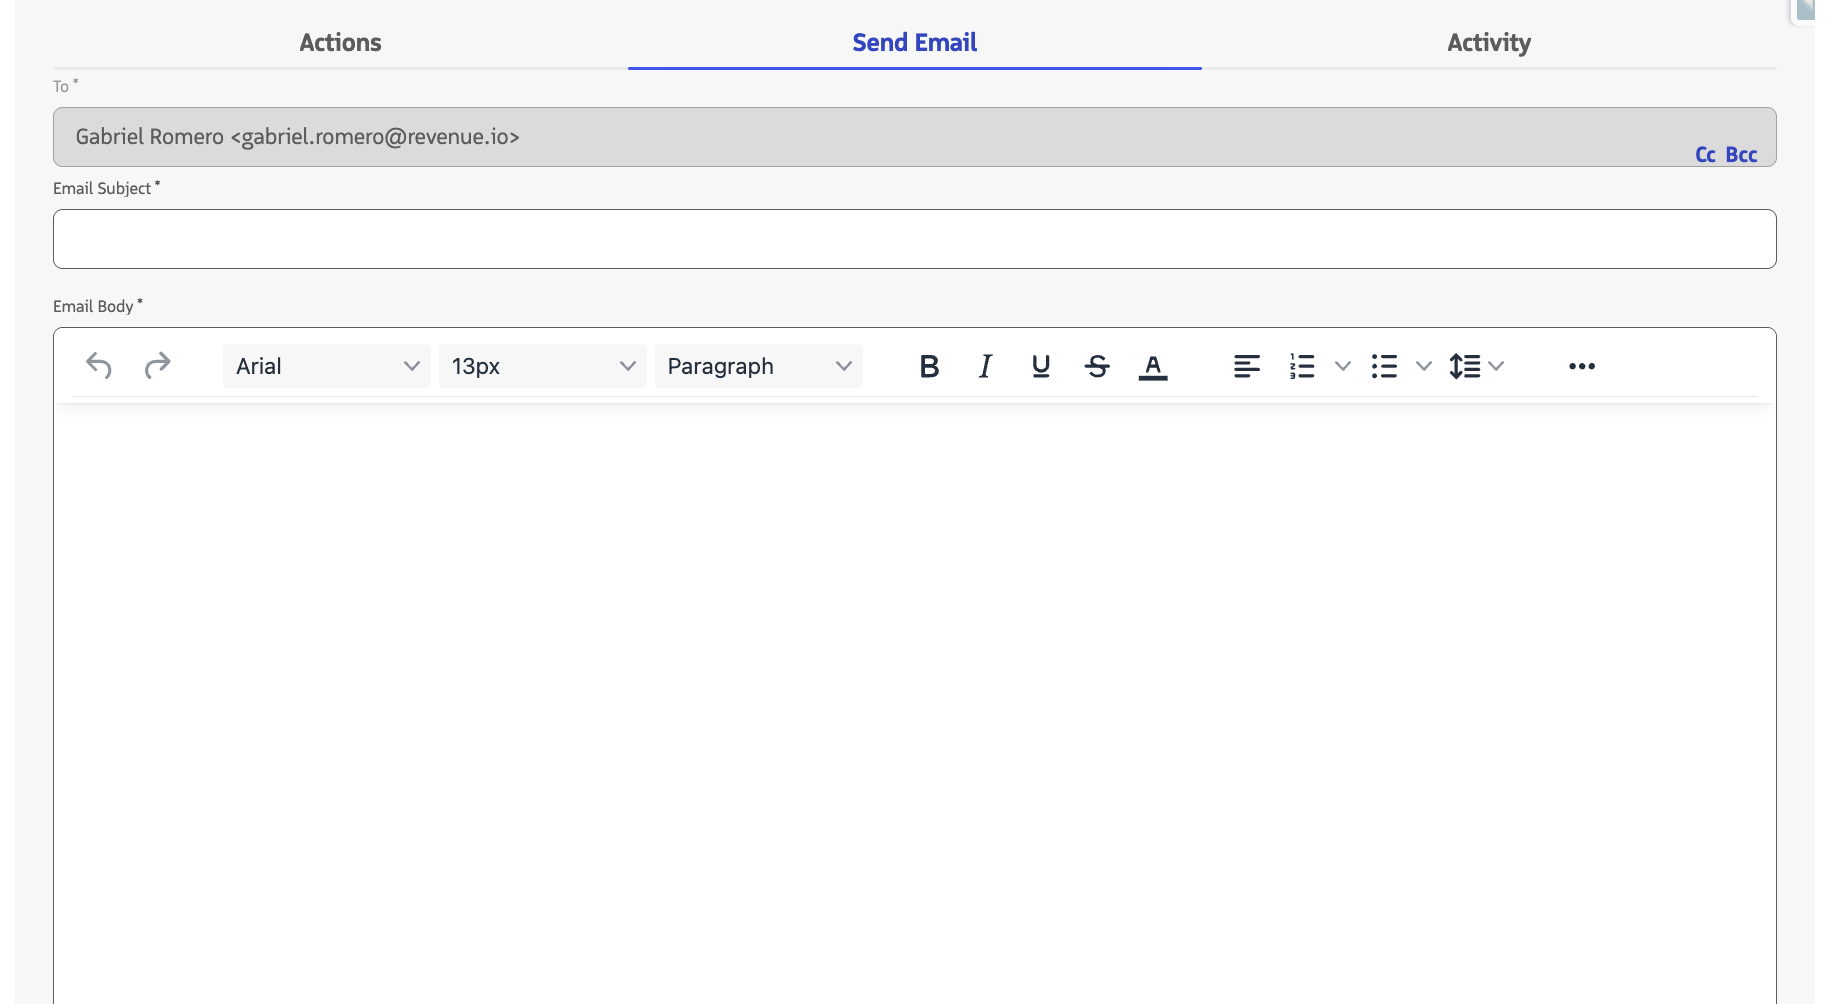
- Send Email: Compose and send a standalone email to the participant.
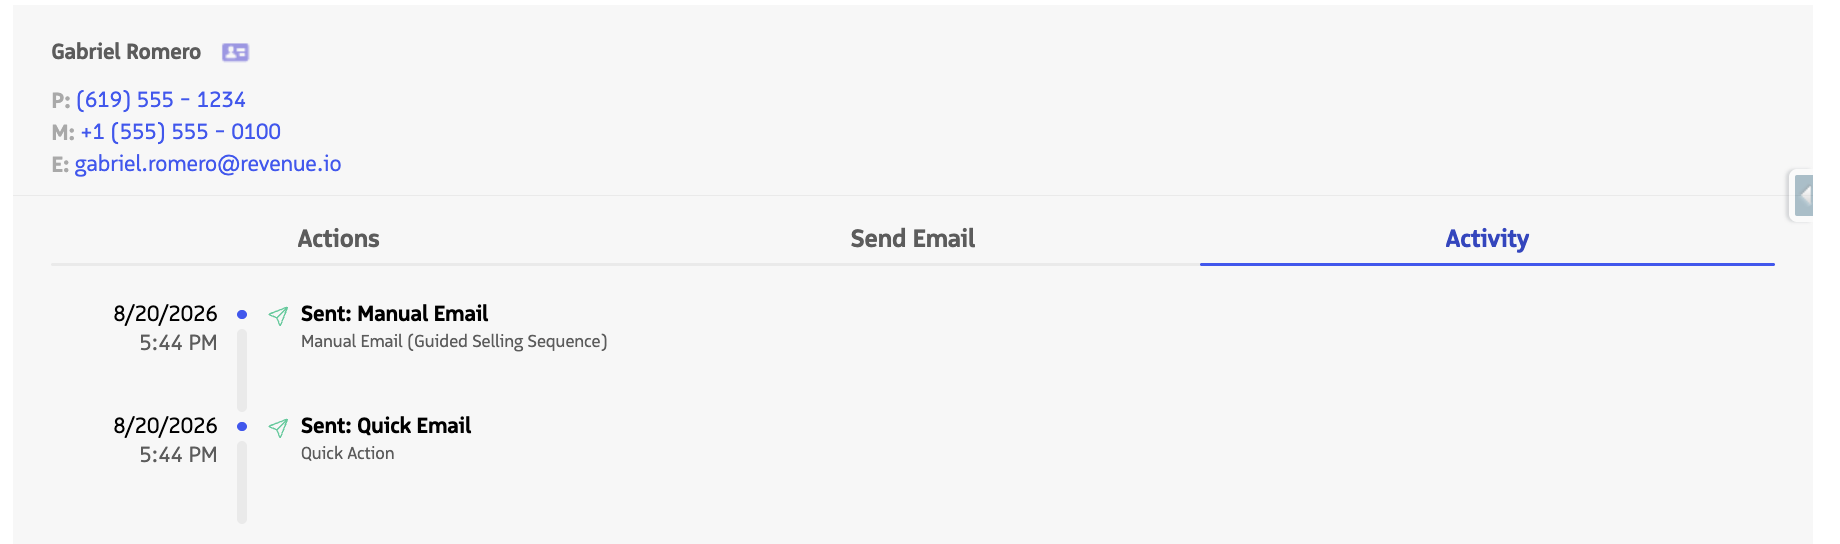
- Activity: Review email engagement activity for the participant.
A participant details card appears above the tabs and displays available information about the participant, including their name, Lead or Contact type, title, company, phone number, mobile number, and email address.
From the participant details card, you can:
- Click the Lead or Contact icon to open the participant’s Salesforce record.
- Click a phone or mobile number to open the RingDNA dialer.
- Click the email address to open the Send Email tab.
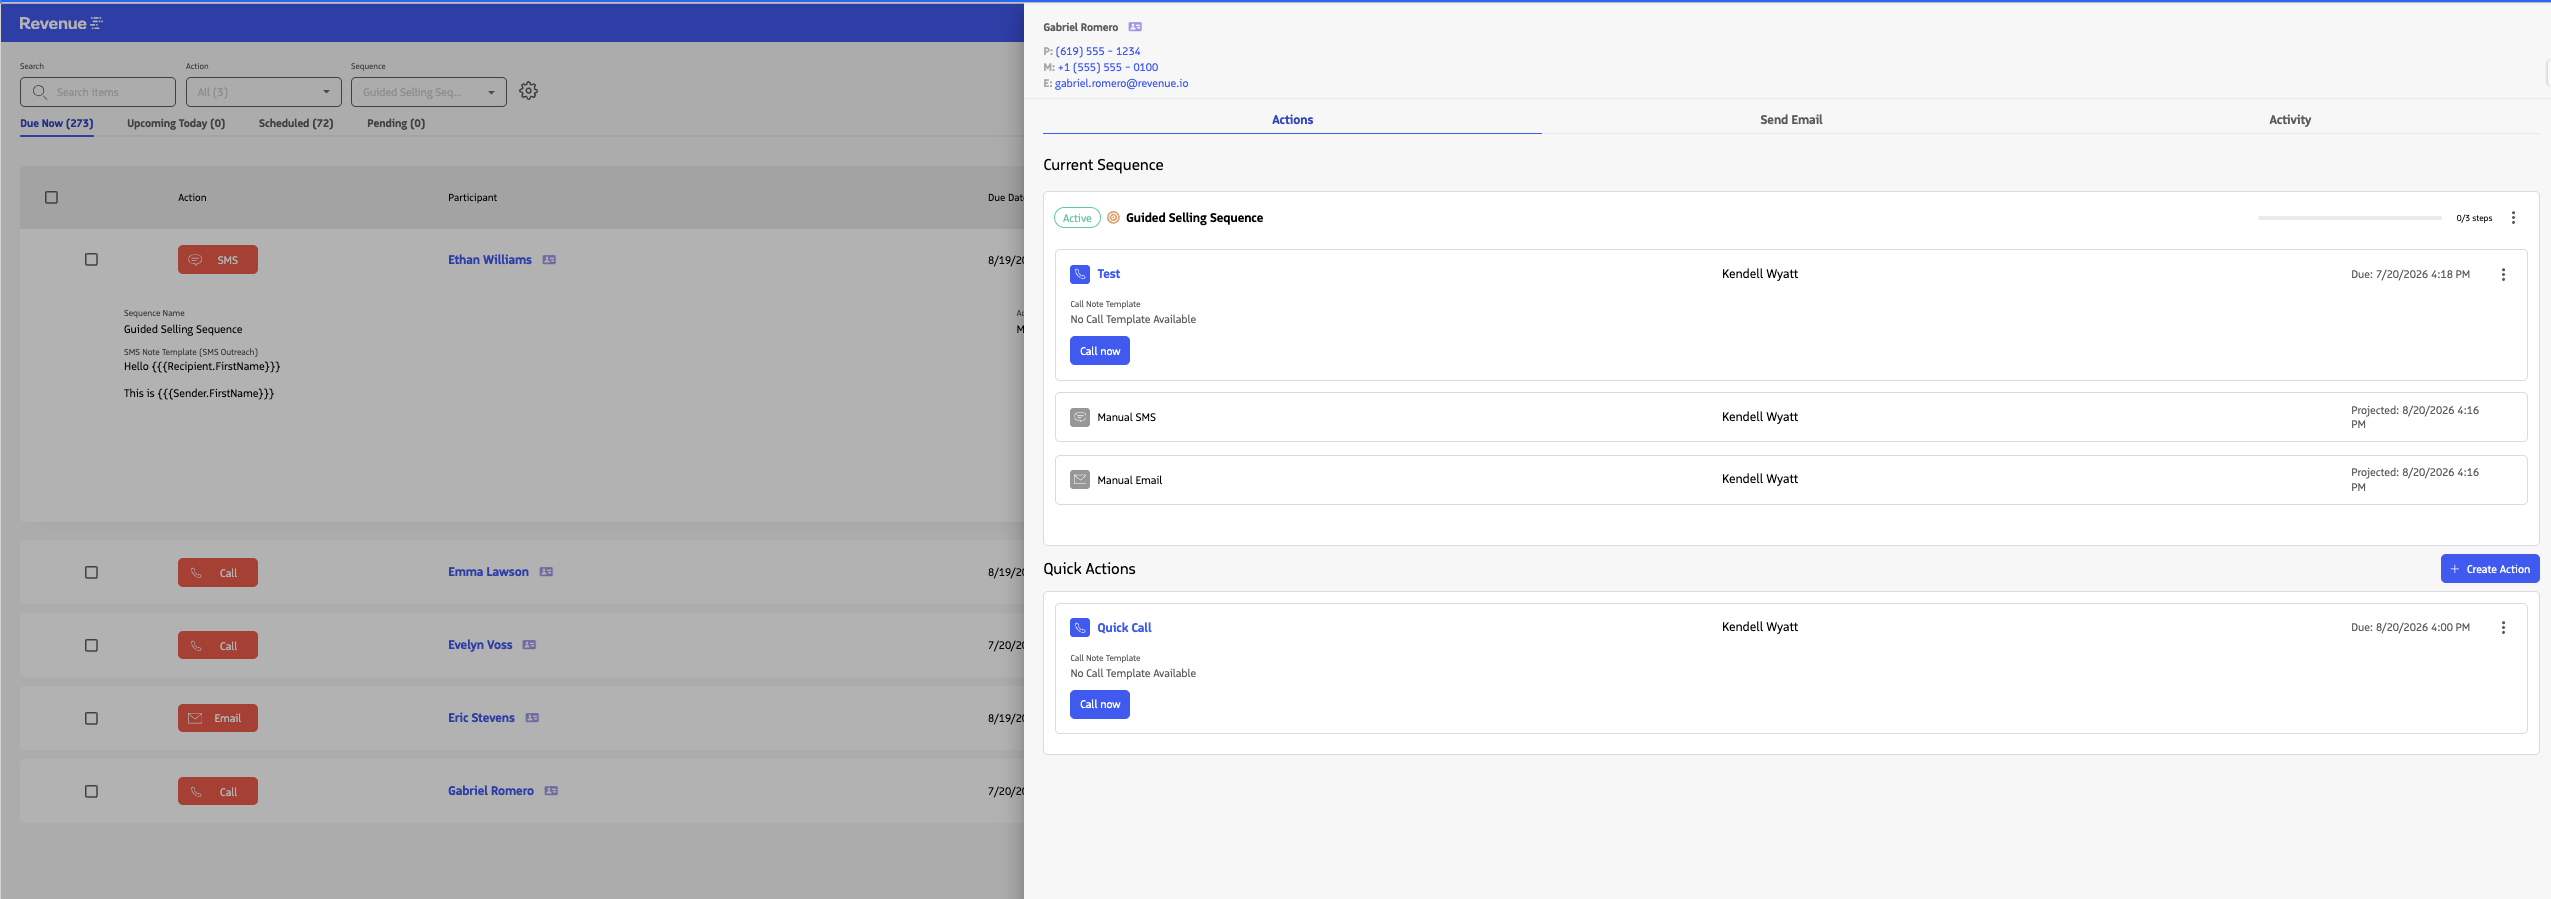
When Participant Overview is opened from Engage, the same participant information and tabs are available in the Participant drawer.
Actions Tab
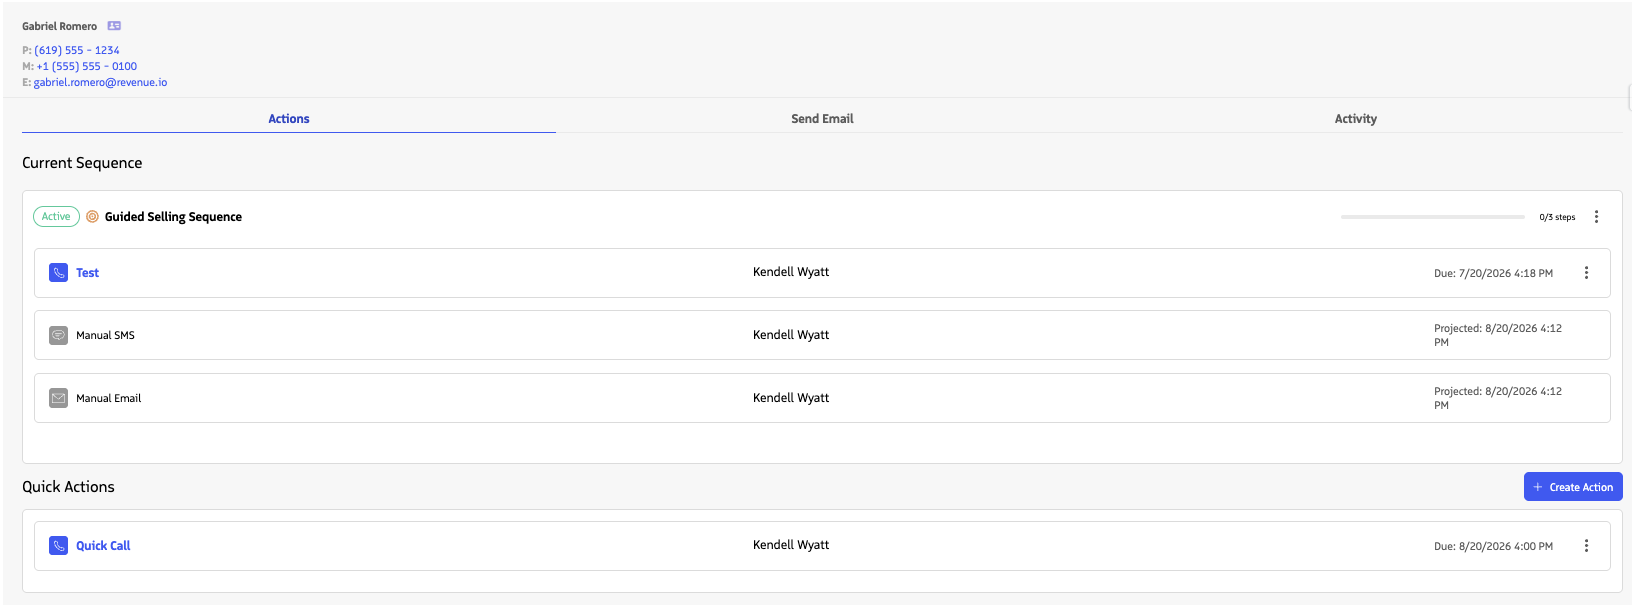
The Actions tab is the default Participant Overview view. It brings the participant’s sequence information, sequence actions, and Quick Actions together in one place.
Current Sequence
The Current Sequence section displays the sequence associated with the participant.
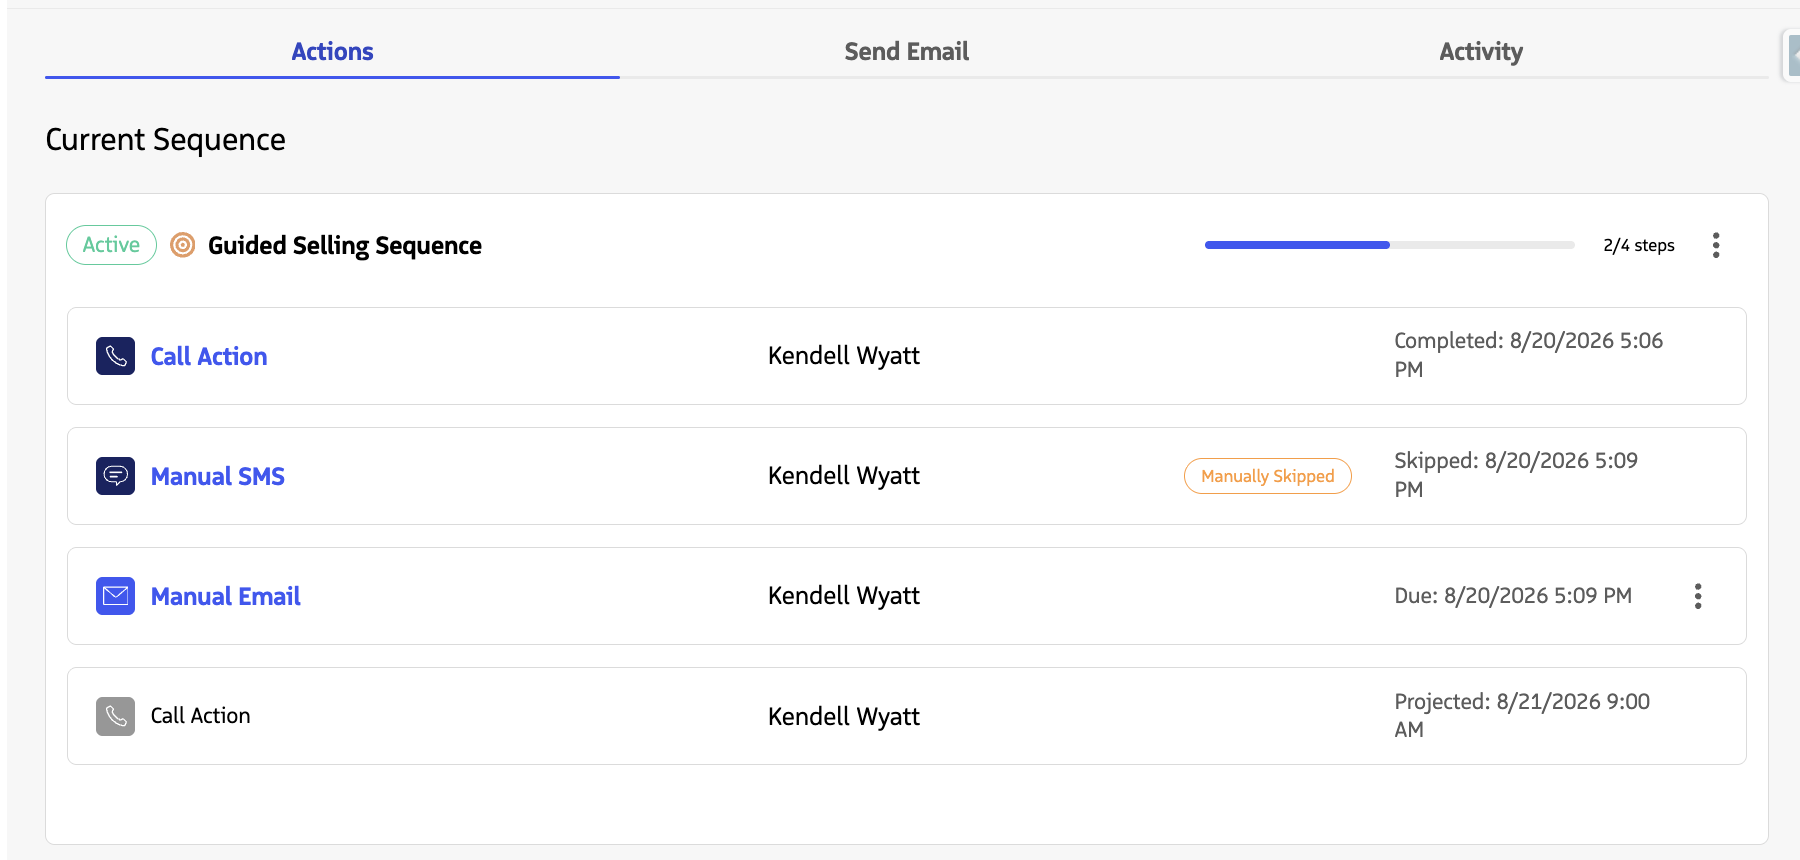
Each sequence card can show:
- Sequence status, such as Active, Paused, Queued, or Inactive
- Sequence record type
- Sequence name
- Sequence progress
- Actions associated with the participant
- An options menu for supported sequence-level actions
Active sequences are expanded by default so you can quickly review the participant’s actions. You can also expand or collapse a sequence manually.
From the sequence options menu, users with the appropriate permissions can:
- View Sequence: Open the sequence.
- Remove Sequence: Remove the participant from the sequence.
For more information about removing participants, see Add or Remove a Participant from a Sequence.
Sequence Progress
Each sequence card includes a progress bar and an X/Y steps indicator showing how far the participant has progressed through the sequence.
Progress is based on sequence actions that have already been executed or initiated compared with the total number of steps available for the participant.
The progress bar also reflects the current sequence or association status, providing a visual distinction between active, paused, queued, and inactive sequences.

Current and Upcoming Actions
Expand a sequence to review the participant’s actions. Unlike Engage, which focuses on actions requiring rep attention, Participant Overview provides context across the participant’s sequence, including past, current, and upcoming steps.
Action rows can display information such as:
- Action type and name
- Action owner
- Outcome
- Execution or projected date
Dates include labels that help explain the action’s position in the participant’s sequence:
- Completed: The date and time a completed action was performed.
- Skipped: The date and time an action was skipped.
- Initiated: An action that has started processing.
- Due: The current action’s due date and time.
- Projected: The estimated date and time of an upcoming sequence step.
Projected dates are calculated using the sequence’s action timing and applicable working-hours and delivery settings. Because they represent upcoming sequence steps, projected dates can change as earlier actions are completed, skipped, or rescheduled.
Complete and Manage Actions
Click an action row to expand its details. Depending on the action type, status, ownership, and permissions, you can complete supported actions directly from Participant Overview.
Available action controls can include:
- Send an email
- Place a call
- Send an SMS message
- Complete or update a task
- Reschedule an Action
- Skip an Action
Use the action’s options menu to access Skip or Reschedule when those options are available.
Add a Participant to a Sequence
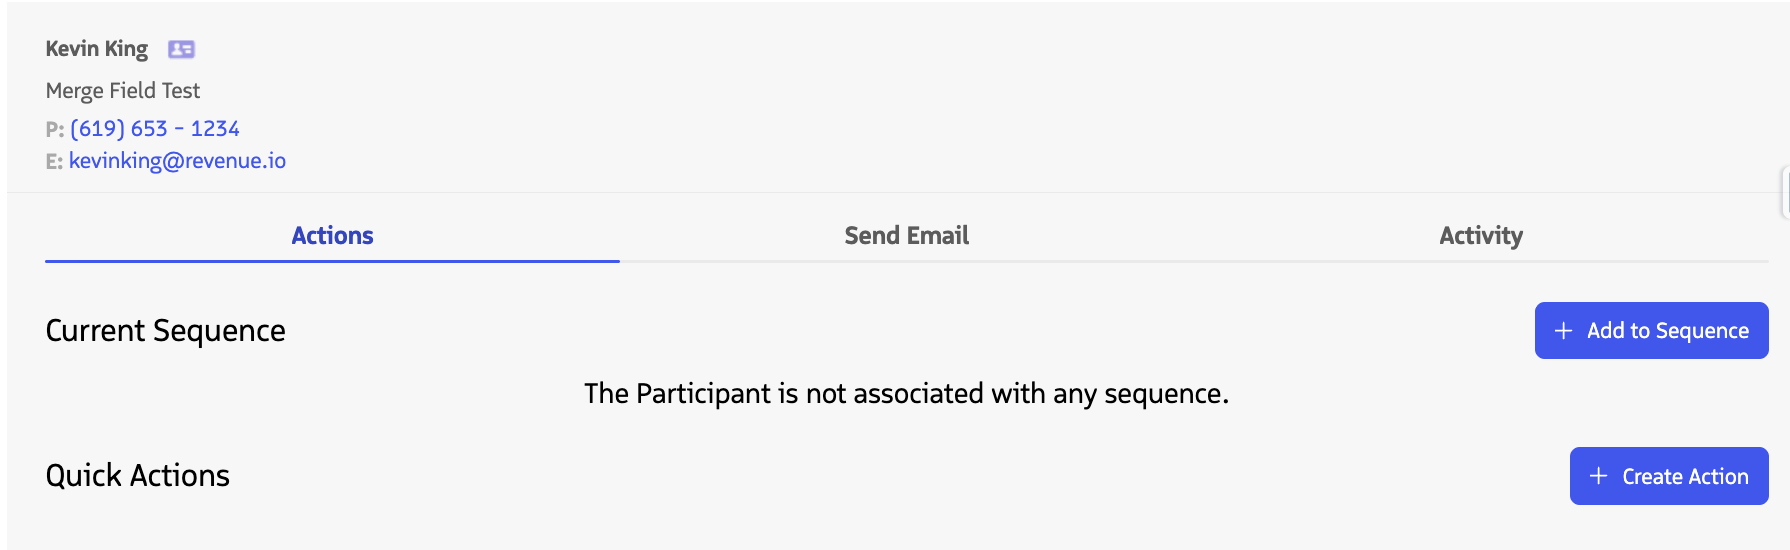
If the participant is not currently associated with a sequence, the Current Sequence section displays an Add to Sequence button.
To add the participant to a sequence:
- From the Actions tab, click Add to Sequence.
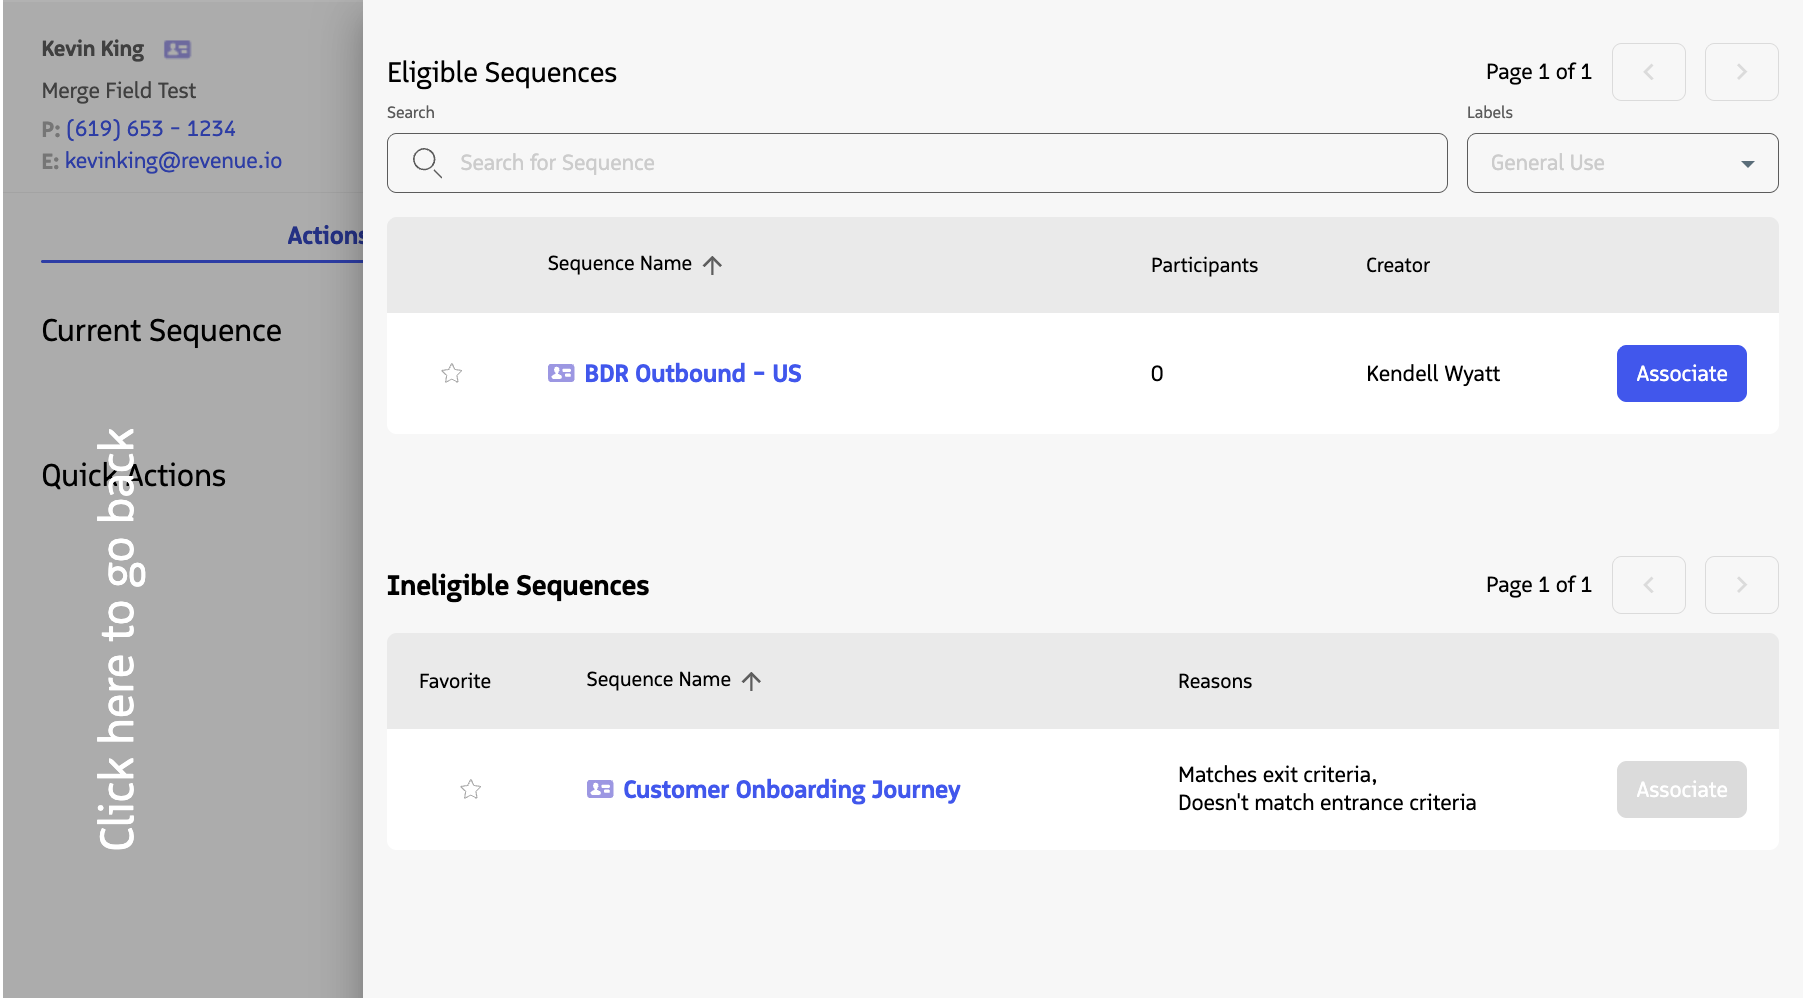
- Review the sequences available under Eligible Sequences.
- Find the sequence you want to use.
- Click Associate.
- Complete any confirmation steps that appear.
After the association is created, the sequence appears under Current Sequence and the participant’s sequence actions become available in Participant Overview.
For additional information about sequence enrollment and removal, see Add or Remove a Participant from a Sequence.
Quick Actions
The current Guided Selling interface uses Quick Actions for one-off participant actions. Previous versions or documentation may refer to similar one-off actions as supplemental actions.
Quick Actions are separate from the participant’s sequence and do not add a new step to the sequence. You can use them to schedule additional follow-up when the normal sequence workflow does not need to change.
The Quick Actions section remains available whether or not the participant is currently enrolled in a sequence.
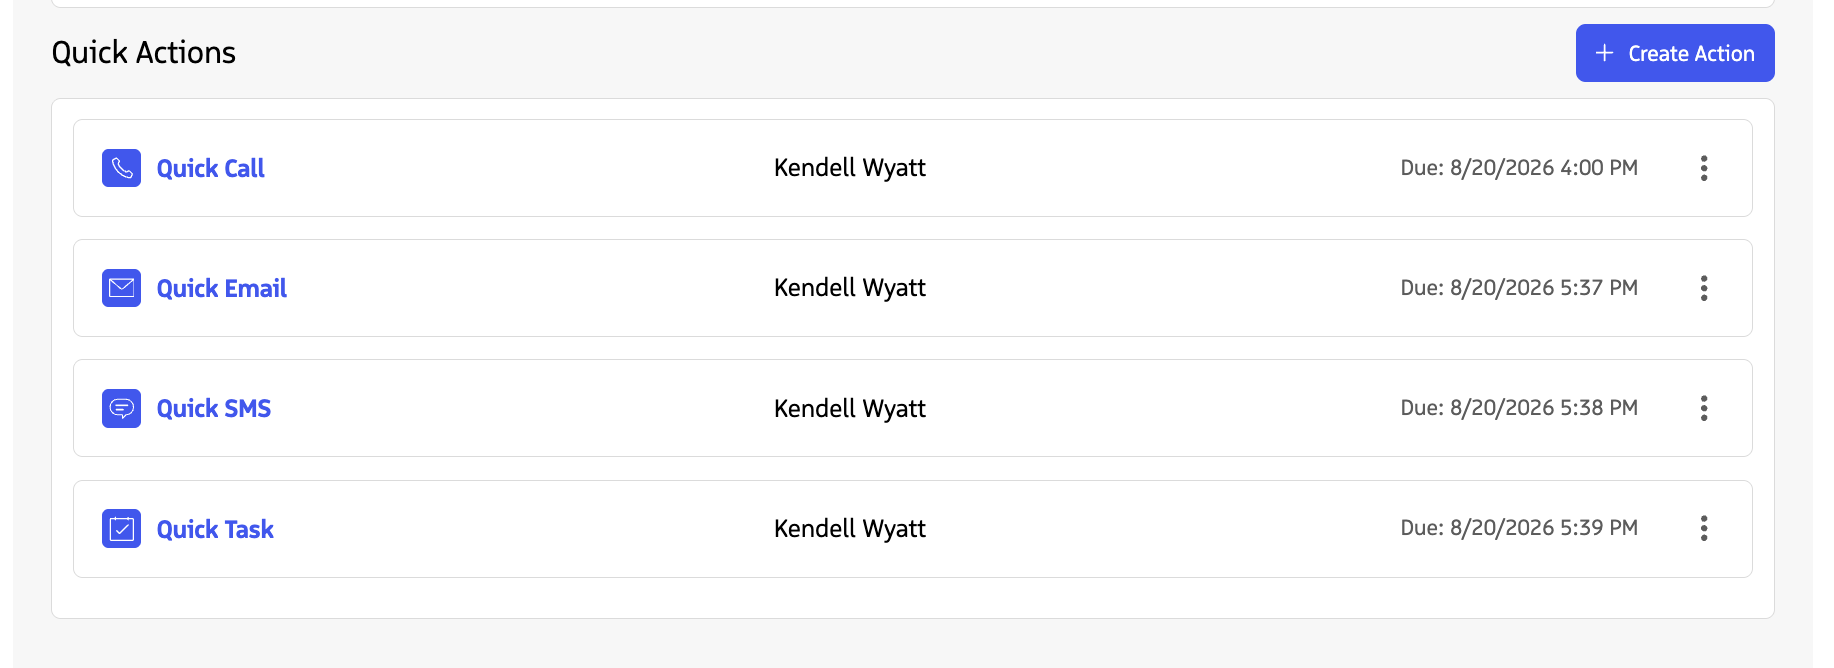
Click Create Action to create a one-off:
- Call
- SMS
- Task
Existing Quick Actions remain visible in the section so you can review actions that are due, upcoming, completed, or skipped.
For details about creating and managing these actions, see Quick Actions.
Send Email
Use the Send Email tab to compose and send a standalone email to the participant without adding an email action to their sequence.
You can also open this tab by clicking the participant’s email address in the participant details card.
For more information, see Send Standalone Emails.
Activity
Use the Activity tab to review the participant’s email engagement history.
This provides additional context about the participant’s engagement without requiring you to leave Participant Overview.