Add and Manage Revenue.io Users
Revenue.io Admins can easily manage which users in their Salesforce Org have access to the platform and designate the appropriate permissions and settings.
Import from Salesforce
Navigate to the Users Tab
Within the Admin Console, click the User tab.
Open the Add Users drawer
Click the Add Users button at the top of the page.
A drawer will open with the list of the users who are included on your Salesforce org. The users who have not yet been added to your Revenue.io account will be selectable via the checkmarks next to their name. Users that have already been added to your Revenue.io account will show, but be disabled and unable to be selected.
You can search for users by Name, Email, Title, City, or Country. You can also filter the list of users by Salesforce profile.
You can choose to show licensed users by clicking the “Display Licensed Users” checkbox. When unchecked, users that have already been added to Revenue.io will be hidden from the table. When checked, users that have already been added to Revenue.io will be displayed, but be disabled and can’t be selected.
Select users to add
You can either individually select users you want to add, or Select All by clicking the checkbox in the header.
Once the users you wish to add are selected, click Next.
Assign licenses and smart numbers
The number of available licenses you have per product shows. If you have licenses available, you can check off which licenses you want your new users to have. If the available licenses you have for a product is 0, you will not be able to assign that license to a new user.
If you select the RingDNA Dialer license, on the next page you will be able to assign smart numbers and extensions per user, or in bulk.
To assign a Smart Number to a user, input the area code you wish to use for that Smart Number – the number will be automatically generated upon hitting Add Users at the bottom of the page. Conversely, if you already have an existing Smart Number for a new user, you can simply leave the fields blank and continue to the next page.
Manage Assigned Licenses
You can manage the licenses of all of your added users in one place.
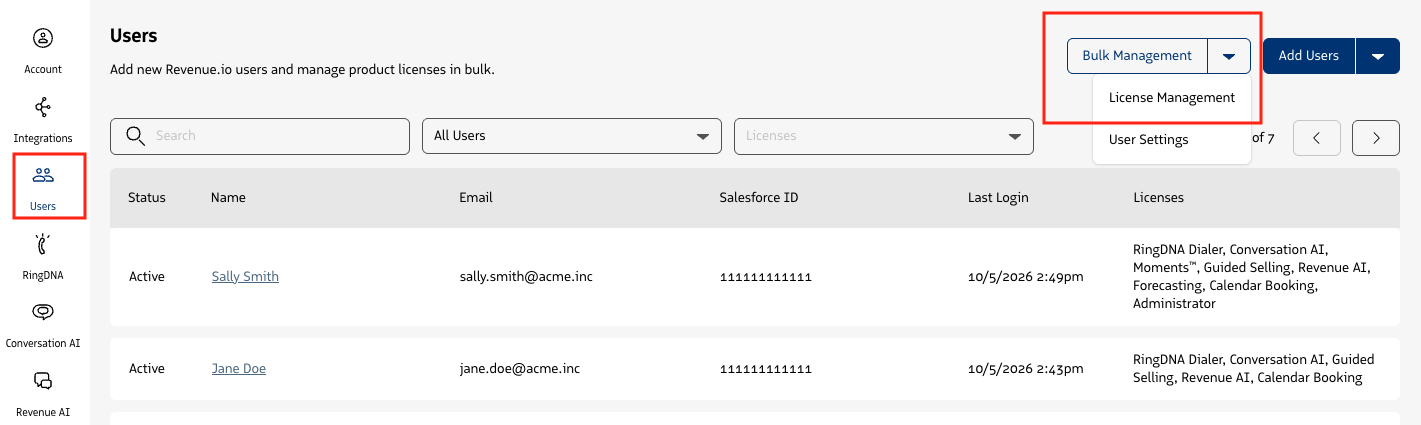
Open License Management
Click Bulk Management, and then select License Management.
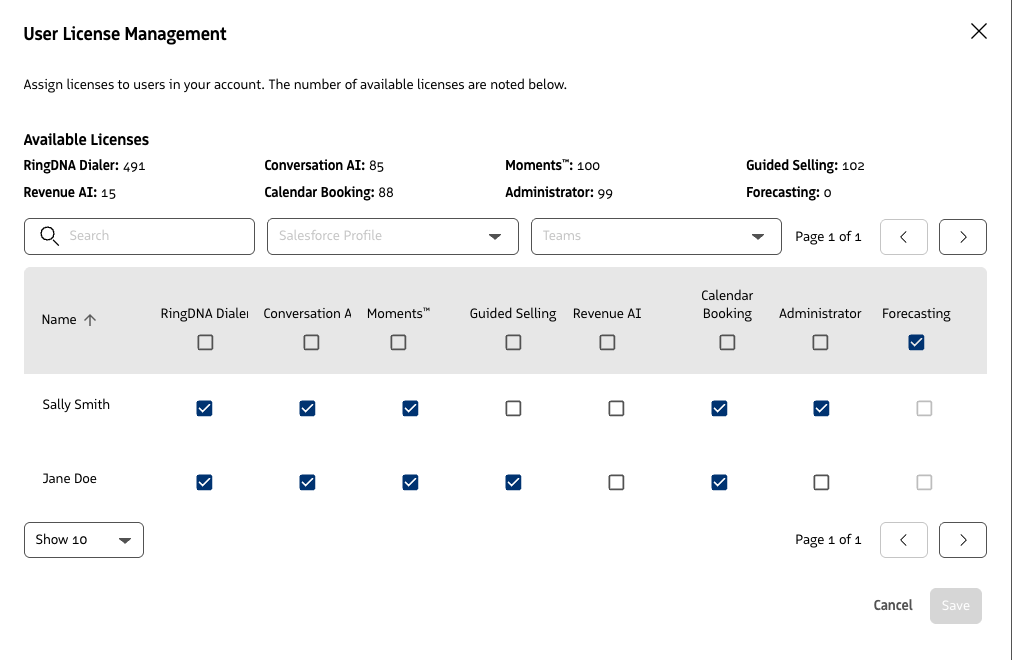
The User License Management drawer opens with a list of all of the users in your Revenue.io account. Checkboxes show each user’s currently assigned licenses, one column per product.
The available licenses you have for each product show at the top of the drawer.
You can search for users by their name, or filter the table by Salesforce Profile and Teams.
Add or remove licenses
Click the checkboxes for licenses you want to add or remove per user. Click the checkbox in a column header to add or remove that license for all of the users in the list.
You will not be able to select more licenses than you have available. Click Save to apply your changes, or Cancel to close the drawer without saving.
After you assign licenses, update product settings for those users in bulk.
Manage Permission Sets
In order to ensure users have access to all of the necessary objects and fields in Salesforce, Permission Sets are included in Revenue.io Salesforce packages, which should be applied to your users by a Salesforce Administrator. See Salesforce Documentation: Assign a Permission Set to Users.
RingDNA Communication Hub:
- RingDNA Agent Permission Set - Grants access to the Conversation Object necessary for logging calls to Salesforce. This permission set is also required for allowing field updates to Advance Solution package fields.
Guided Selling:
- Read more about the Guided Selling Permission sets.
Manage User’s Settings
You can make changes to User settings by clicking into the Users tab on the left-hand nav, and clicking on a user in the list.
The user page has these tabs:
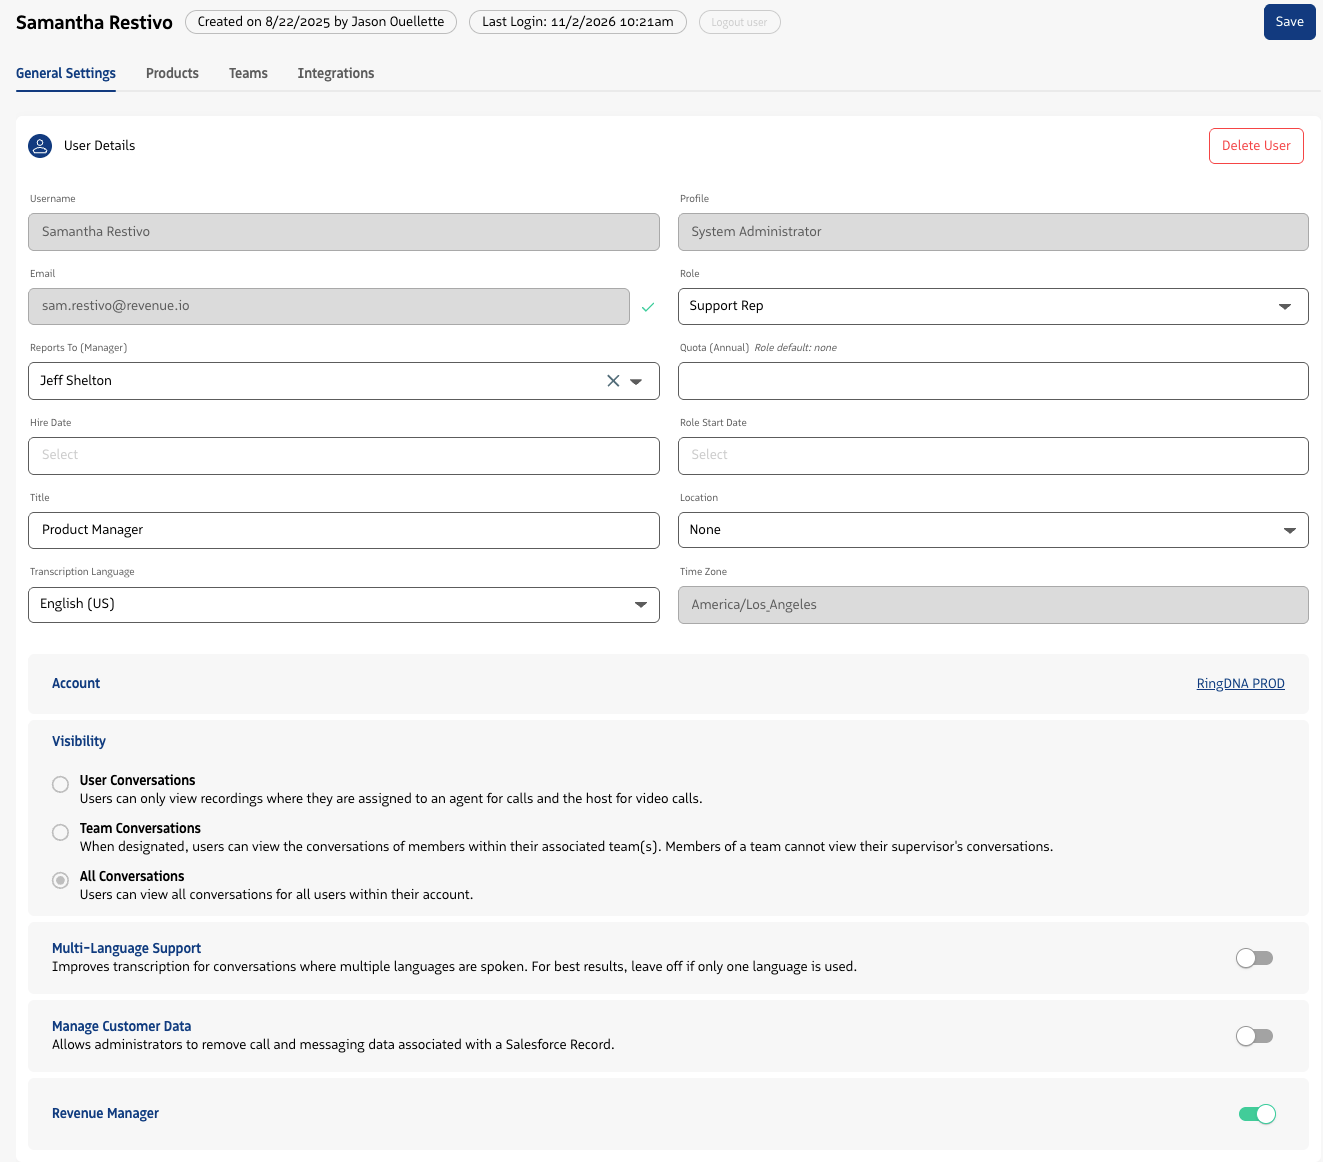
General Settings
Edit personal information such as a job title or phone number extension, manage the user’s licenses, and set the user’s Conversation Visibility.
Products
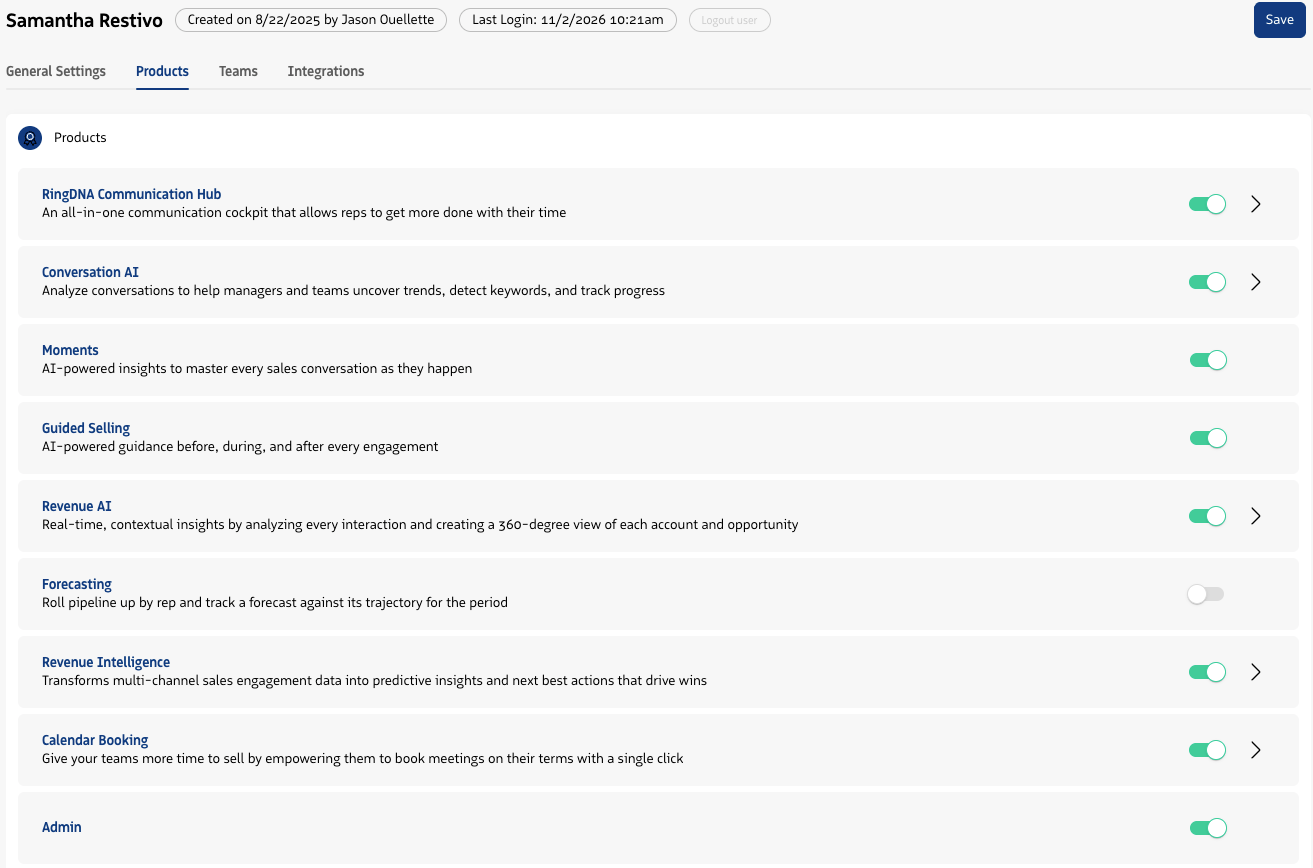
Each product has a toggle that shows whether the user has that product’s license. Turn a toggle on to assign a license or off to remove it. A toggle is unavailable when you have no licenses left for that product. Select the arrow (>) icon next to a product to open its settings. Settings are available for RingDNA Communication Hub, Guided Selling, Calendar Booking, Conversation AI, Revenue AI, and Revenue Intelligence.
Select Products > RingDNA Communication Hub to reassign a Smart Number to a user’s profile and Manage General RingDNA Dialer Settings. The settings are grouped into collapsible sections, including General Settings, Click-to-Call, Call Forwarding, SIP, Notifications and Sounds, Outbound Numbers, Smart Numbers, Voicemail Drop, and Call Queues:
- Click-to-Call
- DialNext and DialNext Preview
- Mute audio notifications when busy
- Hot Leads
- Inbound Call Desktop Notifications / Inbound Message Desktop Notifications
- Local Presence
- Call Recording
- Unavailable Flows
- Salesforce Email Logging
- Call Forwarding and Call Forwarding Prompts
- Call Forwarding Timeout
- Disable Offline Forwarding
- Forwarding Calls with Smart Number
- No Answer Number
- Salesforce Email Sending
- Guided Selling (if Guided Selling licenses have been provisioned)
- Moments™ Notifications(if Moments™ licenses have been provisioned)
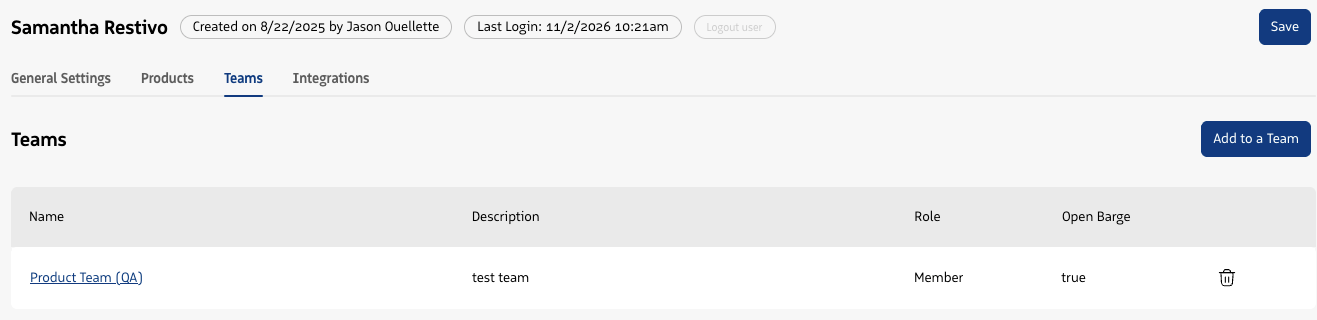
Teams
View the user’s teams and add the user to a team.
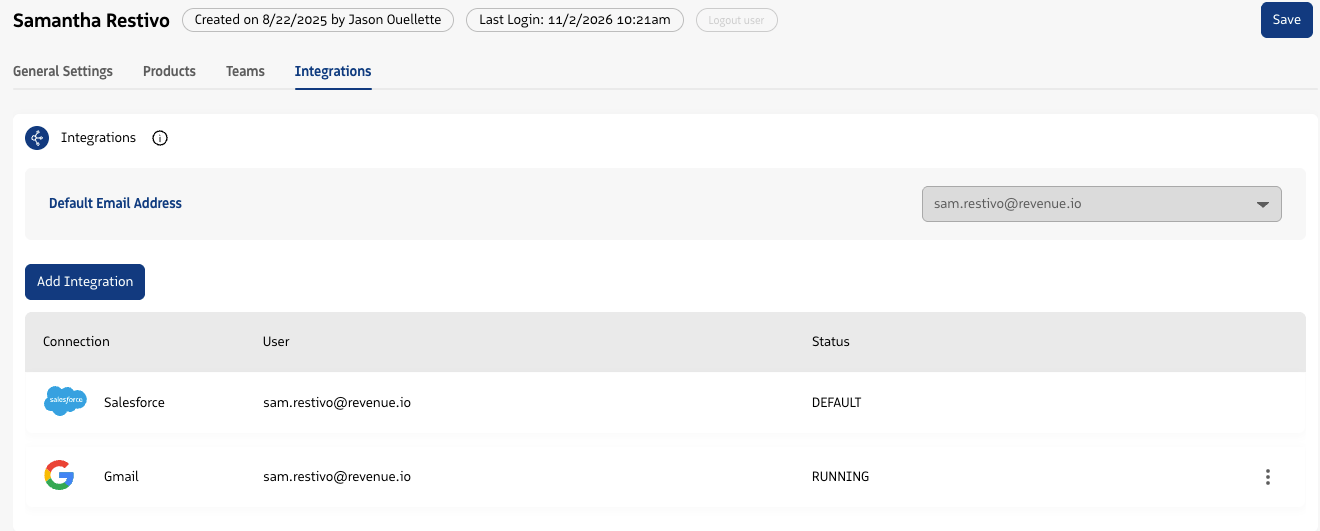
Integrations
Manage the user’s integrations.
Support
Visible to Support users only. Includes advanced settings such as SIP client settings.
Bulk manage user settings
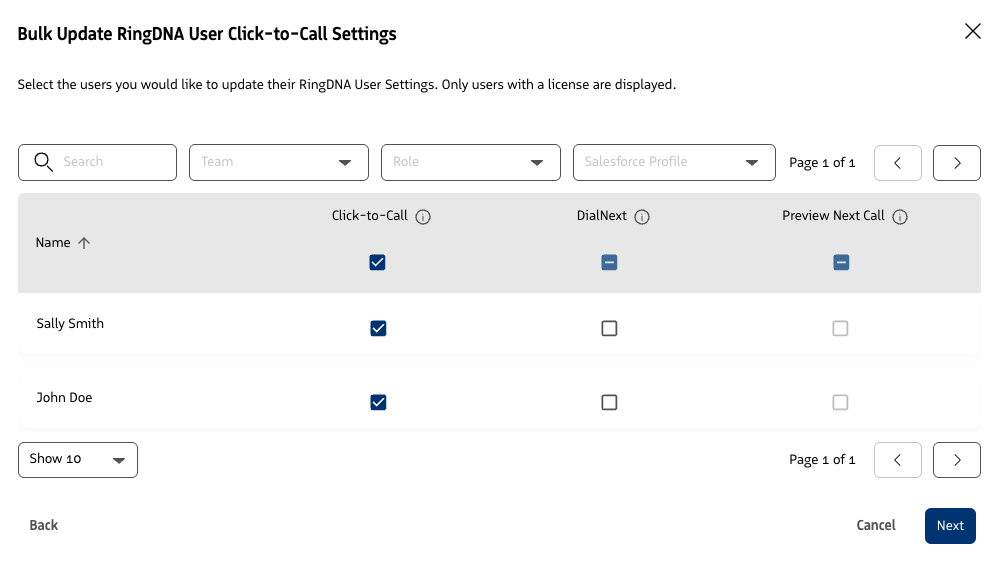
Update product settings for many users at once instead of opening each user. This is useful after you provision licenses in bulk. For example, Revenue AI features are off by default, so you can turn them on for a whole team in one pass.
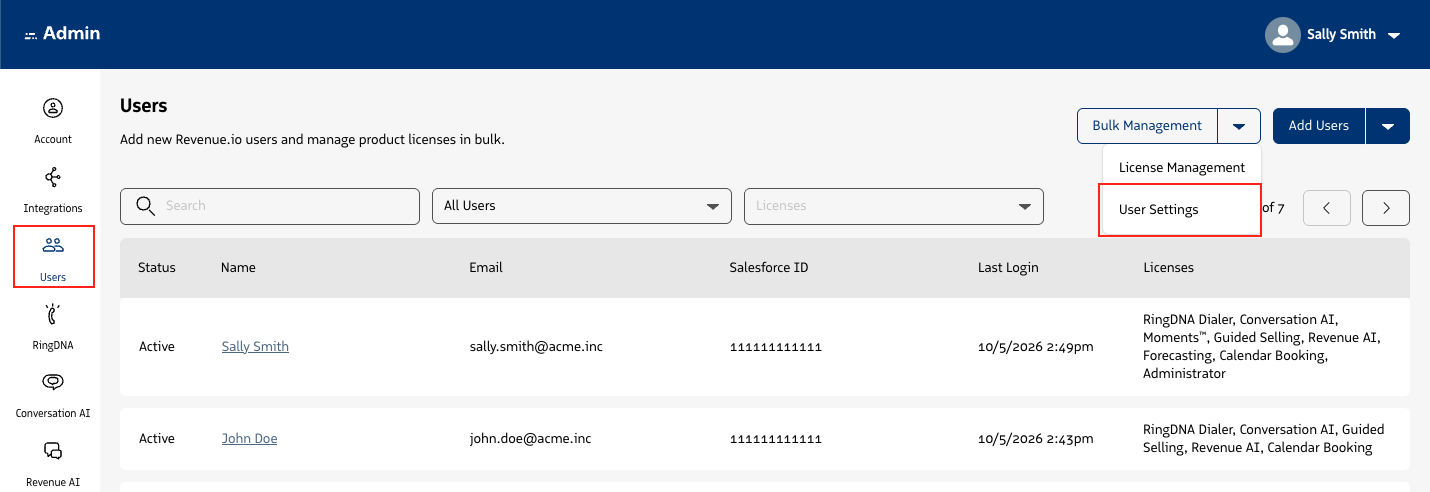
Open Bulk Management
In the Admin Console, go to User Management and click Bulk Management. Select User Settings. (Select License Management to manage licenses instead.)
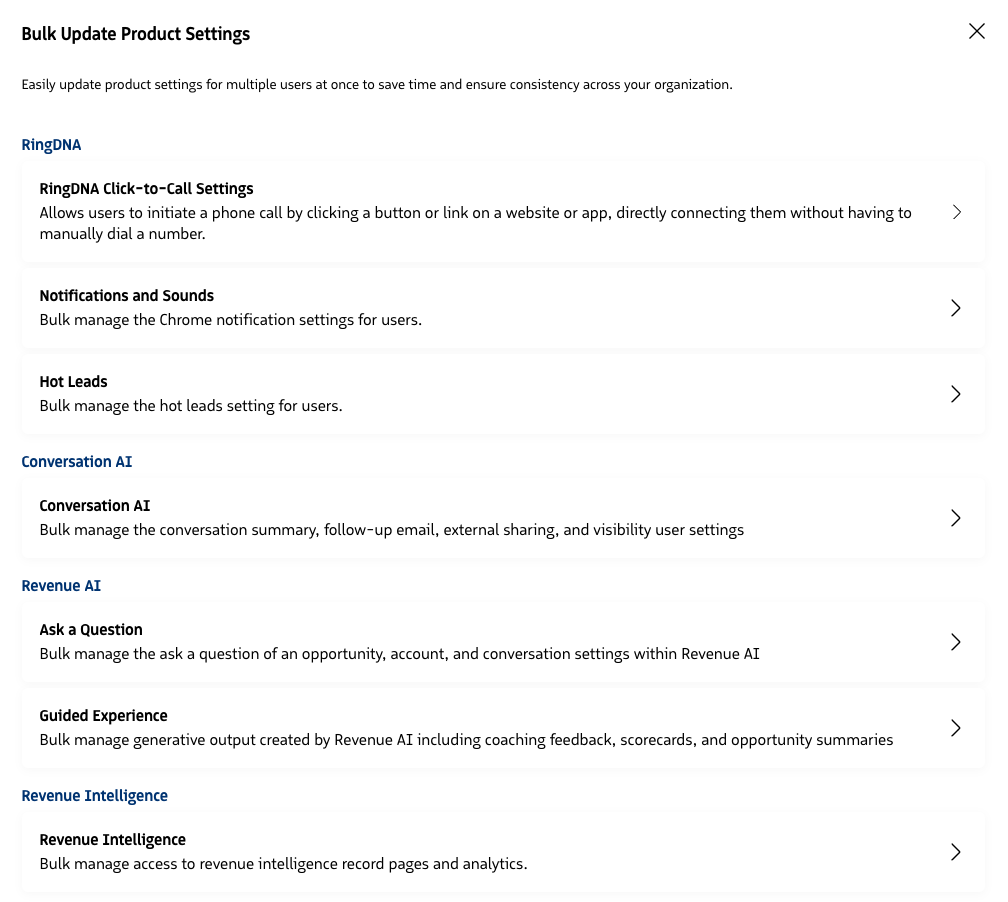
Choose a setting group
Select the settings group you want to update.
Find your users
Search for users by name, or filter by Team, Role, or Salesforce Profile.
Set the checkboxes
The table shows one column per setting. Select the checkbox in a column header to apply a value to every user in the filtered list, or select individual users’ checkboxes.
Review your changes
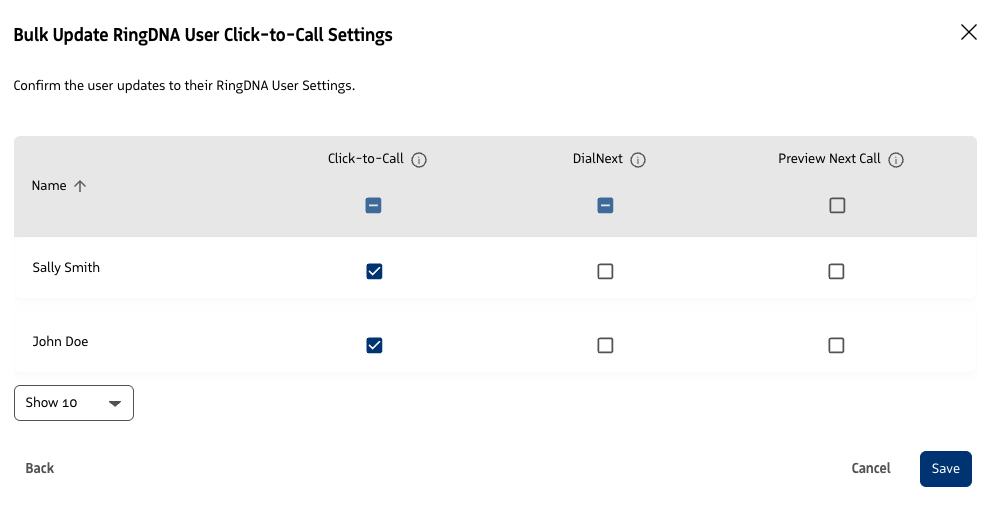
Click Next. The confirmation page lists only the users whose settings changed from their current saved state.
Save
Click Save to apply the changes to all affected users.
Available setting groups
| Product | Setting group | Settings |
|---|---|---|
| Revenue AI | Ask a Question | Ask a Question of a Conversation, Ask a Question of an Account, Ask a Question of an Opportunity |
| Revenue AI | Guided Experience | Scorecards, Coaching Feedback, Opportunity Summaries |
| Conversation AI | Conversation AI | Conversation Summaries, Follow-Up Emails, External Sharing, Visibility |
| RingDNA | RingDNA Click-to-Call Settings | Click-to-Call, DialNext, Preview Next Call |
| RingDNA | Notifications and Sounds | Mute Audio, Inbound Call, Inbound Message, Hot Leads, Emails |
| RingDNA | Hot Leads | Hot Leads |
| Revenue Intelligence | Revenue Intelligence | X-Ray |
Rules that apply to bulk changes
- Only users who hold the required license for a setting group can be changed. Revenue AI settings require a Revenue AI license, Conversation AI settings require a Conversation AI license, and RingDNA settings require a RingDNA Dialer license.
- Preview Next Call requires DialNext. Turning off DialNext also turns off Preview Next Call.
- Visibility can’t be changed for Admin and Support users. They always see all conversations.
- Inbound Message, Hot Leads (notifications), and Emails are available only for users who have messaging, Hot Leads, or a Guided Selling license, respectively.
- Hot Leads is unavailable when your administrator has locked the setting.